18
XP652 MANUAL Airplane
It is important to correctly install the radio system
in your model. Please read and carefully follow the
suggestions listed below.
1. For added protection, wrap the Rx and the Rx
Nicad in foam rubber that is at least 1/4” thick.
2. Run the Rx antenna through the fuselage and make
sure it is fully extended. Never cut or bundle your
Rx antenna — this will decrease range and
performance.
3. Rubber servo grommets are included with your
radio system and should be installed in the servo
flanges. The servos should then be mounted on
either hardwood rails or a plywood tray with the
mounting screws provided. Do not overtighten the
mounting screws. The flange of the brass eyelets
should face down (toward the wood).
4. All servos must be able to move freely over the full
range of their travel. Make sure the linkages do not
impede servo travel. A stalled servo will drain the
battery pack within a few minutes.
5. Before installing servo output arms, make sure the
servo is in its neutral position.
6. In the case of gas-powered model aircraft, mount
the receiver power switch on the side of the
fuselage opposite the muffler to protect the switch
from exhaust residue. With other types of models,
mount the switch in the most convenient place.
Make sure that the switch operates freely and is
capable of traveling its full distance.
7. With your model sitting on the ground and the
transmitter antenna collapsed, check that your
system works at a distance of 75 to 100 feet.
If your system stops functioning at a distance that
is shorter than listed above, please contact the
Horizon Service Center for further information prior
to flying your model.
INSTALLATION REQUIREMENTS
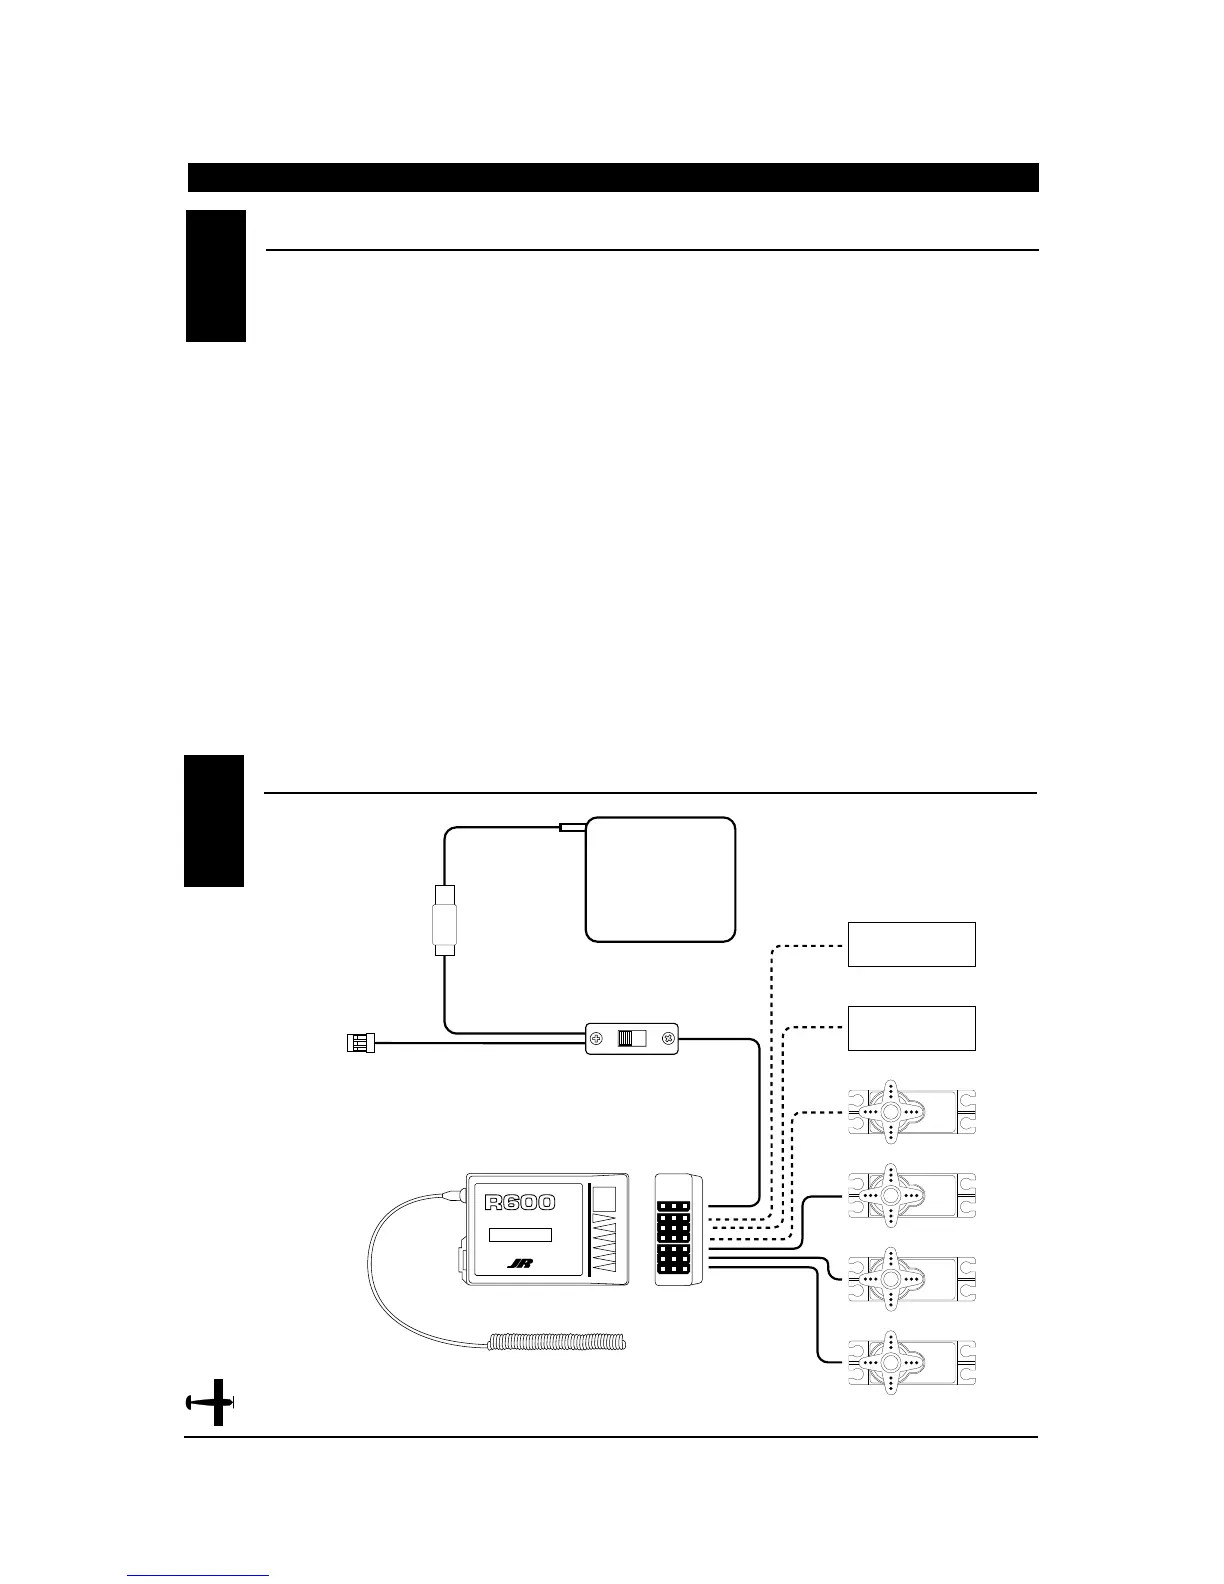
CHAPTER 2:CONNECTIONS
•
Airplane
CONNECTIONS2.2
2.1

 Loading...