LAUNCH
11
4 Connections
4.1 Preparation
1. Make sure that the ignition is turned off and vehicle battery voltage range is 9-14V or 18-30V.
2. Find DLC location.
For passenger cars, the DLC(Data Link Connector) is usually located 12 inches from the center of the
instrument panel, under or around the driver’s side for most vehicles. For some vehicles with special designs,
the DLC location may vary. Refer to the following figure for location.
A. Opel, Volkswagen, Audi
B. Honda
C. Volkswagen
D. Opel, Volkswagen, Citroen
E. Changan
F. Hyundai, Daewoo, Kia, Honda, Toyota, Nissan, Mitsubishi, Renault, Opel, BMW, Mercedes-Benz, Mazda,
Volkswagen, Audi, GM, Chrysler, Peugeot, Regal, Beijing Jeep, Citroen and other most popular models
If the DLC cannot be found, refer to the vehicle’s service manual for the location.
For commercial vehicles, the DLC is always located in driver’s cab.
3. Refer to Chapter 4.2 to make connection.
4. Turn the vehicle’ ignition ON with engine OFF.
5. Now the tool is ready for diagnostics.
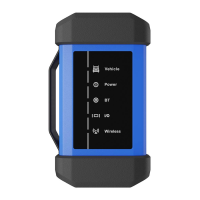
4.2 Vehicle Connection
The method used to connect the VCI device to a vehicle’s DLC depends on the vehicle’s configuration
as follows:
For OBD II vehicles, use the included diagnostic cable (DB15F to HD15F data cable and HD15M to
OBD16 adaptor) to connect the VCI to the vehicle’s DLC port.
 Loading...