31
TM
ADJUSTMENTS
Fig. 21
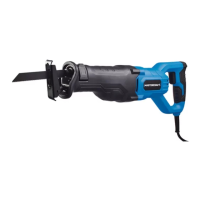
MITRE SCALE (Fig. 21)
The dual bevel slide mitre saw scale can be
easily read, showing mitre angles from 0°
to 50° to the left, and 0° to 50° to the right.
The mitre saw table has positive stops at the
most common angle settings: 0°, 15°, 22.5°,
31.6°, and 45°. These positive stops position
the blade at the desired angle quickly and
accurately. Follow the process below for the
quickest and most accurate adjustments.
Adjusting mitre angles:
• Lift the quick-cam mitre locking lever (1) to
unlock the table.
• Move the turntable while lifting the positive
stop locking lever (2) to align the pointer (3)
to the desired mitre angle measurement.
• Lock the table into position by pressing
down on the quick-cam mitre locking
lever (1).
Mitre angle pointer adjustment:
• Move the table to the 0° positive stop.
• Loosen the screw (4) that holds the pointer
with a star-head screwdriver.
• Adjust the pointer (3) to the 0° mark and
retighten the screw (4).
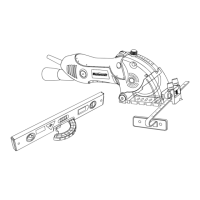
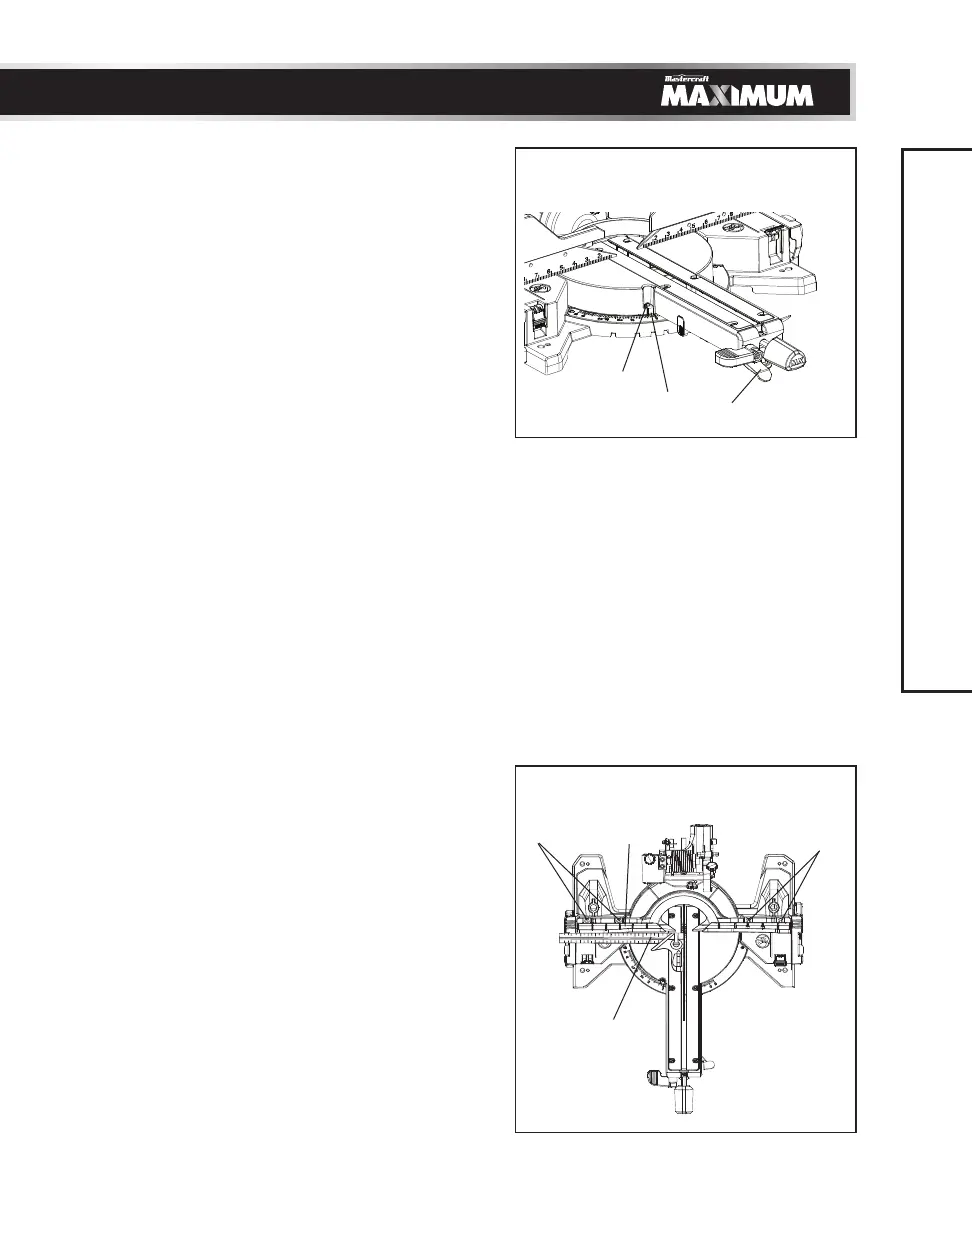
ADJUSTING FENCE SQUARENESS
(Fig. 22)
• Remove the left side and right side sliding
fences.
• Loosen the four fence locking bolts (1).
• Lower the cutting arm and lock in position.
• Using a square (2), lay the heel of the square
against the blade and the ruler against the
fence (3) as shown.
• Adjust the fence 90° to the blade and
tighten the four fence locking bolts.
NOTE: If the saw has not been used recently,
recheck to make sure blade is square to the
fence and readjust if needed.
• After fence has been aligned, using a scrap
piece of wood, make a cut at 90° then
check squareness on the piece. Readjust if
necessary.
2
3
4
Fig. 22
1
1
2
3

 Loading...