51
TM
OPERATION
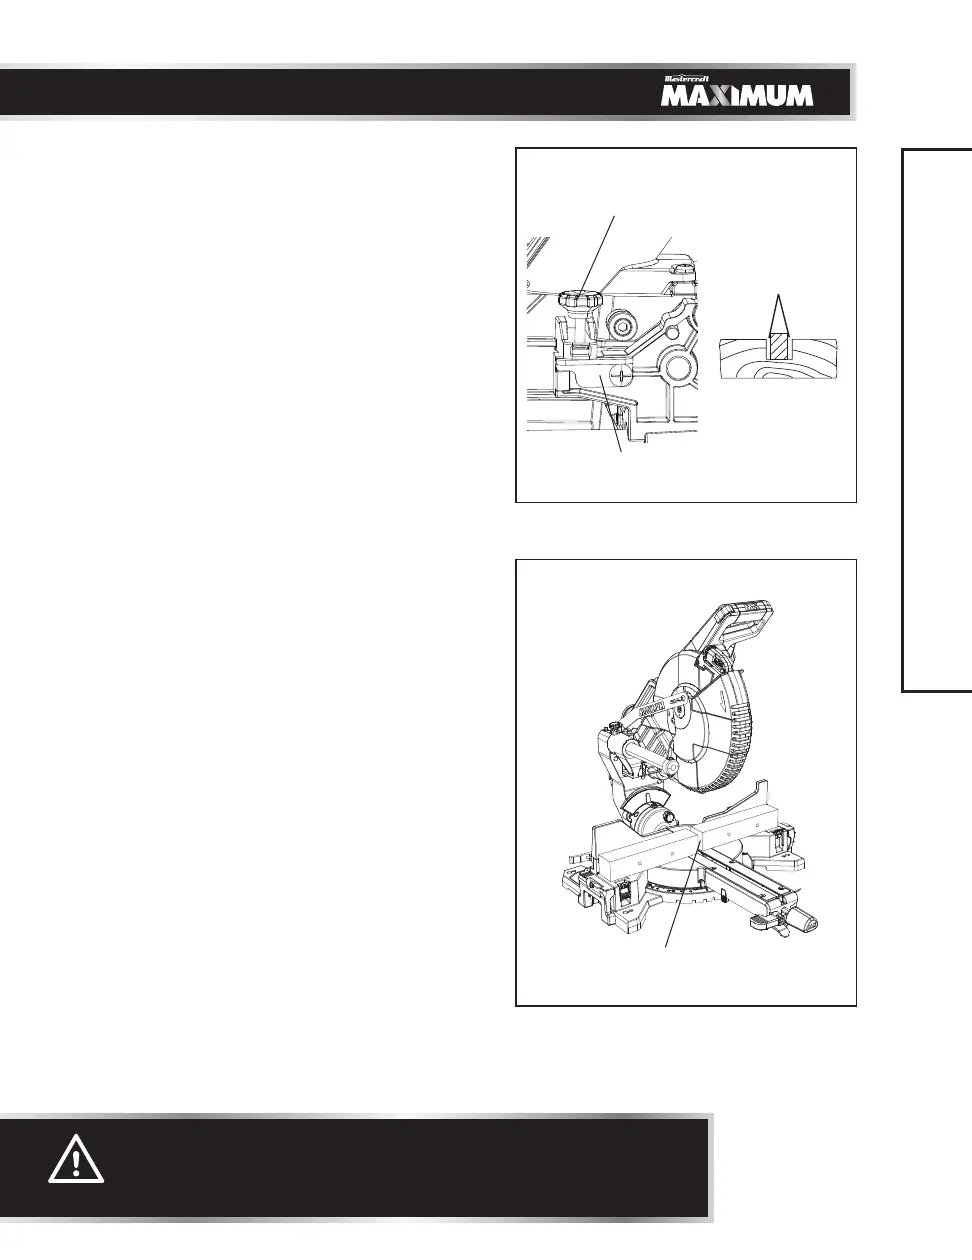
CUTTING GROOVES (Fig. 46)
• Mark lines identifying the width and depth
of the desired cut on the workpiece and
position on the table so the outside tip
of the blade is positioned on the inside
edge of the line. Use a clamp to secure the
workpiece beside the blade.
• Lower the cutting head to the depth marked
on the workpiece, holding the upper arm,
and adjust the stop knob (1) until it touches
the stop plate (2). (SEE “ADJUSTING
CUTTING DEPTH” on page 30).
• Cut two parallel grooves as shown.
AUXILIARY WOOD FENCE (Fig. 47)
When making multiple or repetitive cuts that
result in cut-off pieces of one inch or less, it
is possible for the saw blade to catch the cut-
off piece and throw it out of the saw or into
the blade guard and housing, possibly causing
damage or injury. To minimize this, an auxiliary
wood fence can be mounted to your saw.
Holes are provided in the saw fence to attach
an auxiliary wood fence. This fence is to be
constructed of straight wood approximately
3/4" thick by 2 1/2" high by 22" long.
Attach the wood fence securely and make a
full depth cut to make a blade slot.
Check for interference between the wood
fence and the lower blade guard. Adjust if
necessary.
NOTE: This auxiliary fence is used only with
the saw blade in the 0° bevel position (90° to
the table). The auxiliary wood fence must be
removed when bevel cutting.
WARNING:
DO NOT USE A DADO BLADE, use only the standard 10"
diameter saw blade for this operation.
Fig. 46
Cut these
grooves with
saw
Use a chisel
to cut out the
middle
2
1
Fig. 47
Blade slot

 Loading...