Mimosa Backhaul Help Content
Mimosa Backhaul Power & Data Connections
Copyright © 2014 Mimosa Page 72
Ethernet Port & IP67 Gland Installation
Product Applicability: B5, B5c, B11
This process ensures that the Ethernet cable is properly secured to the radio and protected from dust and
This process ensures that the Ethernet cable is properly secured to the radio and protected from dust and
moisture.
moisture.
Note 1: To remove the IP67 Cable gland, follow these instructions in reverse. Failure to remove the rubber
Note 1: To remove the IP67 Cable gland, follow these instructions in reverse. Failure to remove the rubber
grommet (Step 5) before disconnecting the body of the IP67 Gland from the radio's locking connector
grommet (Step 5) before disconnecting the body of the IP67 Gland from the radio's locking connector
(Step 4), will result in torsional strain to the Ethernet connector.
(Step 4), will result in torsional strain to the Ethernet connector.
Note 2: Due to the advantages of Mimosa’s IP67 rated cable sealing gland, the application of dielectric
Note 2: Due to the advantages of Mimosa’s IP67 rated cable sealing gland, the application of dielectric
grease to the Ethernet connector or cable gland is neither suggested nor recommended.
grease to the Ethernet connector or cable gland is neither suggested nor recommended.
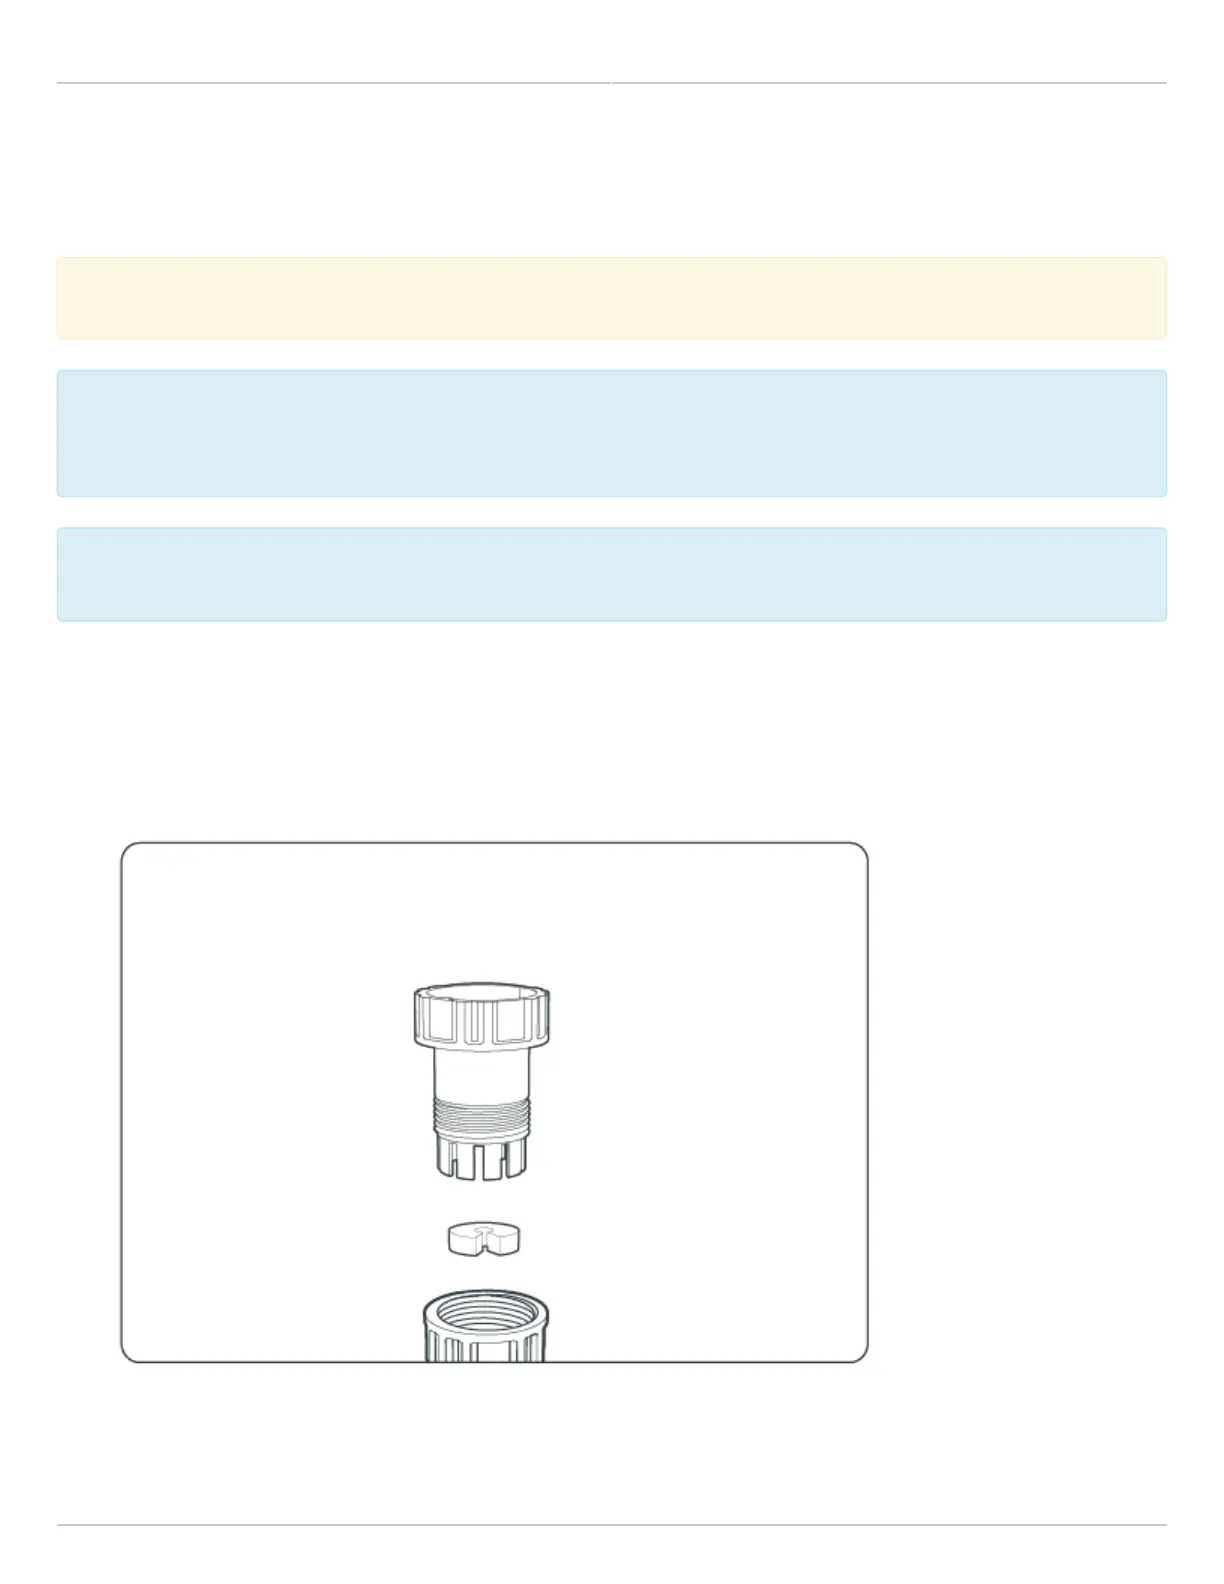
Process
Separate the IP67 Cable gland into its three parts by unscrewing the body from the cap (with rubber1.
grommet). Remove the rubber grommet and set it aside.
Pass the cap, then body over the end of a shielded CAT6 Ethernet cable.2.
 Loading...