Setup 11-9
To preset body mark for exam mode:
1. Select an exam mode in the drop-down list, the current exam mode is set by default.
2. Enter the library name of custom body marks.
3. Select a package from the drop-down list besides Available Item.
4. Add or delete body mark(s)
To add the item selected from the [Available Items] into the [Selected
Items].
To add all items from the [Available Items] into the [Selected Items].
To remove the selected item in [Selected Items] to the [Available
Items].
To remove all items from the [Selected Items].
5. Click [Up] and [Down]: to adjust the sequence of the items in Selected Items.
6. Preset the probe mark of the selected body mark in Selected Items
Move the cursor onto the probe mark of the body mark in Probe area and press <Set> to
make the cursor turn green. Roll the trackball to change the position of the probe, rotate
the multifunctional knob to change the angle, and press <Set> to confirm the orientation
of the probe.
7. Select the body mark in Selected Items and click [Default], and then the body mark will be
marked with a tick ”√”.
8. Click [Save] to complete the setting.
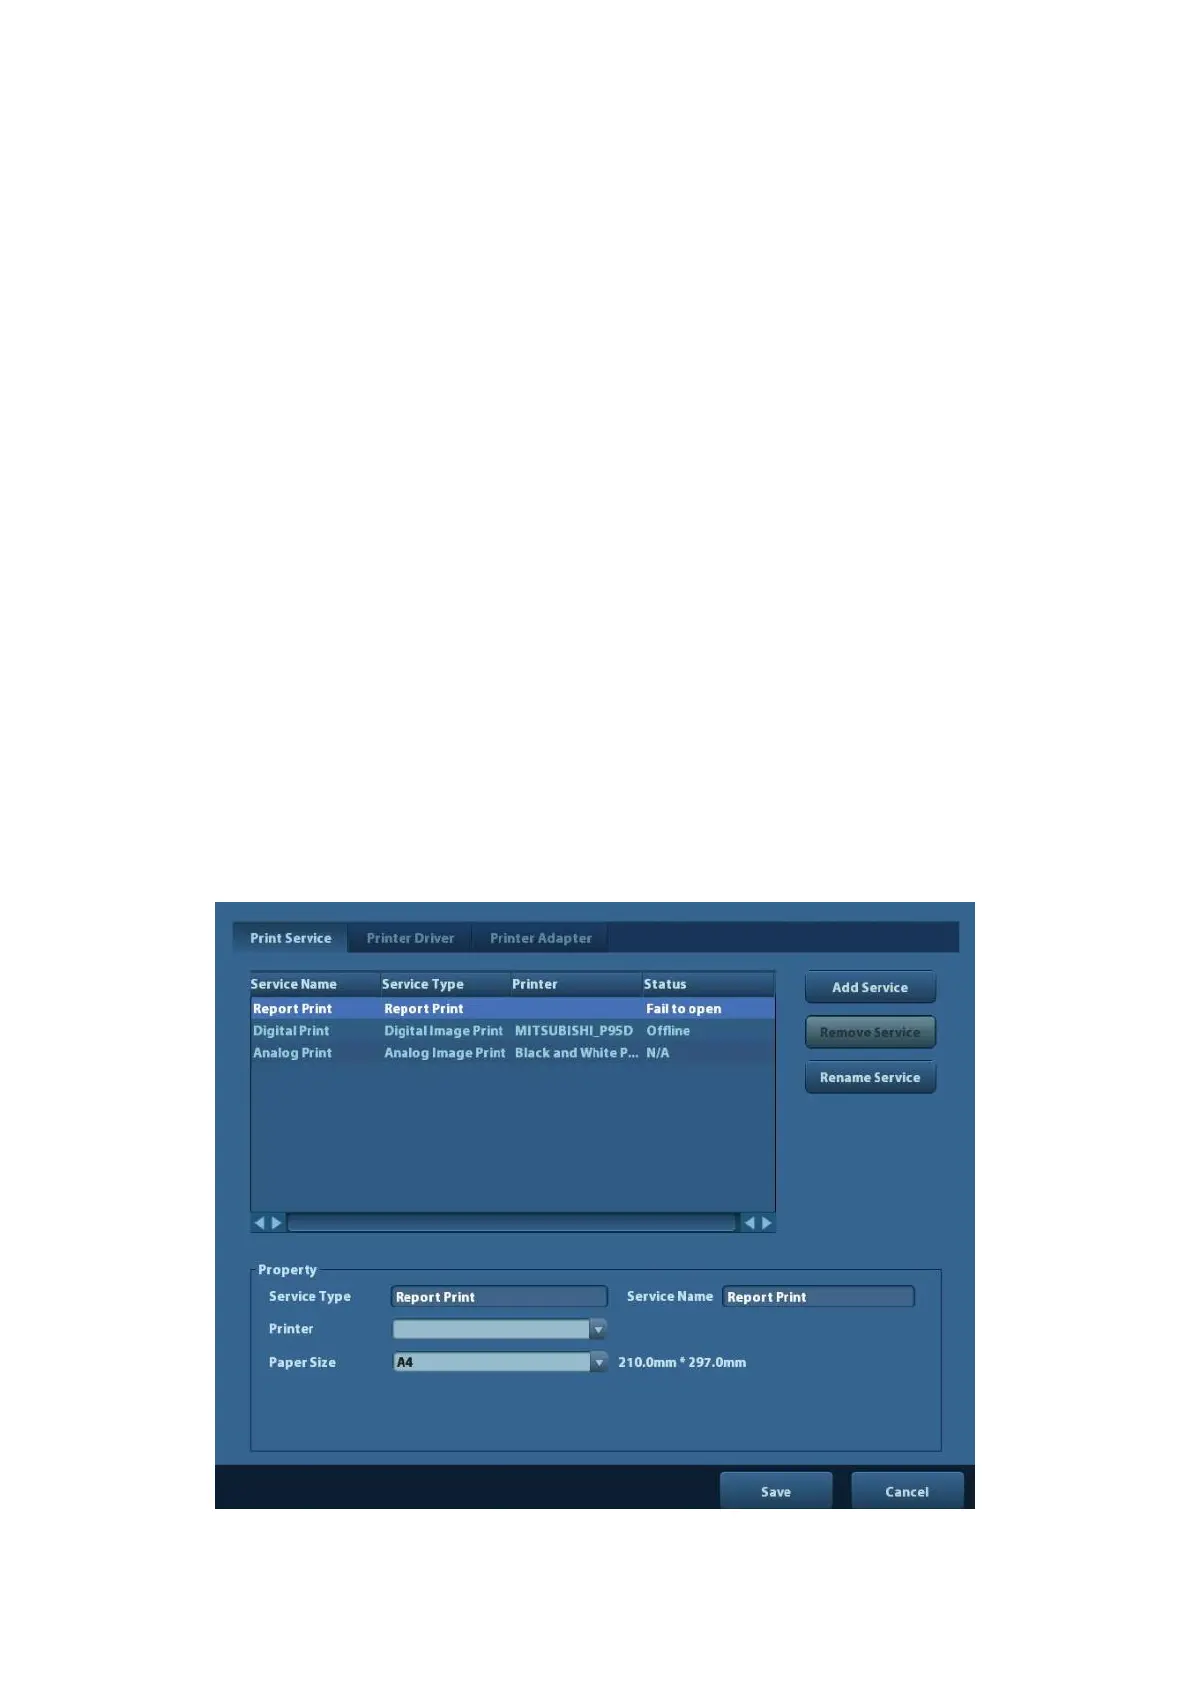
11.6 Print Preset
The settings of a printer include print service, print driver and printer adapter .
 Loading...