12-16 Probes and Biopsy
Used for fixing the angle lock at a chosen angle.
Determines the angle of the biopsy; different
specifications of blocks can be used.
Used for installing the needles of different specifications,
5 types of needles are available.
Specification of guiding
block (14G)
Matched with the corresponding biopsy needle (14G).
Guiding hole of biopsy
needle
Used for installing the needles.
Pinch nut of needle-
guided bracket
Used for locking the needle-guided bracket and the
transducer.
12.2.3 Needle-guided Bracket Inspection and Installation
Inspection of the Needle-guided Bracket
Be sure to perform inspections before and after use of the needle-guided bracket. If an
abnormality is found on the needle-guided bracket, immediately stop using it and contact
MINDRAY Customer Service Department or sales representative.
1. Sterilize the needle-guided bracket before and after use.
2. Confirm that the needle-guided bracket is free of damage, deformation, stripping,
malfunction, loose or missing parts.
3. Confirm that the needle-guided bracket is securely mounted in the correct position.
Installing the Needle-guided Bracket
NGB-001, NGB-002, NGB-003 and NGB-005 metal/needle un-detachable needle-guided
bracket (taking NGB-001 as example)
(1) Put on the sterile transducer sheath.
(2) Inosculate the locating groove on the clamp with the two raised edges on the
transducer head and aligning the locating pit of the clamp to the convex point on the
transducer head.
(3) Turn the grip knob at the tail of the needle-guided bracket tightly.
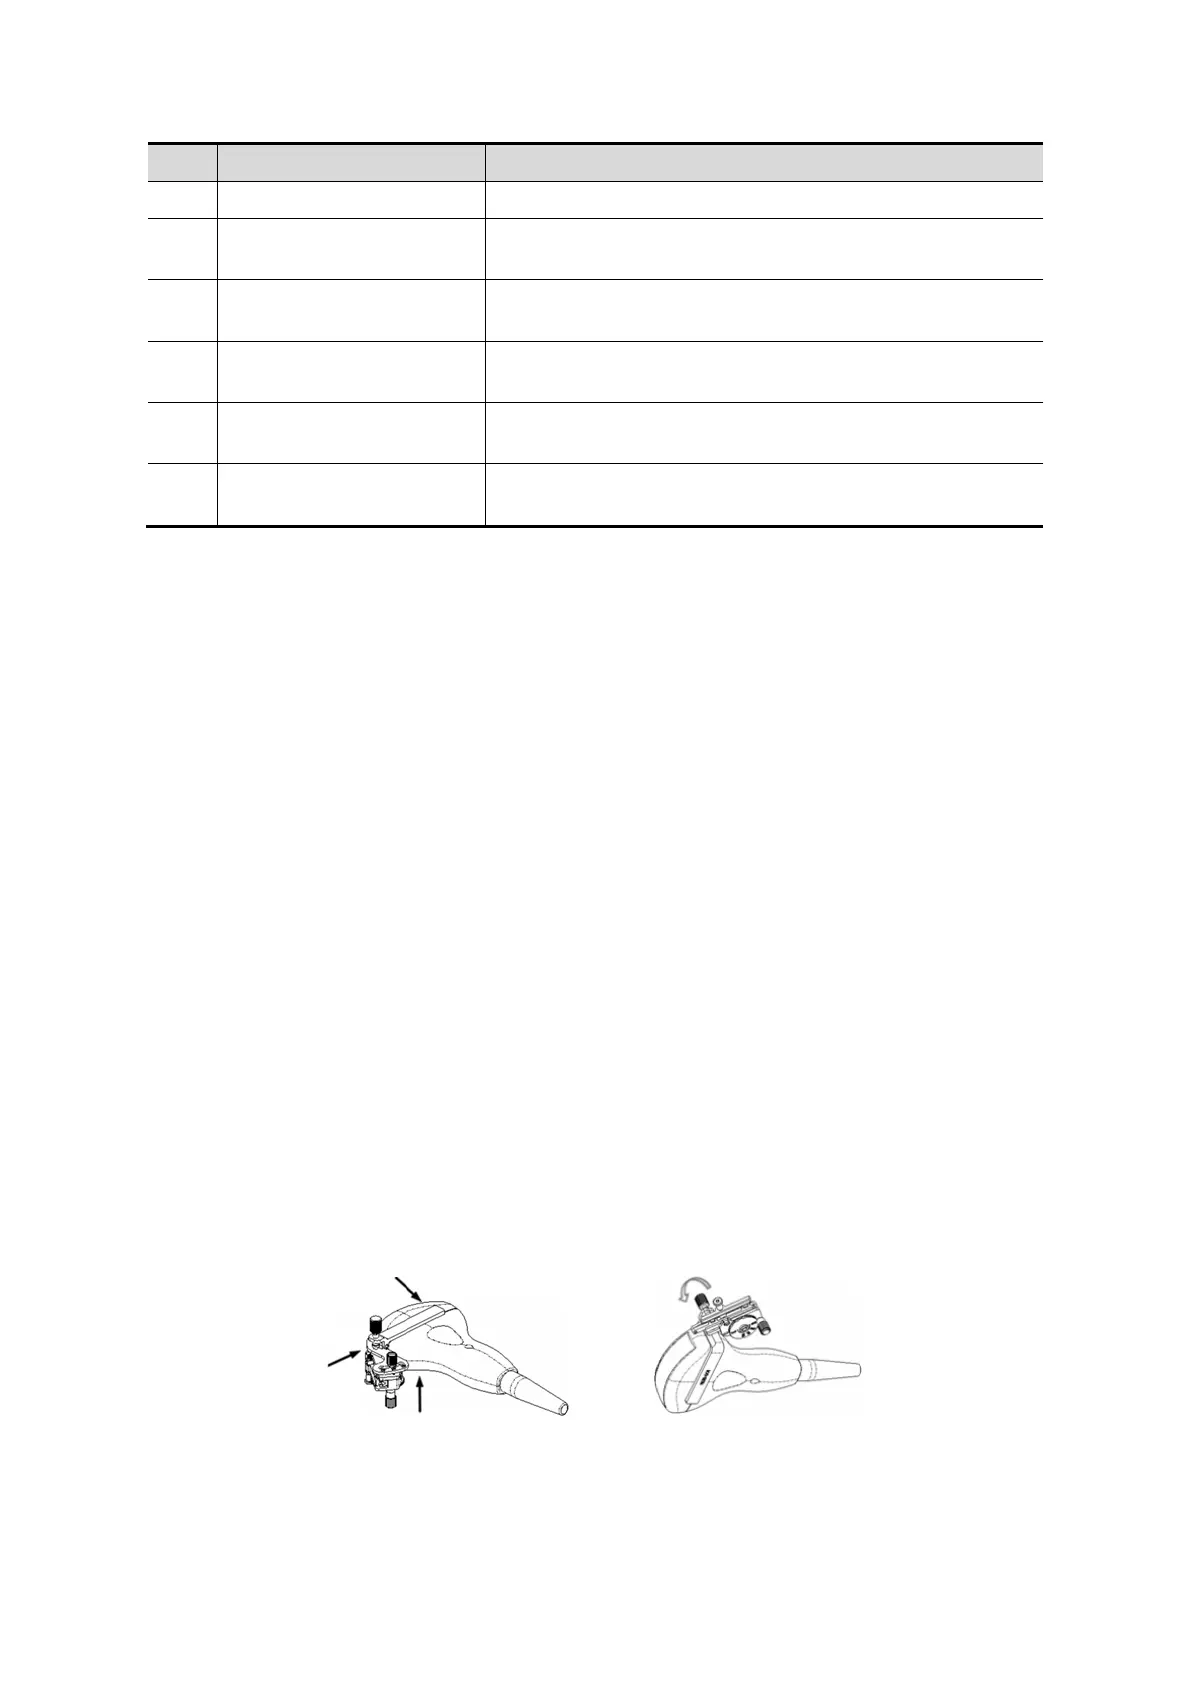
NGB-001
1. Put on the sterile transducer sheath.
2. Hold the transducer by one hand, select the proper needle-guided bracket, and hold
it with the other hand. Match the groove of the bracket with the tab of the transducer.
Amount the bracket onto the transducer.
3. Screw the pinch nut of the needle-guided bracket to confirm that the needle-guided
bracket is properly installed on the transducer.
 Loading...