Mercury 310 Automated Gate System
Installation and Programming Manual
6161
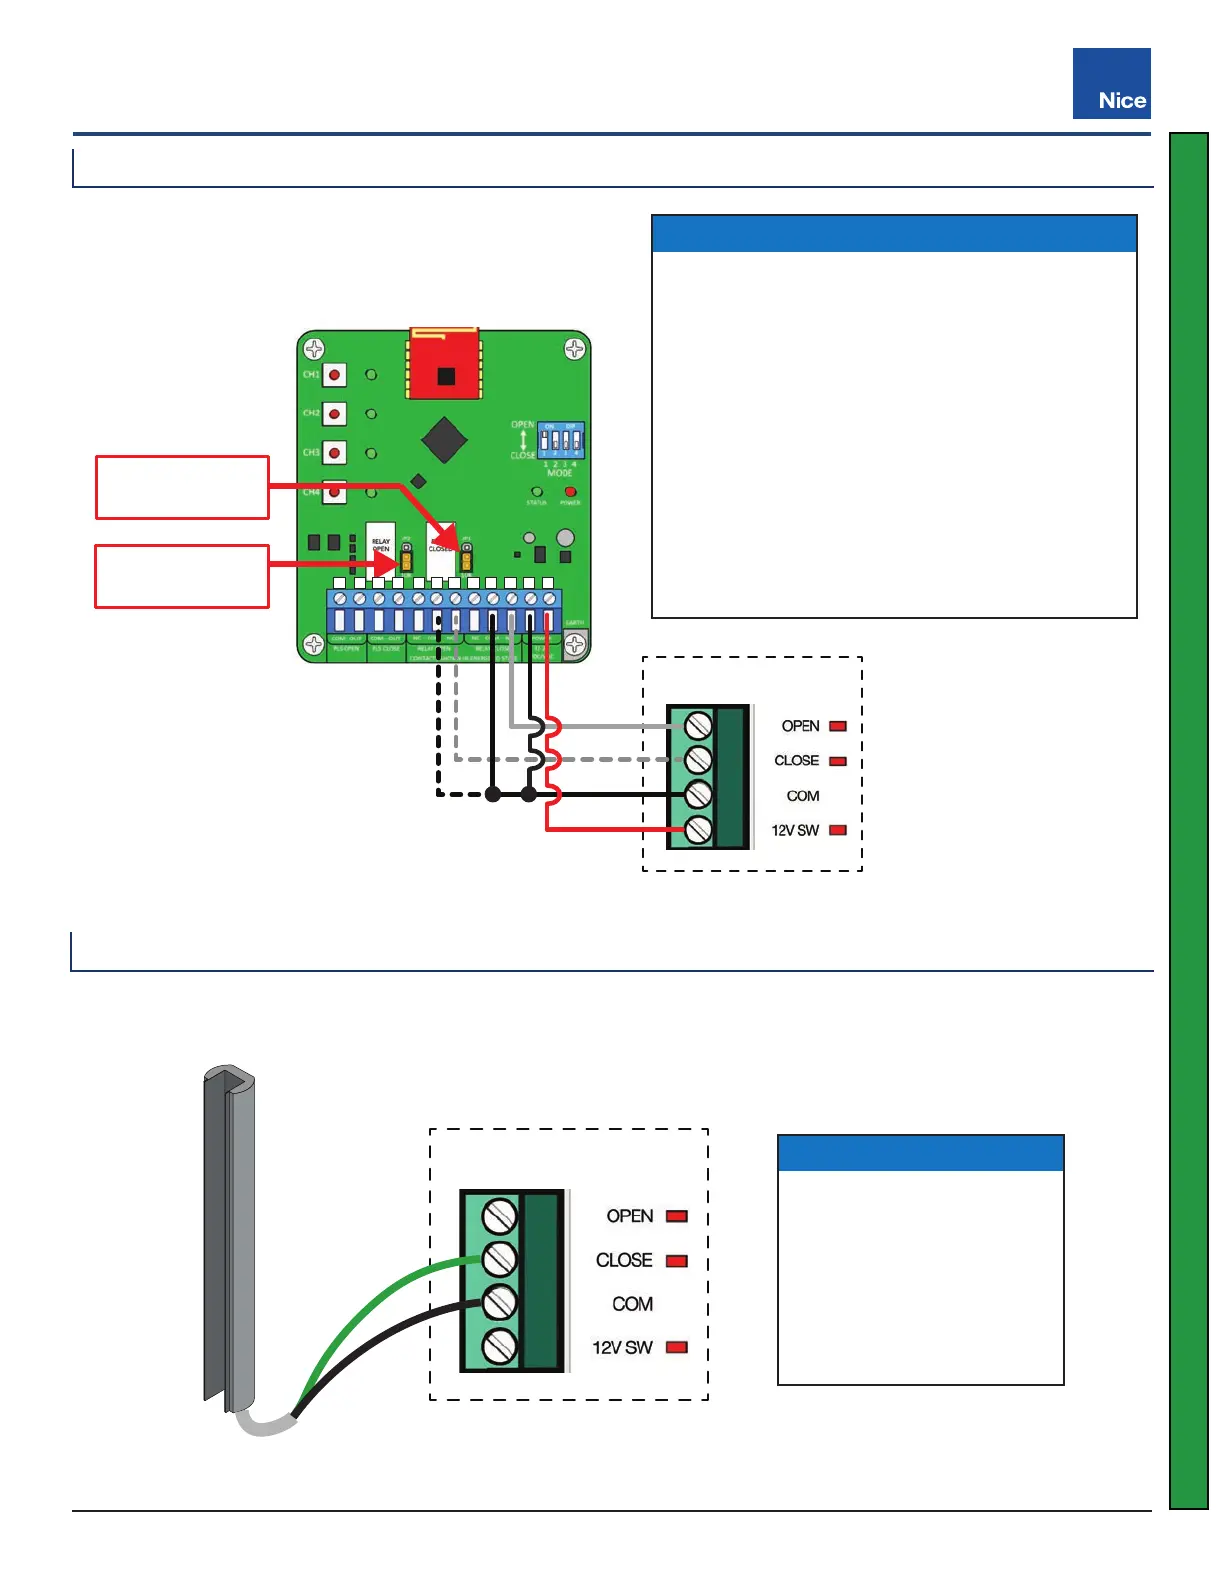
Mercury 310 Controller
JP2 (Open Relay)
10K ON (LOWER)
JP1 (Closed Relay)
10K ON (LOWER)
1 2 3 4 5 6 7 8 9 10 11 12
NOTICE
’ Set board as shown in red boxes per diagram.
Jumpers are three pin type, and placed LOWER
as indicated for 10K operation. Dashed lines
indicate the secondary wiring connections if
an additional sensor is wired to the input. See
manufacturer’s instructions for details.
’ Wiring shown is for sensor in the open-direction.
For a close-direction sensor, use the Close
input. To add a close-direction sensor, wire as
shown with secondary wiring (dotted lines). For
dual direction sensing, jumper Open & Close
inputs together.
EMX WEL200 (Edge Sensor) Wiring
Mercury 310 Controller
Generic 2-Wire Edge Sensor Wiring
Generic 2-wire edge sensors must be 10K Normally Open (N.O.) devices and may be wired to the Sensor Inputs
as shown below.
NOTICE
Wiring shown is for sensor
in the close-direction. For
an open-direction sensor,
use the Open input. For
dual direction sensing,
jumper Open & Close inputs
together.
Mercury 310
www.ApolloGateOpeners.com | (800) 878-7829 | Sales@ApolloGateOpeners.com
 Loading...