Chapter 7 Routine Maintenance
191
ENDOSCOPE REPROCESSOR OER-Pro Operation Manual
6. Close and lock the cover. Be careful not to catch the gas filter when closing
the cover.
7. Enter the data on the replacement date indication stickers provided with
each gas filter, and attach the stickers to the gas filter cases. Be careful not
to block the ventilation opening (remove the previous replacement date
indication sticker before attaching the new sticker).
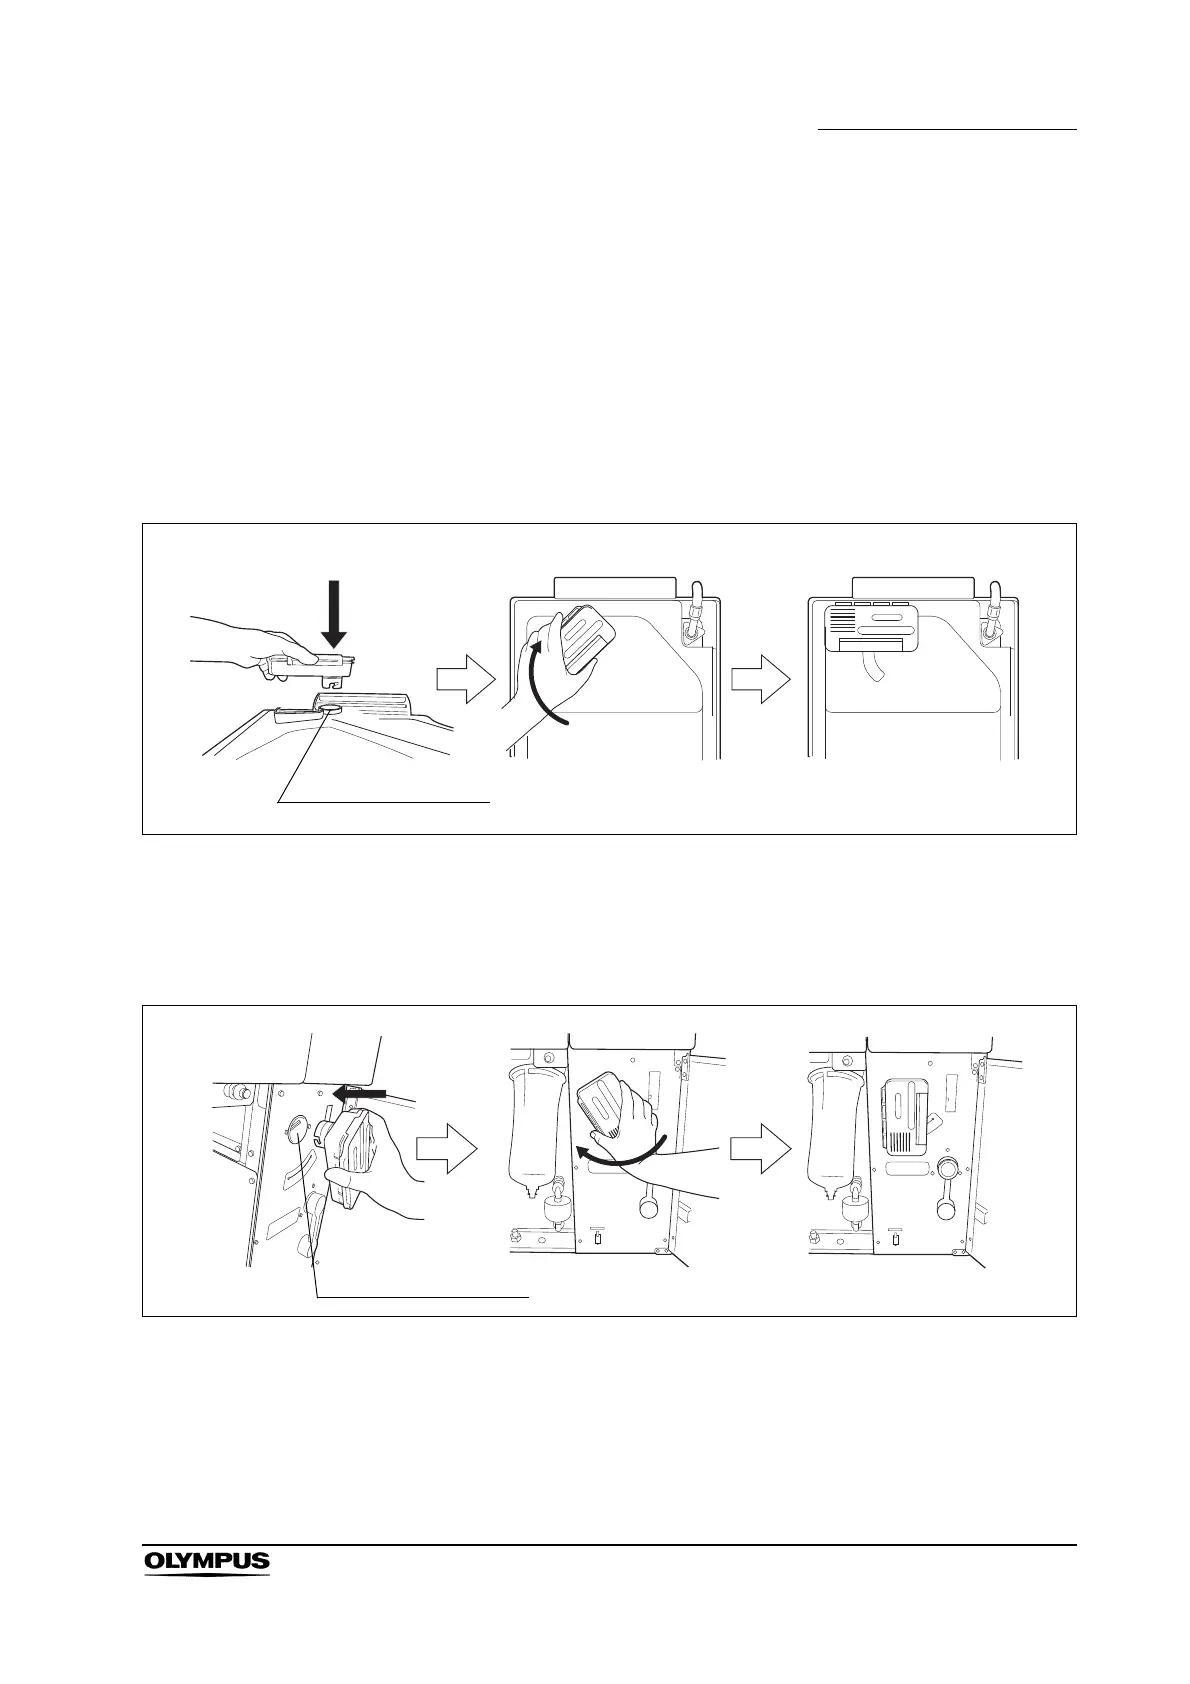
8. Insert the gas filter case designed for the reprocessing basin (the one with
gas filter adapter attached to it) into the mount on the deep part of the lid,
and then turn it all the way in the direction shown below until it is stopped.
Figure 7.6
9. Insert the gas filter case designed for the disinfectant solution tank into the
gas filter case mount at the top right of the inside of the front door, and then
turn it all the way in the direction shown below until it is stopped.
Figure 7.7
10. Close the front door.

 Loading...