Expansion Module Installation
Hardware Installation 3-17
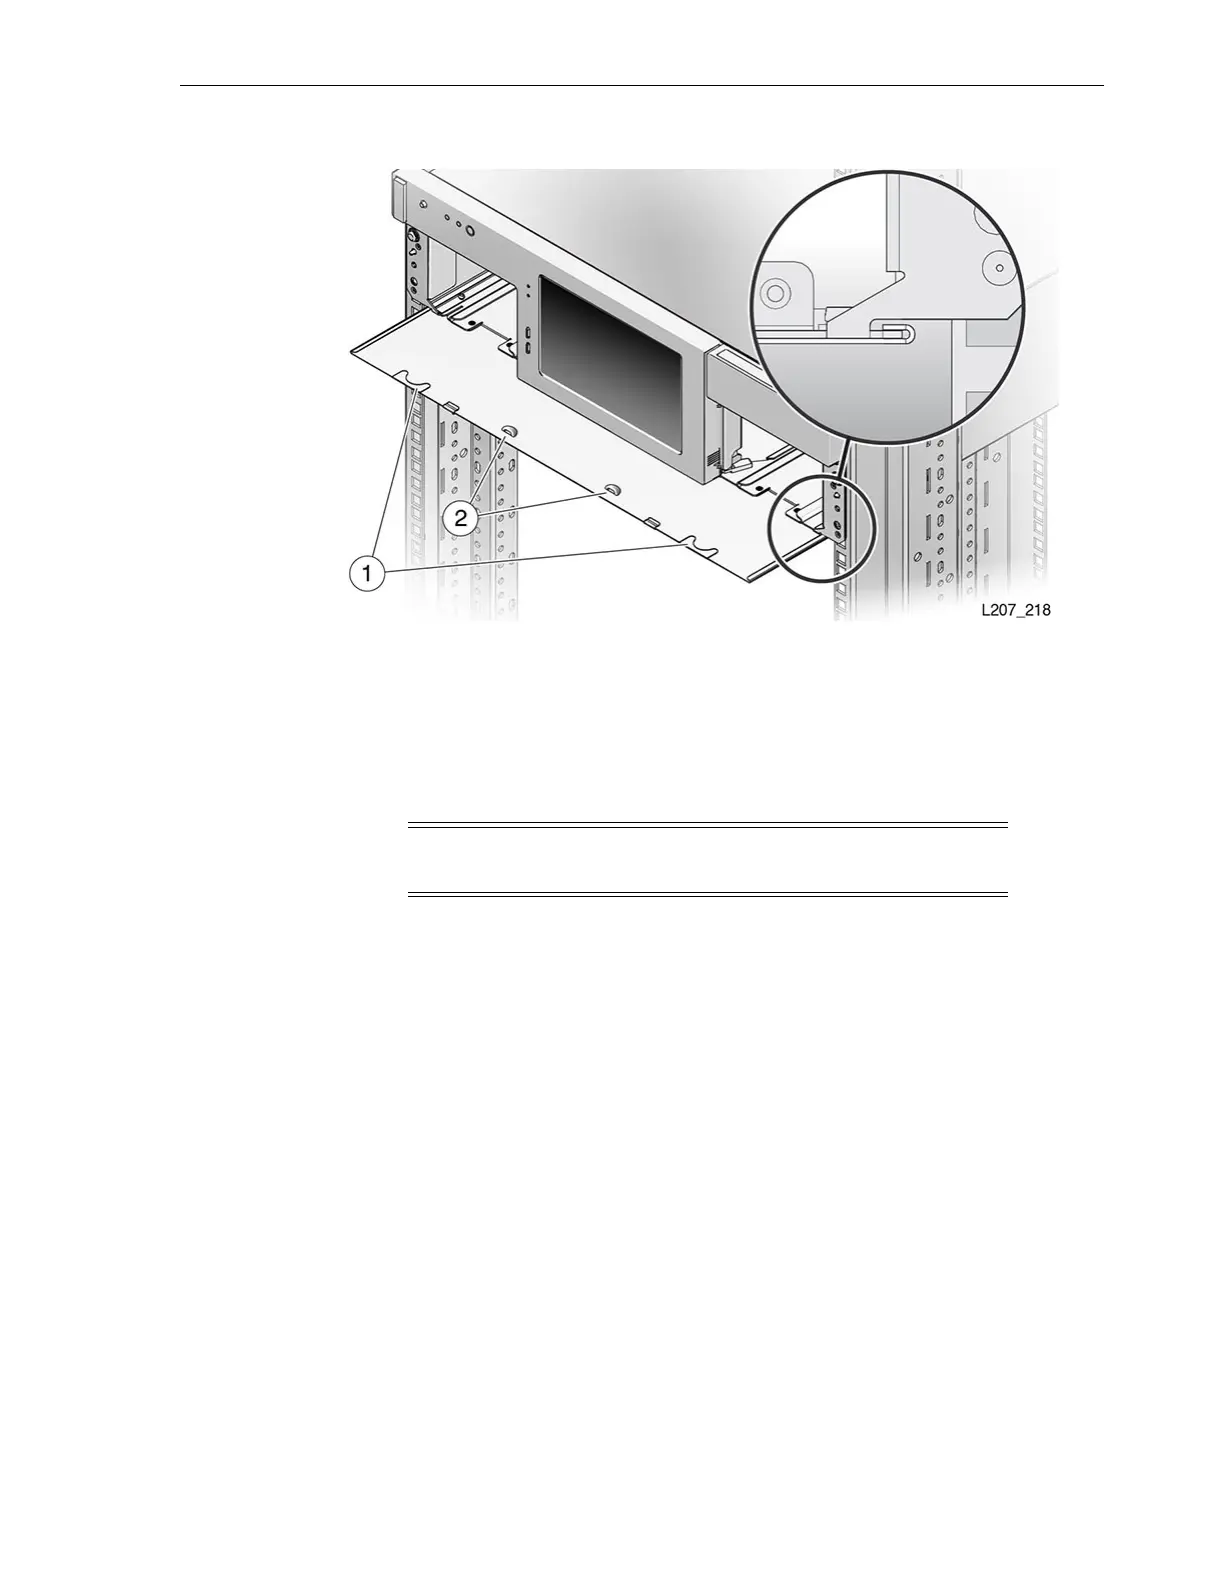
Figure 3–17 Library Floor Removal from the Base Module
Illustration Legend:
1 - Floor Finger Holds
2 - Floor Lock (Improved Floor Design)
Install Clip Nuts for the Expansion Module
Perform the following tasks to install clip nuts.
Task 1 Install Clip Nuts at the Front of the Rack
1. Locate the 2U space immediately below the installed module.
2. Open the package containing the clip nuts and remove one nut.
3. Locate the middle hole of the second U (fifth hole down from the junction of the
first U boundary) on both the left and right rail stiles (see Figure 3–18)for
installation of the clip nut. Use the Rail Installation Template, if desired.
4. For each clip nut location:
a. Seat one edge of the clip nut into the hole from the back of the rack stile.
b. Compress the other edge of the clip nut and seat it in the hole.
5. Make sure the clip nuts are parallel (in the identical mounting hole).
Note: Continue with "Prepare the Expansion Module for
Installation" if the rack has threaded holes.
Tip: The square nut is located on the inside of the rack stile.
 Loading...


