Step 3 of 6 (Set the Librar y Date and Time)
Library Initialization 4-7
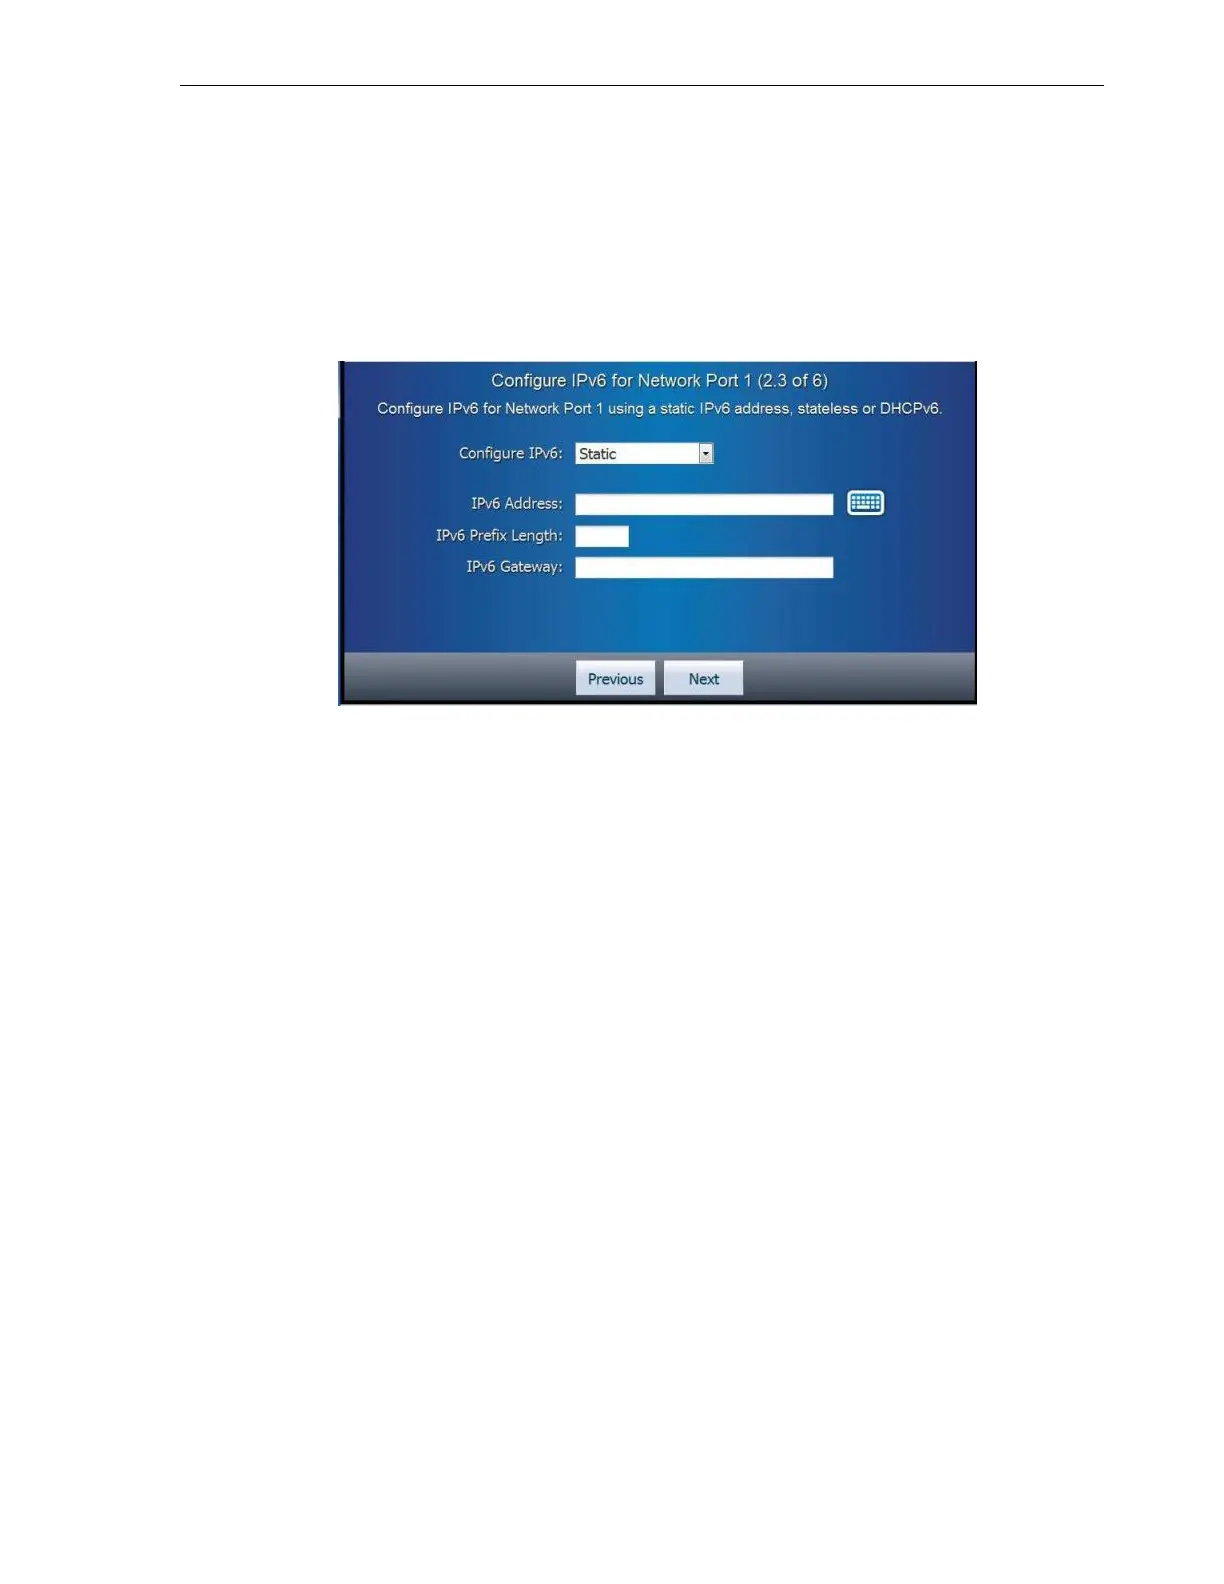
Task 1 Enter the IPv6 Address
1. Tap the keyboard button.
2. Tap the Clear button to remove any existing IPv6 Address value.
3. Tap the screen keys to enter the IPv6 Address.
4. Tap the Next button after you have entered the last address character.
Figure 4–7 IPv6 Static Address Fields
Task 2 Enter the IPv6 Prefix Length
1. Tap the Clear button to remove any existing IPv6 Prefix Length value.
2. Tap the screen keys to enter the IPv6 Prefix Length.
3. Tap the Next button after you have entered the last character.
Task 3 Enter the IPv6 Gateway
1. Tap the Clear button to remove any existing IPv6 Gateway value.
2. Tap the screen keys to enter the IPv6 Gateway.
3. Tap the Done button after you have entered the last character.
The Configure IPv6 for Network Port 1 screen appears.
4. Verify the values are correct and tap the Next button.
The Set the Library Date and Time task appears.
Step 3 of 6 (Set the Library Date and Time)
The third step of library initialization is to set the library date and time.
Set the Library Time Zone
To set the library time zone:
1. Use the Time Zone list to select the appropriate value.
2. Use the Closest City or Region list to select the appropriate value.
3. Tap the Next button.
 Loading...


