Expansion Module Installation
Hardware Installation 3-21
Use the following instructions to install an expansion module:
1. Lift the module to the bottom of the installed module.
2. Insert the rear edge of the module flange into the grooves on the bottom edge of
the installed module and push the 2U expansion module in approximately 75
millimeters (3 inches).
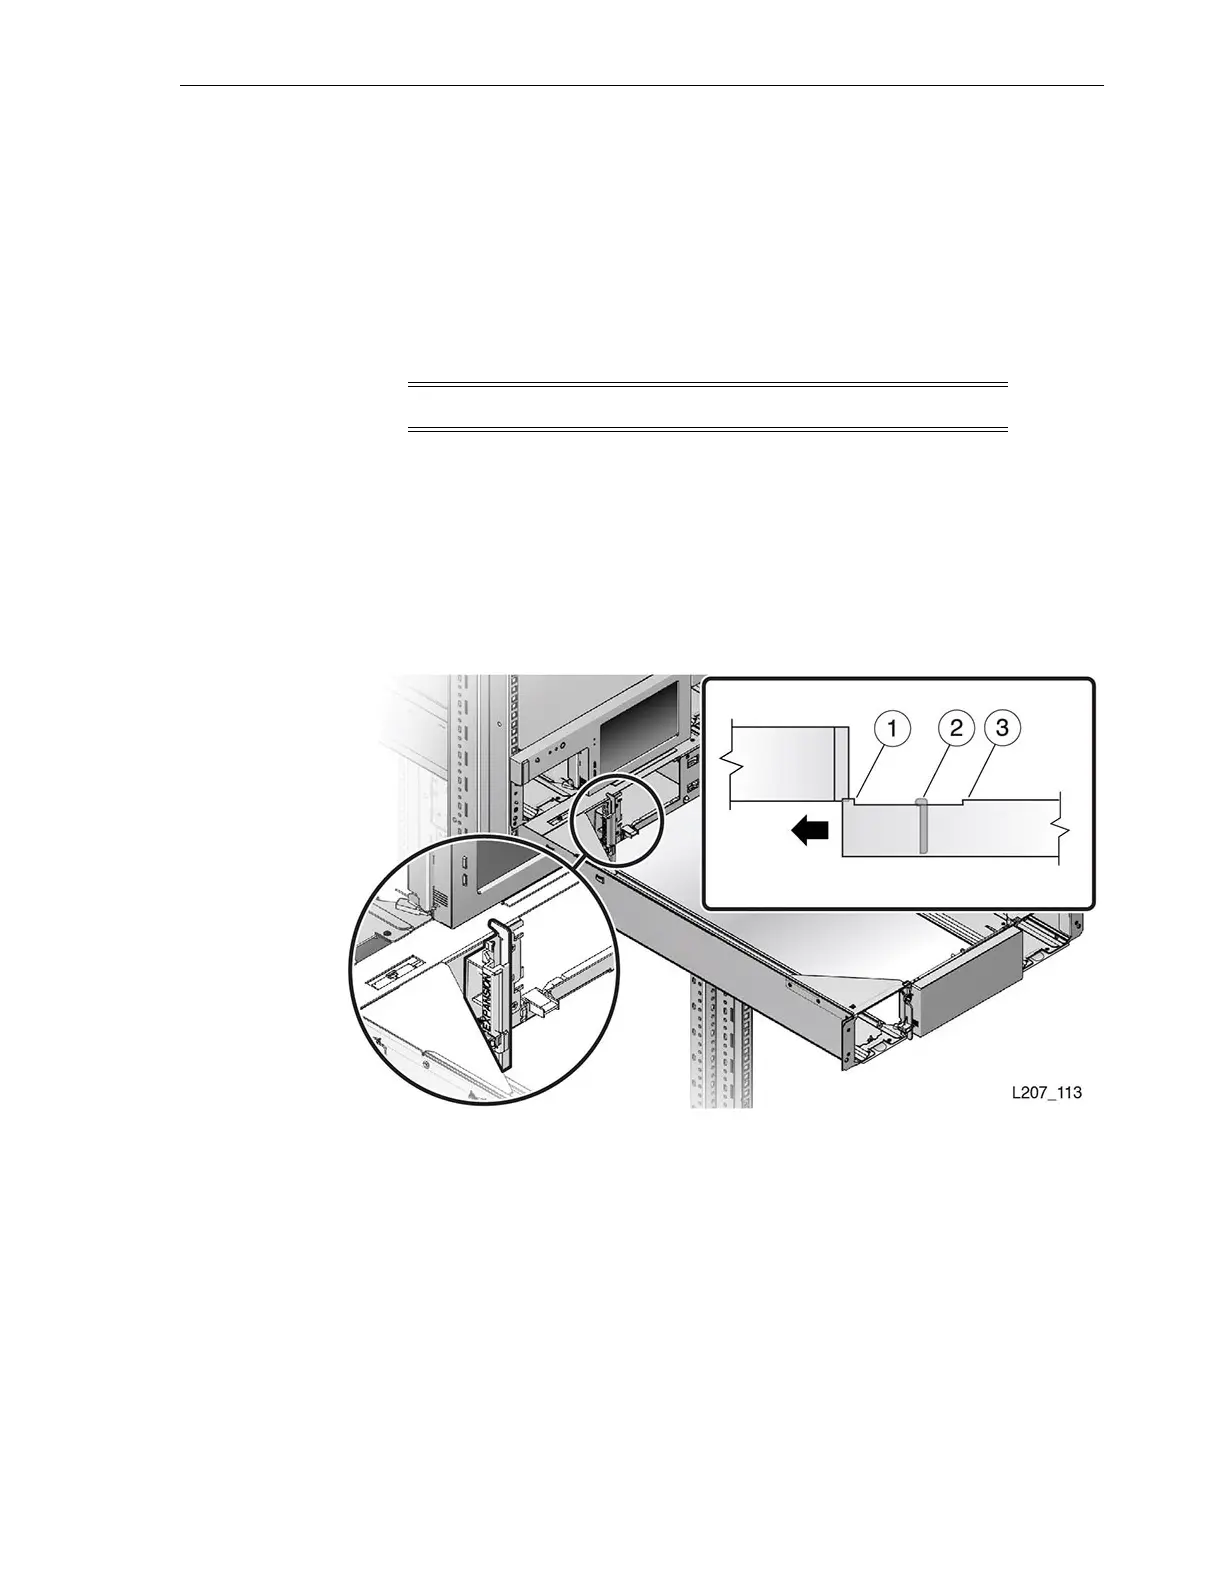
3. Lower the front edge of the module approximately 10 mm (0.4 inch), guide any
sharp metal edges away from the upper module front panel, and push the module
in until the sharp edges are past the front panel (see Figure 3–22).
4. Raise the front of the 2U module, push the module in, and engage the module left
and right side flanges with the grooves in the previous module.
5. Push the module in and seat the alignment tab in the slot of the left magazine bay
(see Figure 3–23).
6. Continue with the next section ("Secure the Expansion Module").
Figure 3–22 Scratch Avoidance
Illustration Legend:
1 - Flange (Short Section)
2 - Tall Metal Part with Sharp Edges
3 - Flange (Long Section)
Note: Do not scratch the front panel of the module above.
 Loading...


