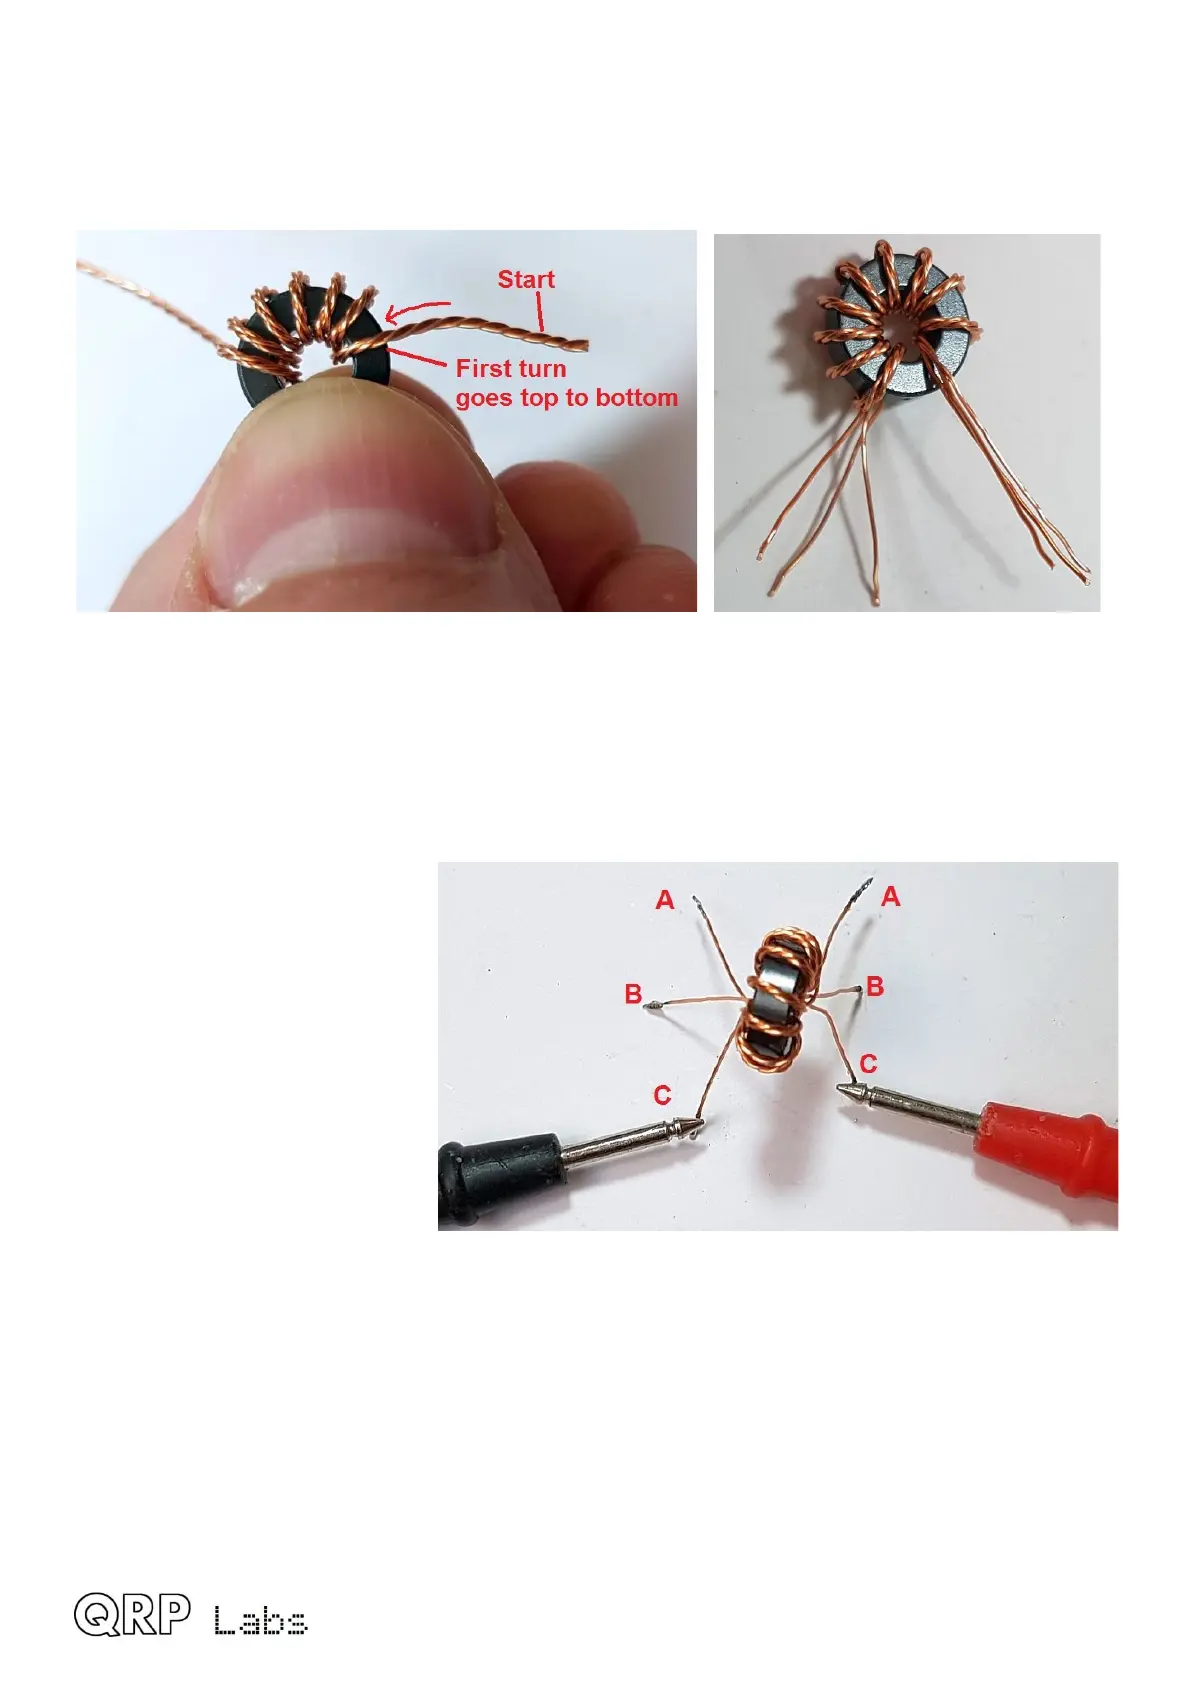
Hold the core between thumb and finger. Pass the wire first from above, to below. Then take the
wire from below, and bring it around to pass through the toroid again to form the second turn. After
each turn, ensure the wire is fitting snugly around the toroidal core. Wind 10 turns on the core.
Each time through the toroid’s central hole counts as one turn. Cut off the excess wire, leaving
about 2.5cm remaining.
Now it’s necessary to identify which wire belongs to which winding. You have three windings
twisted together, they all use the same wire. The only way to do this is with a DMM as continuity
tester. First, untwist and straighten the wire ends that are not wound around the toroidal core.
Now tin the last few mm at the ends of each wire. You can do this by scraping off the enamel then
tinning with the soldering iron; or, if your soldering iron is powerful enough, hold the wire end in a
blob of molten solder for a few (maybe 10) seconds, until the enamel burns off.
Now use a DMM to test for
continuity. Re-arrange the wires
so that there is continuity from
A-A, B-B, and C-C in this photo.
Carefully keep this orientation of
wires and insert the transformer
this way into the PCB. BE
CAREFUL not to lose the
orientation of the wires! The
right wires must be in the right
holes, so that the windings are
connected correctly in the
circuit!
Refer to the diagram on the following page to see the correct orientation.
Once the wires are inserted through the correct holes in the PCB, and pulled tight, check for
continuity between the pairs of wires in holes A, B and C once AGAIN. It is much easier to get this
right first time, than it is to make repairs later!
When you are satisfied that the wires are all in the correct holes, you can cut them to a length of
about 2mm and solder them. It is best to cut-and-solder one wire at a time, since if you cut all the
wires to 2mm length then the toroid is more likely to fall out before you’ve had a chance to solder
any of the wires. If that happens, it will be tough to get all the wires back in the correct holes again.
QMX assembly Rev 1.00e 38

 Loading...