34
Flown Deployment
NOTE: Acceptable configurations of a flown array: 1) The position of the “Angle Bar” for any loudspeaker must be equal
to or greater than the loudspeaker above it. 2) The sum of boom angles for all loudspeakers in an array, and overall array
tilt, must be less than or equal to 84 degrees.
Flown Deployment with an Array Frame
NOTE: Bumper Pads must be adhered to the bottom of
the Array Frame for stacking. See the sections for Ground
Stacking and Stacking over a Subwoofer(s) for more details.
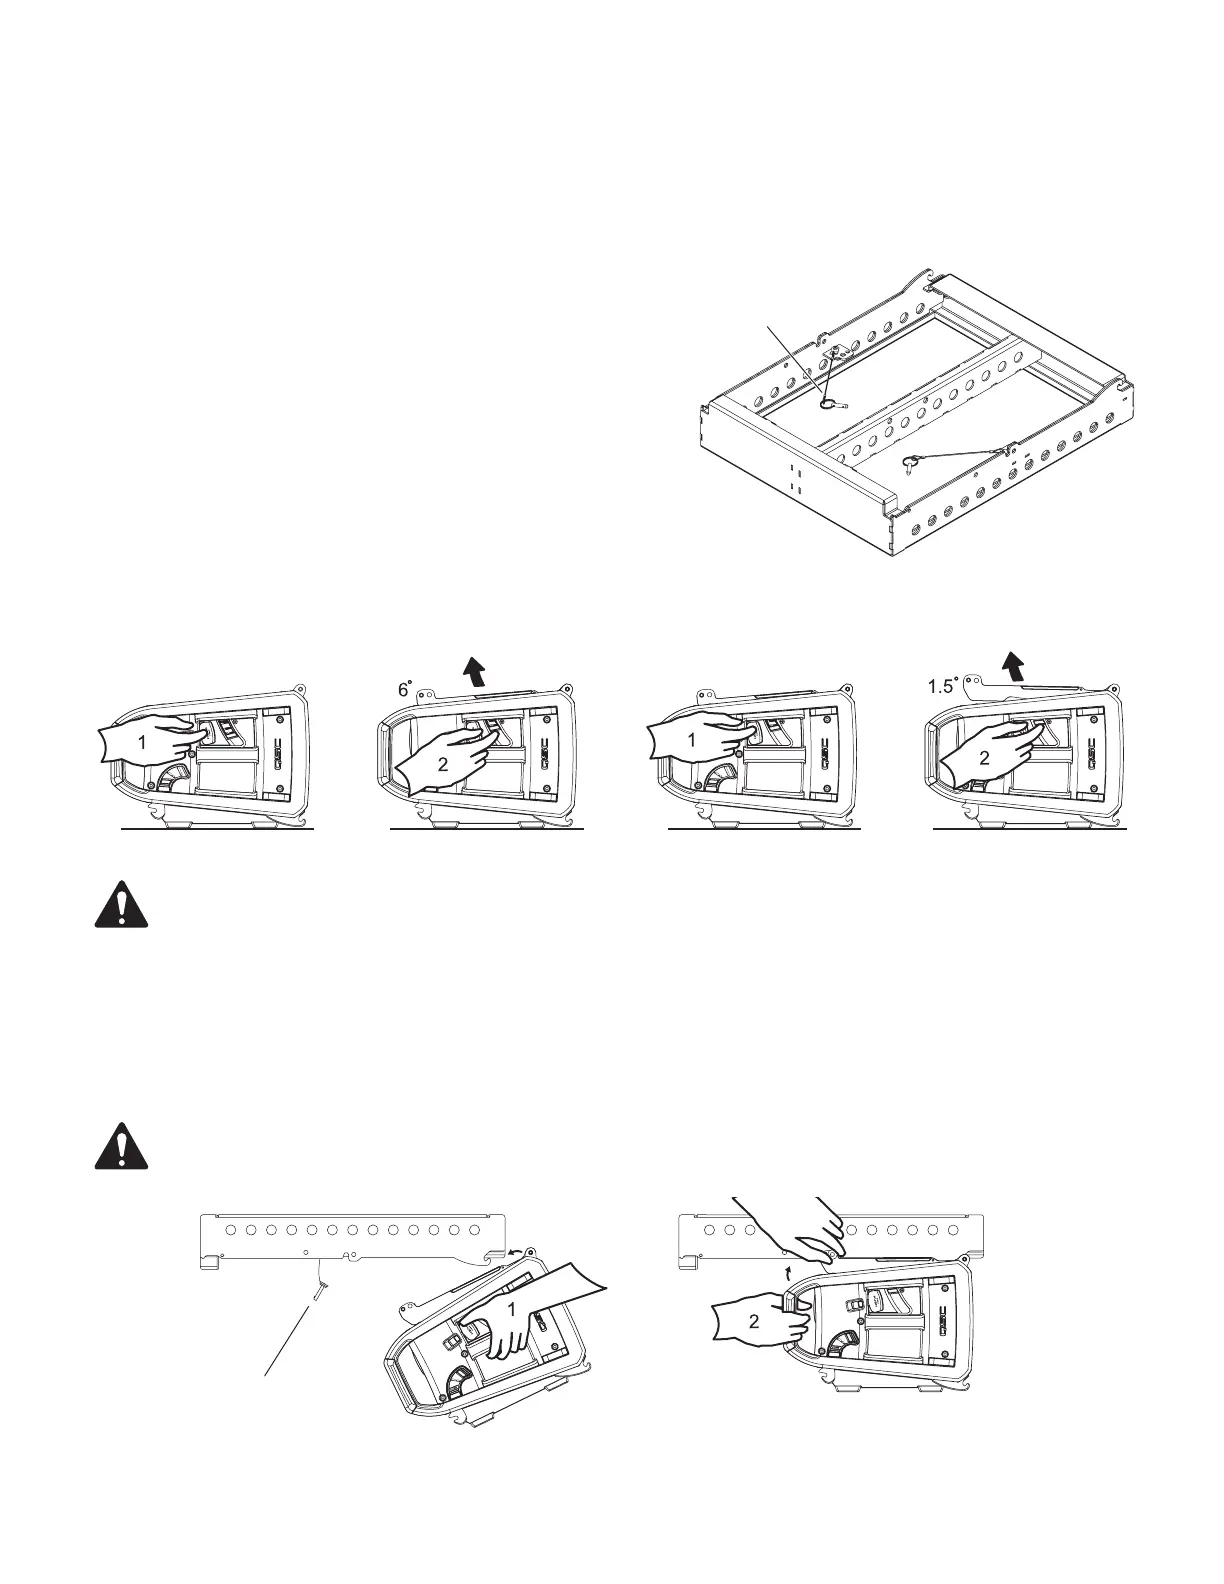
Array Frame Attachment Preparation
1. Push Angle Levers on both sides all the way in, until they make a click
sound and stay depressed.
2. Push Angle Bar Lift up on both sides, until they make a click sound
and the Angle Bar is at the 6° setting.
3. Repeat steps 1 and 2 to raise Angle Bar to the 1.5° setting.
—Figure53—
CAUTION!: When transporting the loudspeakers, return the Angle Bar to the retracted position (12° setting) and push
the Lock Lever down to protect the QSC RapidDeploy latching mechanism.
Attaching a Loudspeaker to the Array Frame
1. Hang both Front Strikes of the loudspeaker onto the Front Hooks of the Array Frame.
2. Lift rear handles of the loudspeaker until the Angle Bar reaches the Array Frame. Secure the loudspeaker Angle Bars to the Array
Frame with the Array Frame Rigging Pins on both sides.
WARNING!: Both Rigging Pins must be used to safely secure the loudspeaker to the Array Frame. Never use only
onepin!
Array Frame
Rigging Pin
—Figure54—
rame
—Figure52—

 Loading...