1.Replacement and Adjustment
4
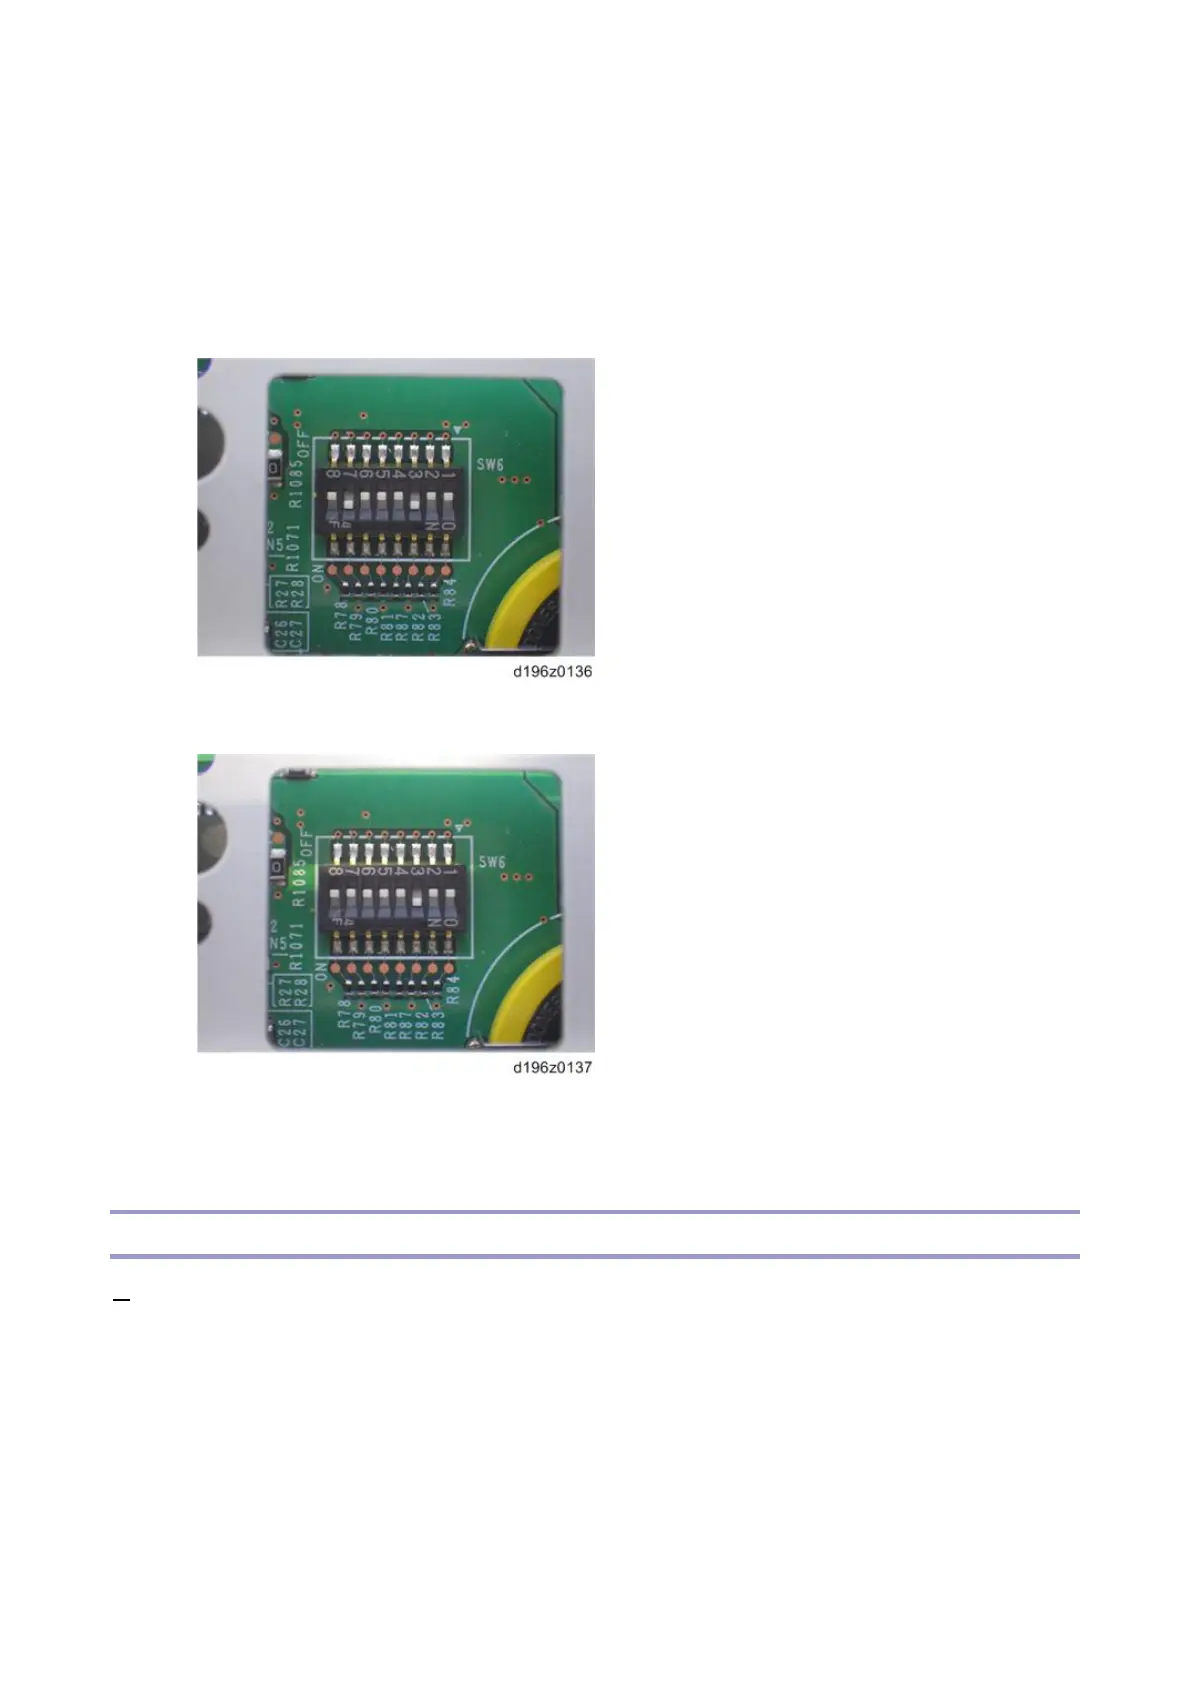
• The correct DIP switch setting depends on the MFP. Note the DIP switch settings of the old operation
panel unit before replacing, and apply the same settings to the new Smart Operation Panel. (Below are
two examples for DIP switch settings.)
• When No.3 and No.7 are set to ON
• This is the factory default setting of a service part
• For Type JX controllers
When only No.3 is set to ON
• For Type JL controllers
• If the DIP switch setting is wrong, SC672 will be displayed.
• After replacing the operation panel unit, make sure that the latest version of the firmware is installed on
the Smart Operation Panel. Update it if necessary (Updating the Smart Operation Panel).
CPU Board
1. Operation panel unit (Operation Panel Unit)
 Loading...