9.7.6 Replacing the precharging rectifier
Removing modules
To remove a pre-charging rectifier module, proceed as follows:
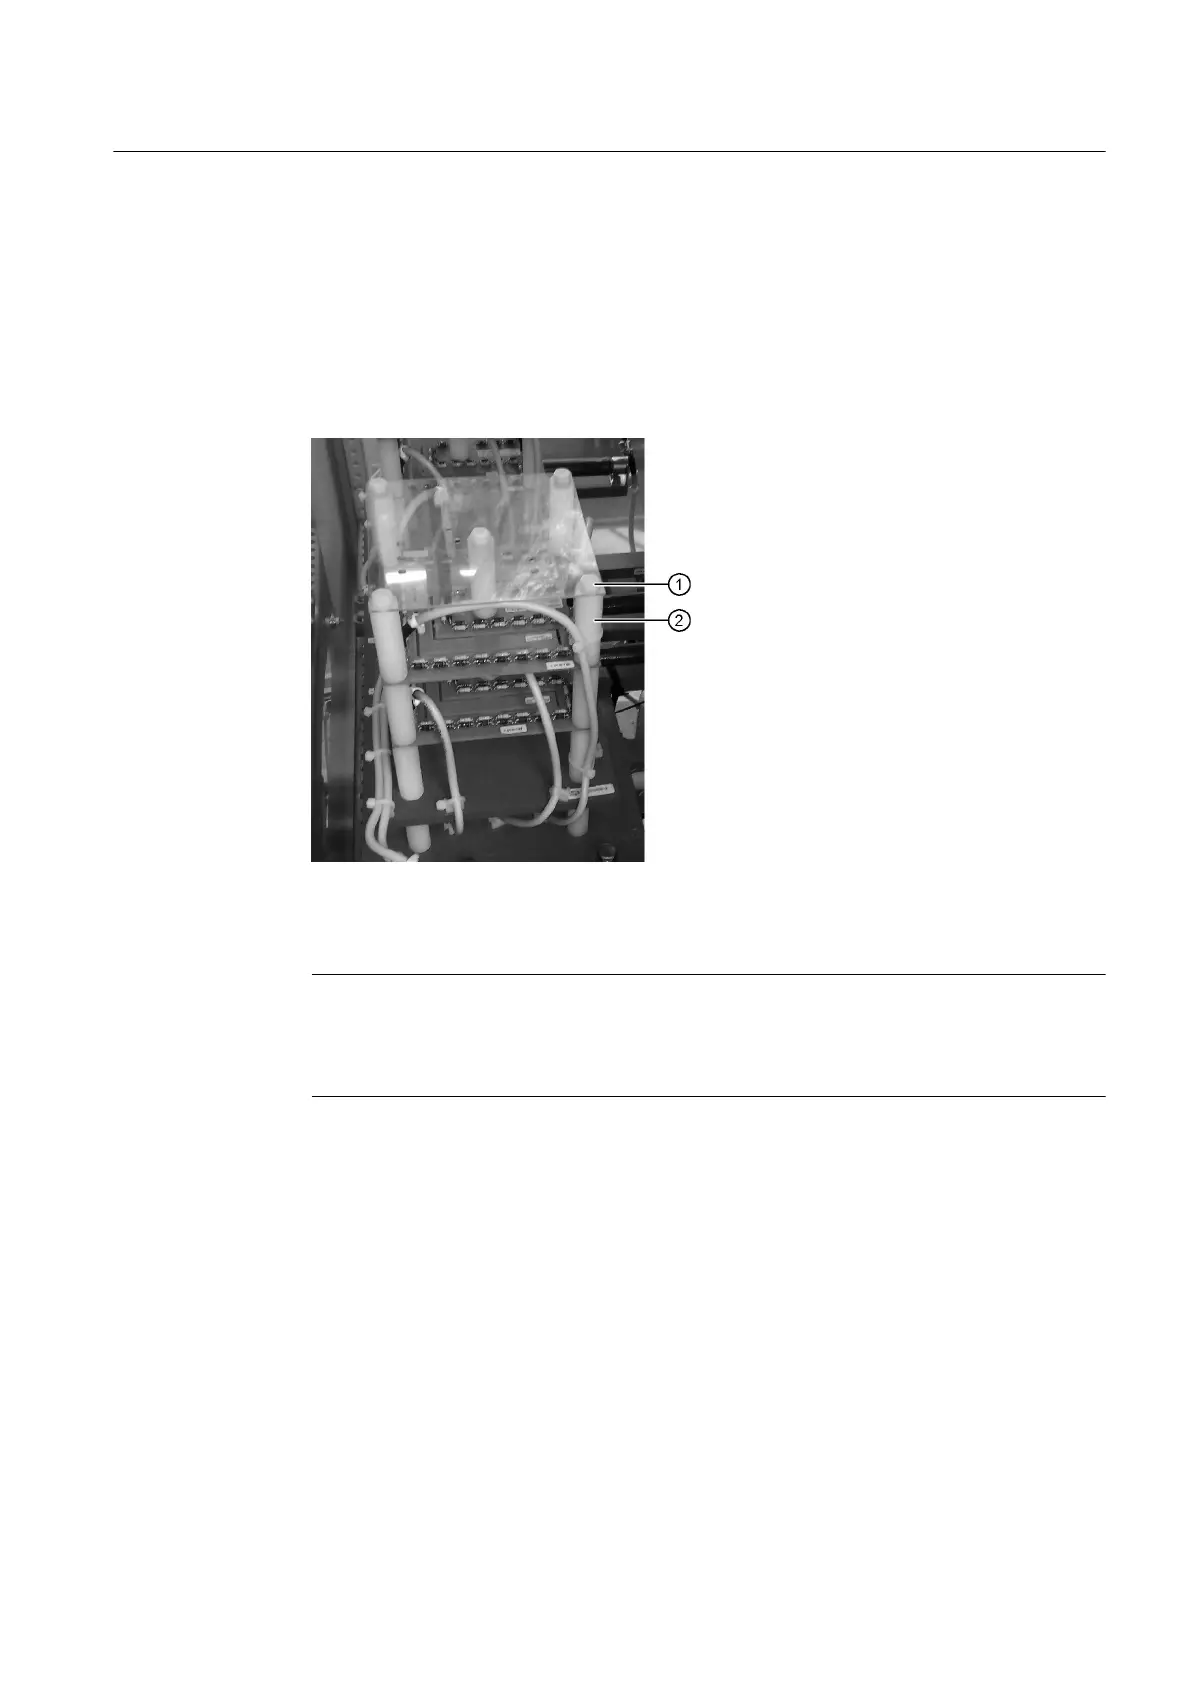
1. Loosen the five plastic screws ① on the cover.
Figure 9-6 Example diagram: Replacing the pre-charging rectifier
2. Remove the five cylindrical spacing bolts ②.
3. Remove all connecting leads. If necessary, remove the cable ties.
Note
Note the core markings
The cables are equipped with Faston connectors. Make a note of the core markings. When
installing the new module, note the core markings for the cables.
4. Remove the module.
Installing a module
Install the new module in the reverse order to when you removed it.
Maintenance
9.7 Repair
SINAMICS PERFECT HARMONY GH150 6SL38253AE412AA1-Z
Operating Instructions Rev.201910281231 EXAMPLE 121
 Loading...