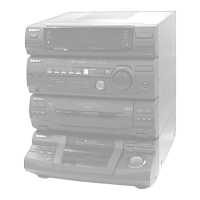
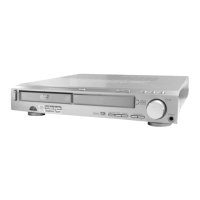
HCD-PZ1D
28
SECTION 3
TEST MODE
COLD RESET
The cold reset clears all data including preset data stored in the
RAM to initial conditions. Execute this mode when returning the
set to the customer.
Procedure:
1. Press the [
?/1
] button to turn on the system.
2. Press the [
x
] button, [DISC 3] button and [
?/1
] button simul-
taneously.
3. The message “COLD RESET” appears on the LCD module.
Then, the LCD module becomes blank for a while, and the
system is reset.
COMMON TEST MODE
This mode is used to check operations of the respective section of
Equalizer level, volume and VACS ON/OFF.
Procedure:
• To enter Common Test Mode
1. Press the [
?/1
] button to turn on the system.
2. Press the [
x
] button, [PRESET EQ] button and [DISC 1] si-
multaneously.
3. The message “VACS0” appears on the LCD module.
• Check of Equalizer Level
1. Press the [EQ BAND/MEMORY] button repeatedly until a
message “ALL EQ MIN” appears on the LCD module. GEQ
decreases to its minimum.
2. Press the [EQ BAND/MEMORY] button repeatedly until a
message “ALL EQ MAX” appears on the LCD module. GEQ
increases to its maximum.
3. Press the [EQ BAND/MEMORY] button repeatedly until a
message “ALL EQ FLAT” appears on the LCD module. GEQ
is set to fl at.
• Check of Volume
1. Press the [USB] button repeatedly, the sound volume increases
to its maximum and message “VOLUME16” t “VOLUME
MAX” appears on the LCD module.
2. Press the [OPTIONS] button repeatedly, the sound volume
decreases to its minimum and message “VOLUME16” t
“VOLUME MIN” appears on the LCD module.
• Check of VACS (Variable Attenuation Control System)
ON/OFF Select
1. Press the [REC TO USB] button repeatedly until a message
“VACS OFF” or “VACS ON” appears on the LCD module.
• To release from Common Test Mode
1. To release from this mode, press the [
?/1
] button.
2. To cold reset is enforced at the same time.
AMP TEST MODE
This mode is used to display the real time VACS level and check
operations of the respective sections of Equalizer band and DBFB
ON/OFF.
Procedure:
• To enter AMP Test Mode
1. Press the [
?/1
] button to turn on the system.
2. Press the [
x
] button, [GROOVE] button and [DISC 1] button
simultaneously.
3. The message “AMP TEST IN” appears on the LCD module.
• Check of VACS Display/AMP Adjustment Select
1. Press the [REC TO USB] button repeatedly until a message
“V0 0 0” appears on the LCD module. “0” represents VACS
level which is triggered by signal level.
2. Press the [REC TO USB] button repeatedly until a message
“D +6 +2 +4” appears on the LCD module. “+6” represents
Equalizer Low level, “+2” represents Equalizer Mid level and
“+4” represents Equalizer High level.
• Check of Equalizer Band Select
1. Press the [EQ BAND/MEMORY] button repeatedly until a
message “LOW +6 dB” appears on the LCD module. EQ Band
is set to Low level.
2. Press the [EQ BAND/MEMORY] button repeatedly until a
message “MID +2 dB” appears on the LCD module. EQ Band
is set to Middle level.
3. Press the [EQ BAND/MEMORY] button repeatedly until a
message “HIGH +4 dB” appears on the LCD module. EQ Band
is set to High level.
• Change of Equalizer Band
1. Press the [EQ BAND/MEMORY] button repeatedly until a
message “LOW +6 dB” appears on the LCD module.
2. When the [OPERATION DIAL] ring is turned clockwise or
counterclockwise even slightly, “LOW +6 dB” change to
“LOW –8 dB” y “LOW +8 dB” appears on the LCD mod-
ule.
3. Press the [EQ BAND/MEMORY] button repeatedly until a
message “MID +2 dB” appears on the LCD module.
4. When the [OPERATION DIAL] ring is turned clockwise or
counterclockwise even slightly, “MID +2 dB” change to “MID
–8 dB” y “MID +8 dB” appears on the LCD module.
5. Press the [EQ BAND/MEMORY] button repeatedly until a
message “HIGH +4 dB” appears on the LCD module.
6. When the [OPERATION DIAL] ring is turned clockwise or
counterclockwise even slightly, “HIGH +4 dB” change to
“HIGH –8 dB” y “HIGH +8 dB” appears on the LCD mod-
ule.
• Check of DBFB ON/OFF Select
1. Press the [OPTIONS] button repeatedly until a message
“DBFB OFF” or “DBFB ON” appears on the LCD module.
• To release from AMP Test Mode
1. To release from this mode, press the [
?/1
] button.

 Loading...