™
Page 10 of 81
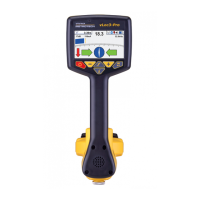
3 vLoc3-Pro Receiver
Note also that certain frequency options have an A-frame icon next to them. This indicates that these frequencies are selected to
be used with the fault nd A-frame.
3.4.6 Classic Locate
This option is only shown if the User menu is entered from the Classic Screen.
Use the enter key to reveal the list of options relating to the Classic Locate modes. Options are:
Classic Locate
Peak
Peak Arrows
Null
Broad
Delta Null
Omni Directional Peak
Omni Directional Peak
3.4.7 Locate Perspective
Enter this option to be able to select in what graphical format the data is displayed. These displays are described further in the
manual. The options are:
Locate Perspective
Classic Locate
Vector locate
Transverse graph
Plan view
Sonde
3.4.8 Language
The unit may be supplied with dierent language options. Use the enter key to select the language of choice.
3.4.9 Imp/Metric
Select either Imperial or Metric measurements.
3.4.10 Continuous Info
The front Locate Screen can display a continuous reading of either depth, current, both or can be switched o. Use the enter
button to select your preference.
3.4.11 Auto Power O
The unit can be set to switch o after a set time. Options are: 5-minutes, 10-minutes, or Never. Note that when the A-frame is
connected the timer is set to “Never”.
3.4.12 Warnings
Warnings relating to: - Shallow cable, Overload, Overhead cable and Signal Overload. Scroll down to the relevant warning and
use the return button to select or de-select.
3.4.13 Bluetooth Pairing (Optional Feature)
Press the enter button to enter the Bluetooth pairing routine. This allows the unit to link with external devices such as
dataloggers and GPS devices that have Bluetooth capability.
 Loading...