October 2012
4-7
ColorQube 8570/8870 Service Manual
REP 1.6, REP 1.7
Repairs and Adjustments
Xerox Internal Use Only - Revised, 3rd Revision
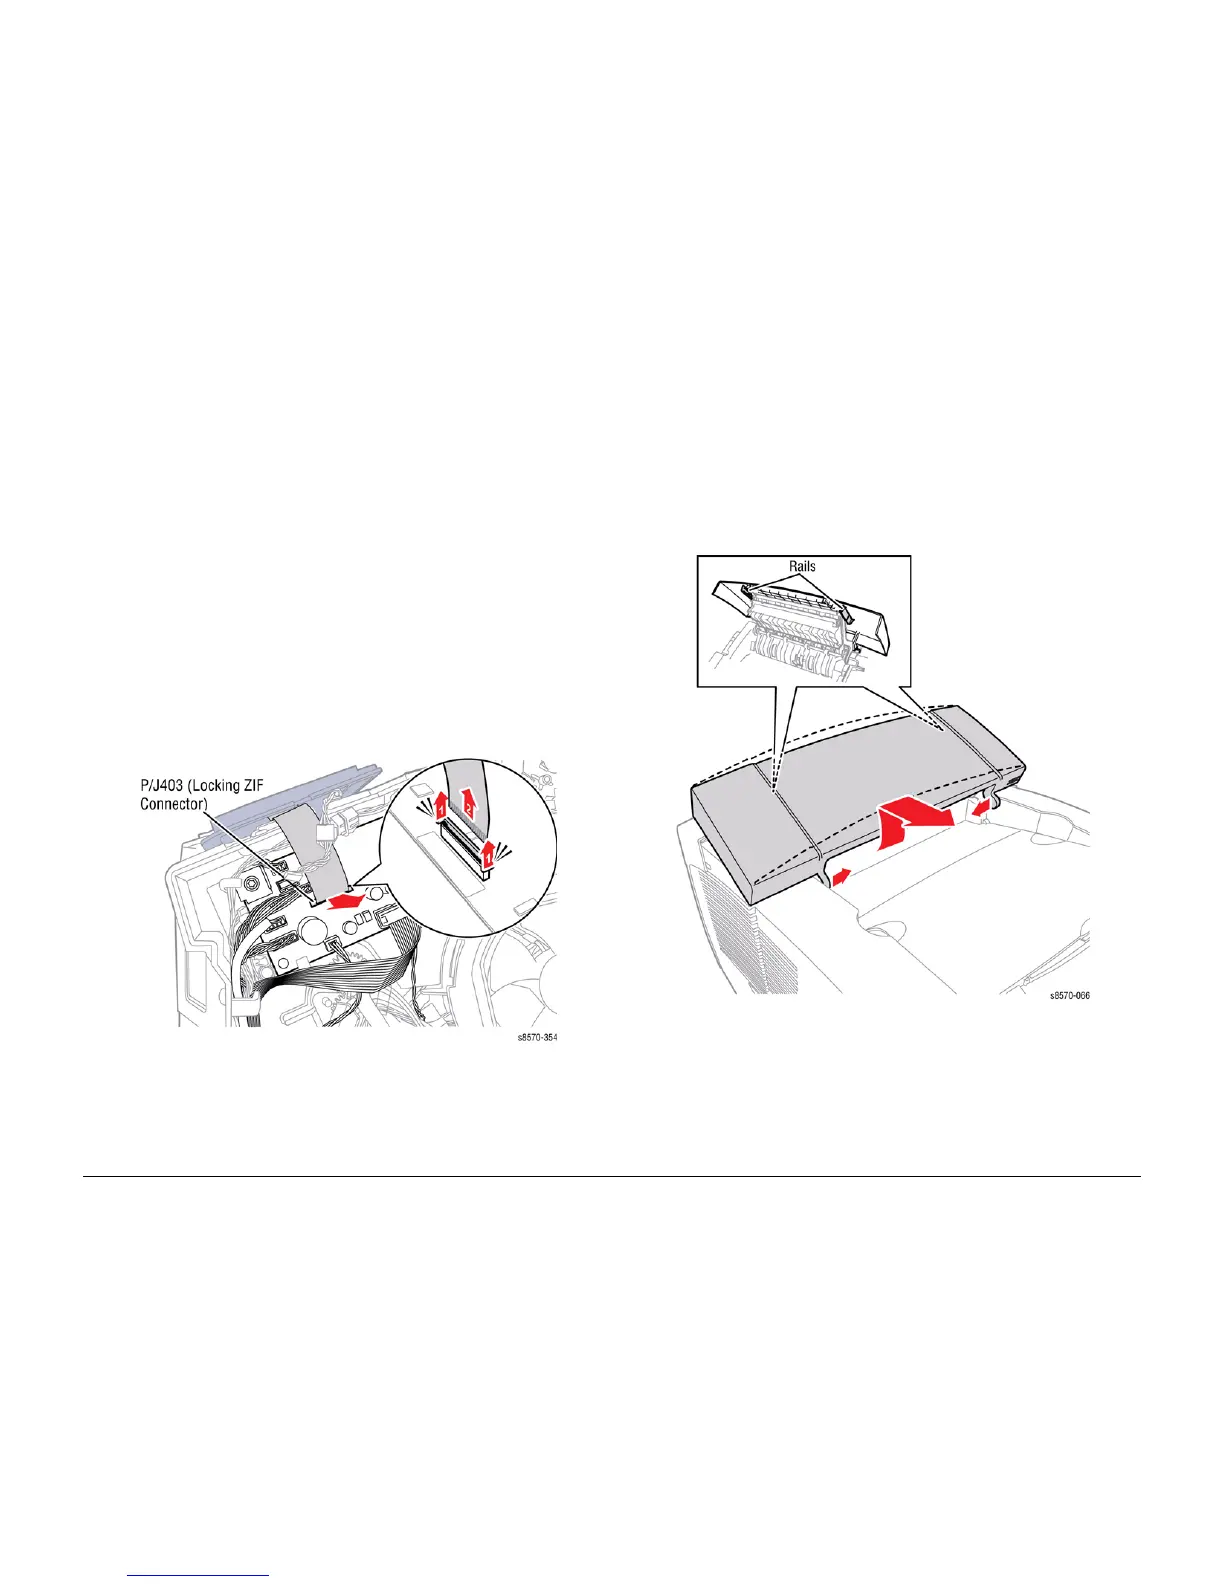
REP 1.6 Control Panel
Parts List on PL 1.1 Item 6
Removal
1. Remove the Control Panel Cover (REP 1.5).
2. Remove the Right Side Cover (REP 1.11).
CAUTION
Failure to take care when disconnecting or reconnecting the ZIF cable may result in erratic
operation such as intermittent backlight and garbled or missing text.
CAUTION
Do not disconnect the ZIF cable and remove the Control Panel unless necessary, as the Con-
trol Panel connector is fragile and can be easily damaged, even when correctly following the
replacement procedures.
CAUTION
Be sure to unlock the ZIF connector to release the ribbon cable. Be careful when disconnecting
the ribbon cable to prevent damaging the cable. DO NOT pull on the cable until you have
released the locks.
NOTE: The ribbon cable connector is the locking type connector and requires unlocking prior
to removal and locking after reinstallation of the cable in order to make proper connection.
3. Disconnect the wiring harness connector P/J403 from the I/O Board.
4. Lift and remove the Control Panel.
Figure 1 Removing the Control Panel
Replacement
CAUTION
Be sure to lock the ZIF connector after connecting the ribbon cable to the I/O Board.
REP 1.7 Exit Cover
Parts List on PL 1.1 Item 7
Removal
1. Lift the Exit Cover from the chassis.
2. Release the Upper Duplex Guide from the Exit Cover.
3. Release the rails from the Exit Cover.
4. Flex the Exit Cover to release the left and right notches on the Cover from the printer and
lift the Cover toward the rear of the printer
5. Slide the Exit Cover out from the Exit Module.
Figure 1 Removing the Exit Cover
Replacement
Lift the Upper Exit Guide slightly, and engage the pins on the Upper Exit Guide with the slots on
the Exit Cover before inserting the cover hinge pins into the pivot points in the printer frame.
 Loading...