October 2012
4-72
ColorQube 8570/8870 Service Manual
REP 4.5
Revised, 3rd Revision - Xerox Internal Use Only
Repairs and Adjustments
REP 4.5 Media Drive Assembly
Parts List on PL 4.1 Item 5
Removal
NOTE: DO NOT remove the Tray 1 Pick Solenoid screw. A new Solenoid is included with the
new Media Drive Assembly. No screw loosening is required.
1. Remove the Control Panel Cover (REP 1.5).
2. Remove the Left Side Cover (REP 1.10).
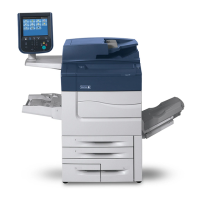
3. Disconnect the Media Drive Assembly wiring harness connectors from the Left Side Har-
nesses:
• Media Path Motor ( P/J106)
• Deskew Clutch ( P/J111)
• Tray 2 Pick Clutch ( P/J109)
• Tray 1 Pick Solenoid ( P/J110)
• Preheater Lift Solenoid ( P/J112)
4. Remove 1 screw (metal, T-20) that secures the braided ground wire to the Media Drive
Motor mounting plate.
Figure 1 Removing the Screw
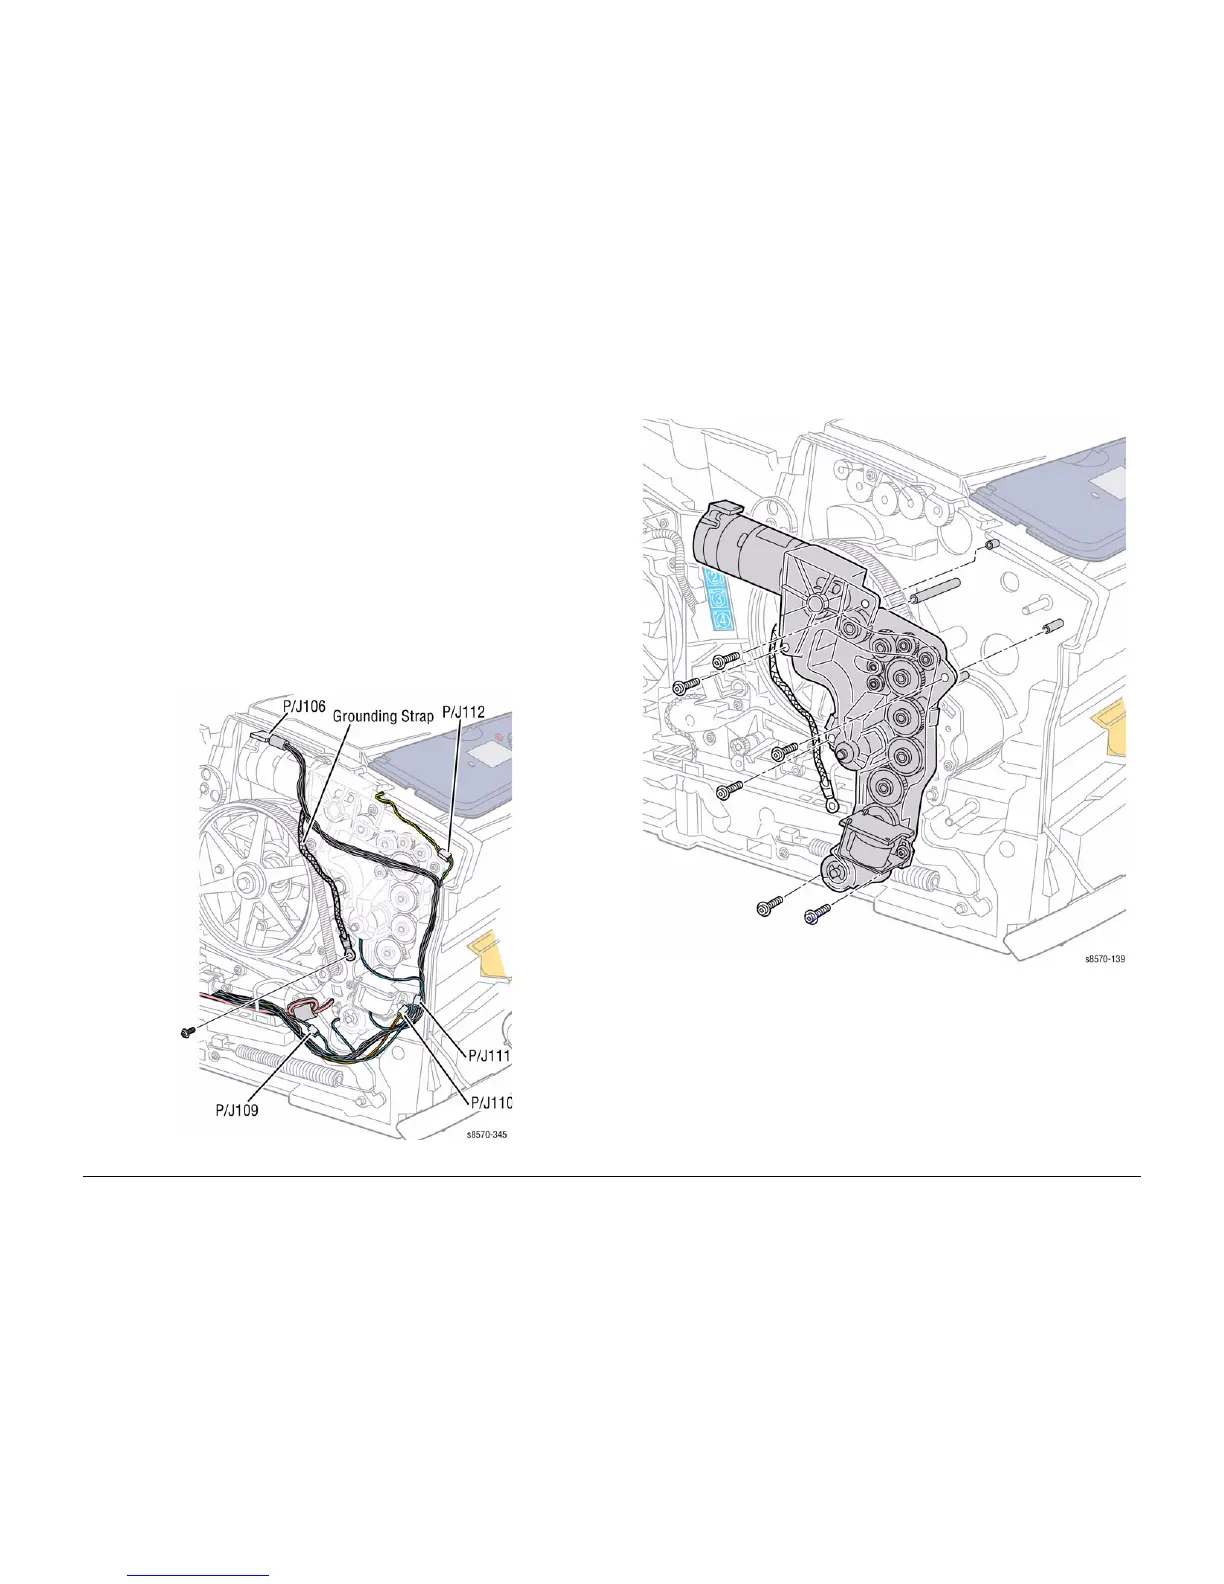
5. Remove 6 screws (plastic, T-20) that secure the Media Drive Assembly to the frame.
6. Remove the Media Drive Assembly.
Figure 2 Removing the Media Drive Assembly
 Loading...