October 2012
4-71
ColorQube 8570/8870 Service Manual
REP 4.4
Repairs and Adjustments
Xerox Internal Use Only - Revised, 3rd Revision
Replacement
CAUTION
When replacing the Head Tilt Solenoid screw, torque to no more than 12 in.-lbs. Overtightening
this fastener can result in irreversible damage to the chassis.
CAUTION
To ensure proper operation of the Printhead following reassembly, perform these steps in the
order given.
1. Insert the plastic end of Head Tilt Solenoid into the frame, swing to the right and replace
the screw.
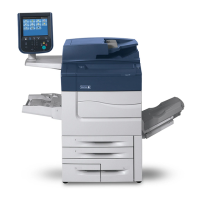
2. With the Printhead centered on the Drum, use a screwdriver to turn the lower screw of the
Process Drive clockwise until you hear the Head Tilt Solenoid snap into place (see Figure
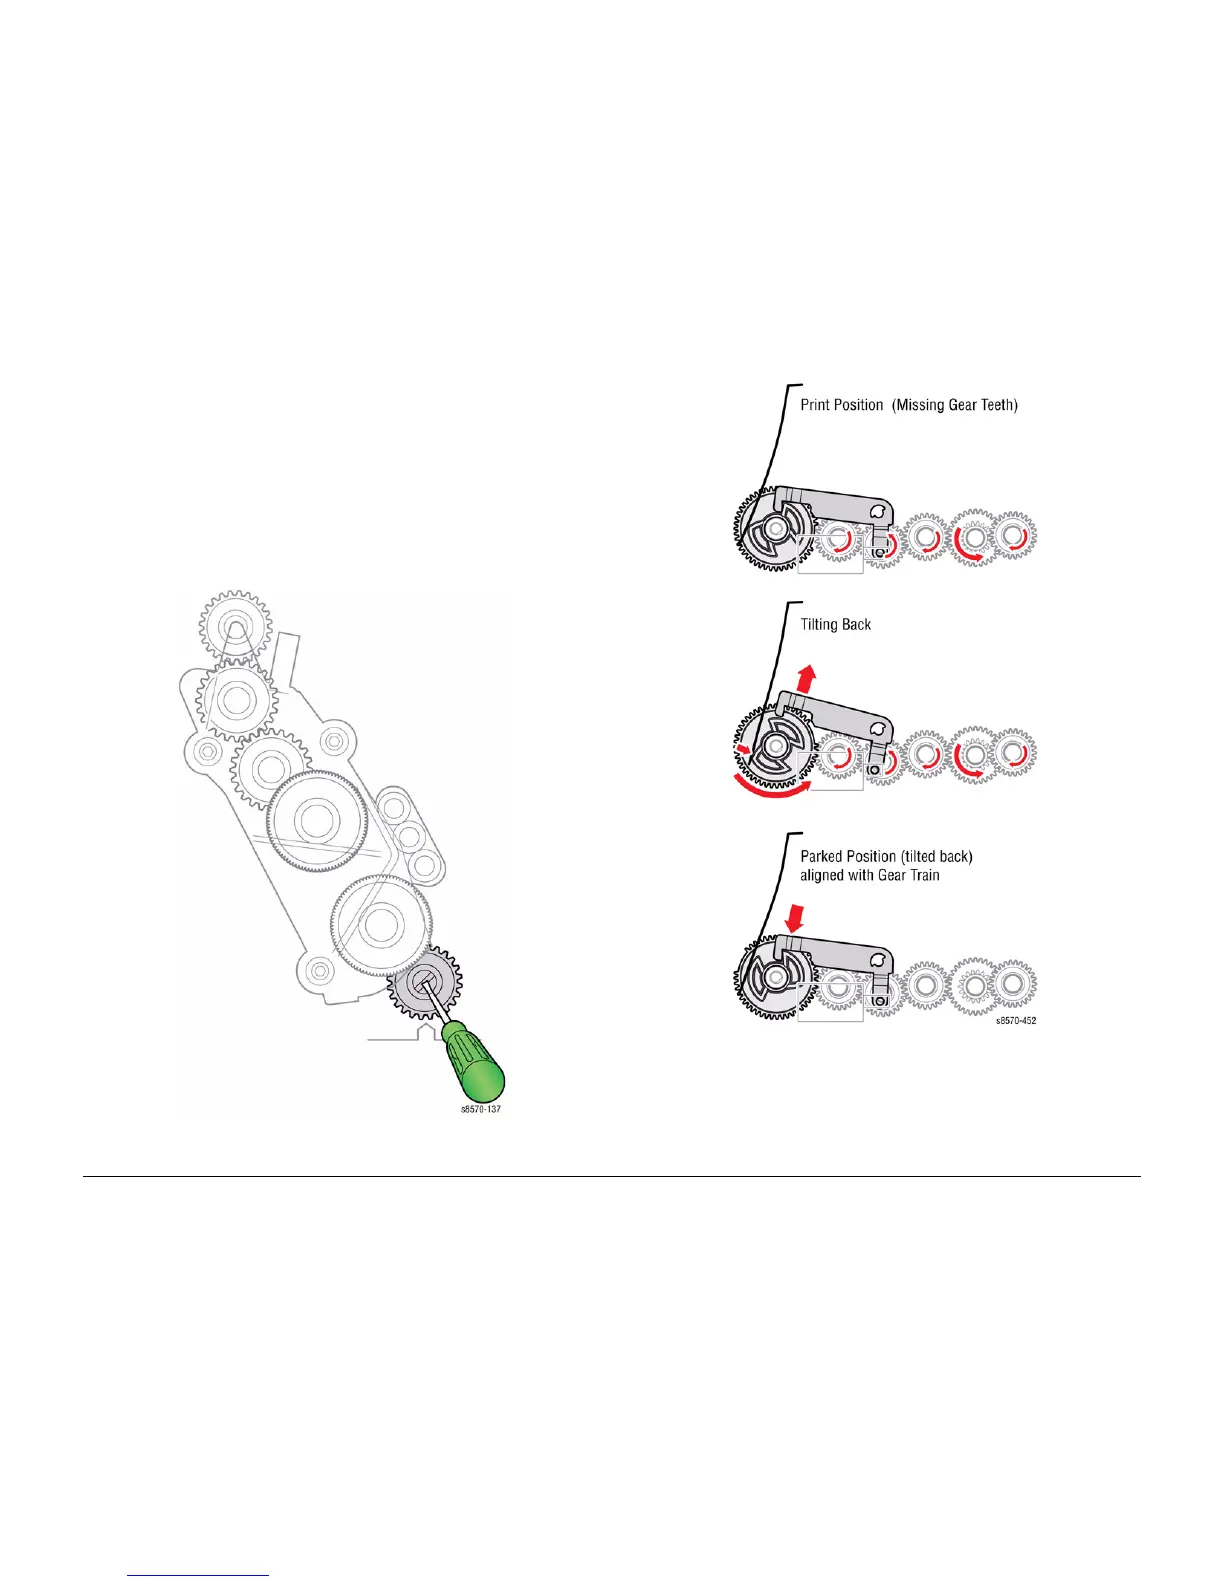
4 for Head Tilt Latch position).
Figure 3 Engaging the Head Tilt Solenoid
Figure 4 Head Tilt Latch Position
 Loading...