October 2012
4-50
ColorQube 8570/8870 Service Manual
REP 2.21
Revised, 3rd Revision - Xerox Internal Use Only
Repairs and Adjustments
REP 2.21 Transfix Arm Kit (with Pins)
Parts List on PL 2.1 Item 21
Removal
1. Open the Front Door and release the 2 Stopper Straps.
Figure 1 Lowering the Front Door
2. Remove the Control Panel Cover (REP 1.5).
3. Remove the Right Side Cover (REP 1.11).
4. Remove the Control Panel (REP 1.6).
5. Remove the Left Side Cover (REP 1.10).
6. Remove the Exit Cover (REP 1.7).
7. Remove the Ink Loader (REP 1.8).
8. Remove the Lower Inner Duplex Guide (REP 3.2).
9. Remove the Outer Duplex Guide (REP 3.4).
10. Remove the Upper Duplex Guide and Solenoid (REP 3.5).
11. Remove the Exit Module (REP 3.13).
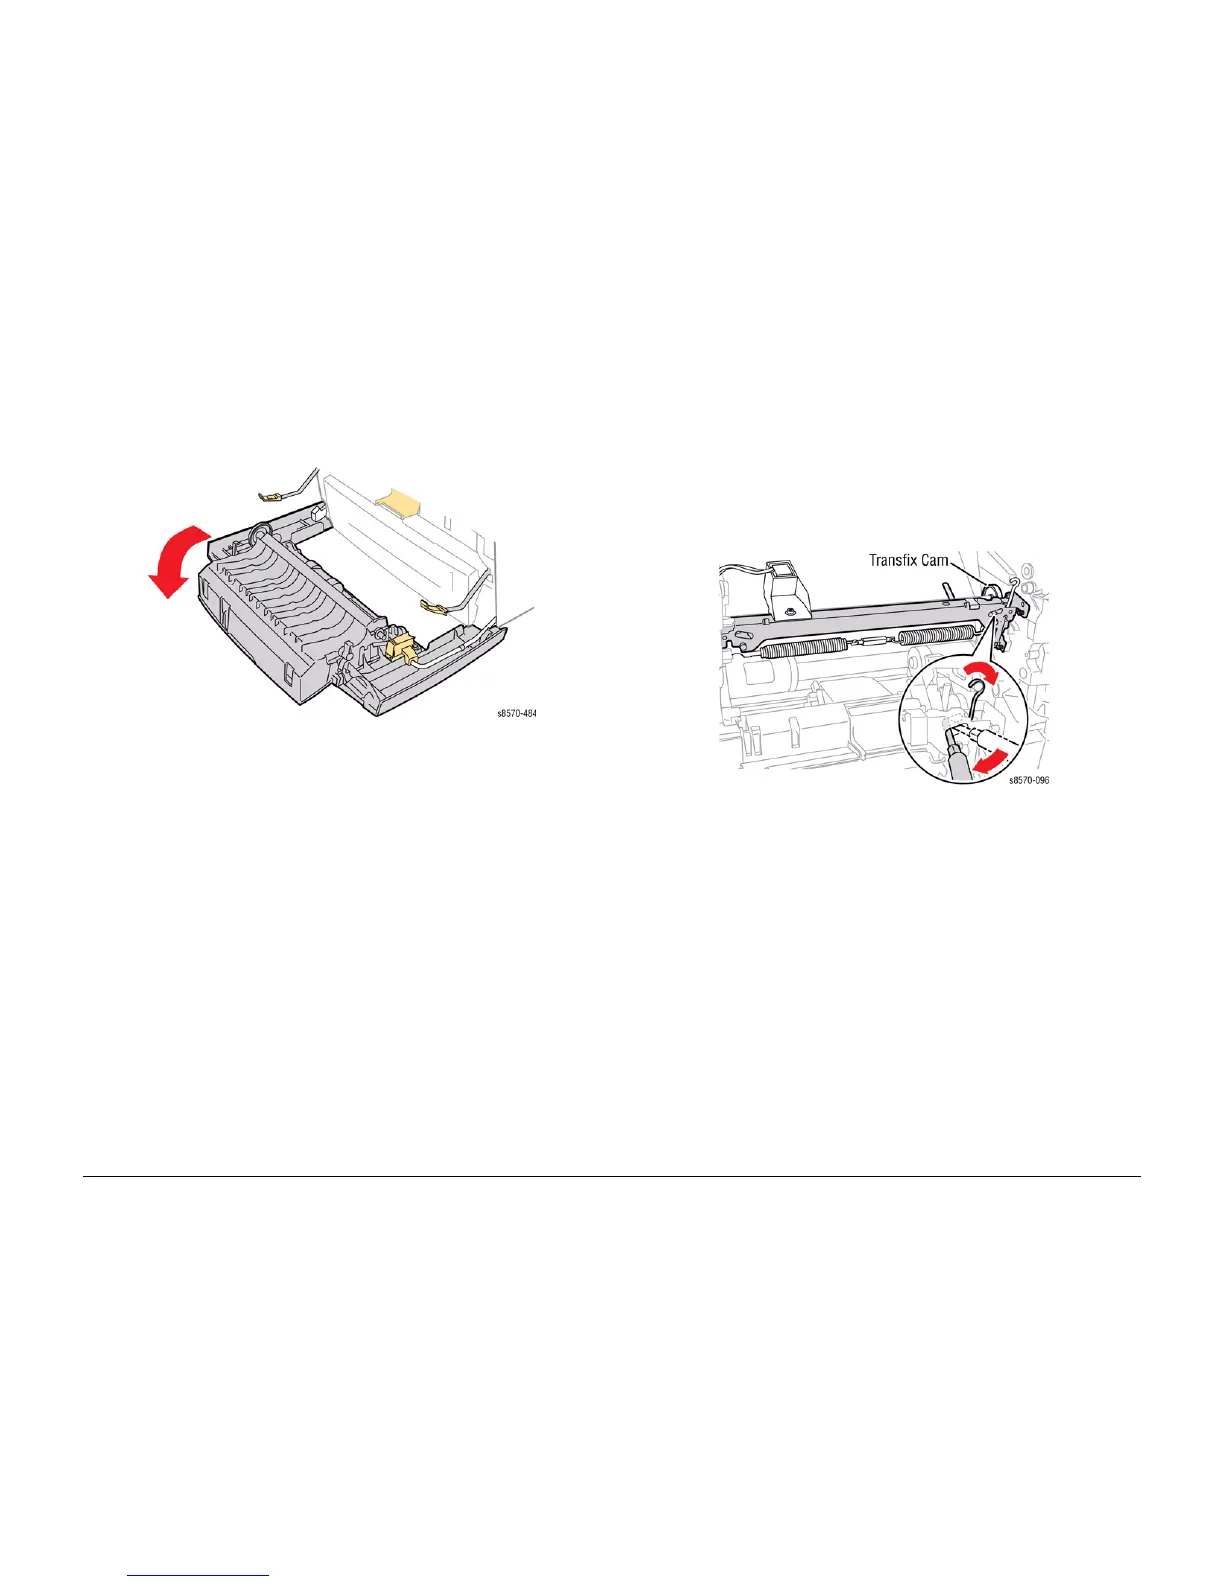
CAUTION
Use care when releasing the Transfix Module Spring Hooks. Move the lever handle towards
the center of the printer as indicated in Figure 2.
CAUTION
Be careful not to pry against the Transfix Cam as shown in Figure 2 to prevent damaging the
Cam.
12. Insert a T-20 or T-15 Torx bit through the right side slotted hole in the Transfix Load Mod-
ule. Engage the hole at the back of the module, and lever the module’s spring cam
towards the center of the printer while disconnecting the spring hooks from the Transfix
Load Arms. Repeat this process for the left side.
Figure 2 Detaching the Transfix Load Module Spring Hooks
 Loading...