October 2012
4-45
ColorQube 8570/8870 Service Manual
REP 2.17
Repairs and Adjustments
Xerox Internal Use Only - Revised, 3rd Revision
REP 2.17 Drum Maintenance Pivot Plate/ Drum Wiper
Blade Assembly
Parts List on PL 2.1 Item 17, PL 2.1 Item 18
Removal
1. Remove the Front Door (REP 1.1).
2. Remove the Control Panel Cover (REP 1.5).
3. Remove the Right Side Cover (REP 1.11).
4. Remove the Lower Inner Duplex Guide (REP 3.2).
5. Remove the Inner Simplex Guide and Pre-Deskew Sensor (REP 3.1).
6. Remove the Preheater and Deskew Assembly (REP 2.20).
NOTE: Be sure to place a sheet of paper through the front of the printer between the
Drum Assembly and the Pivot Plate Assembly to prevent damaging the Drum while
removing the Pivot Plate Assembly
7. Remove the Drum Maintenance Unit (REP 1.16).
8. Remove the Drum Cooling Fan (REP 4.12).
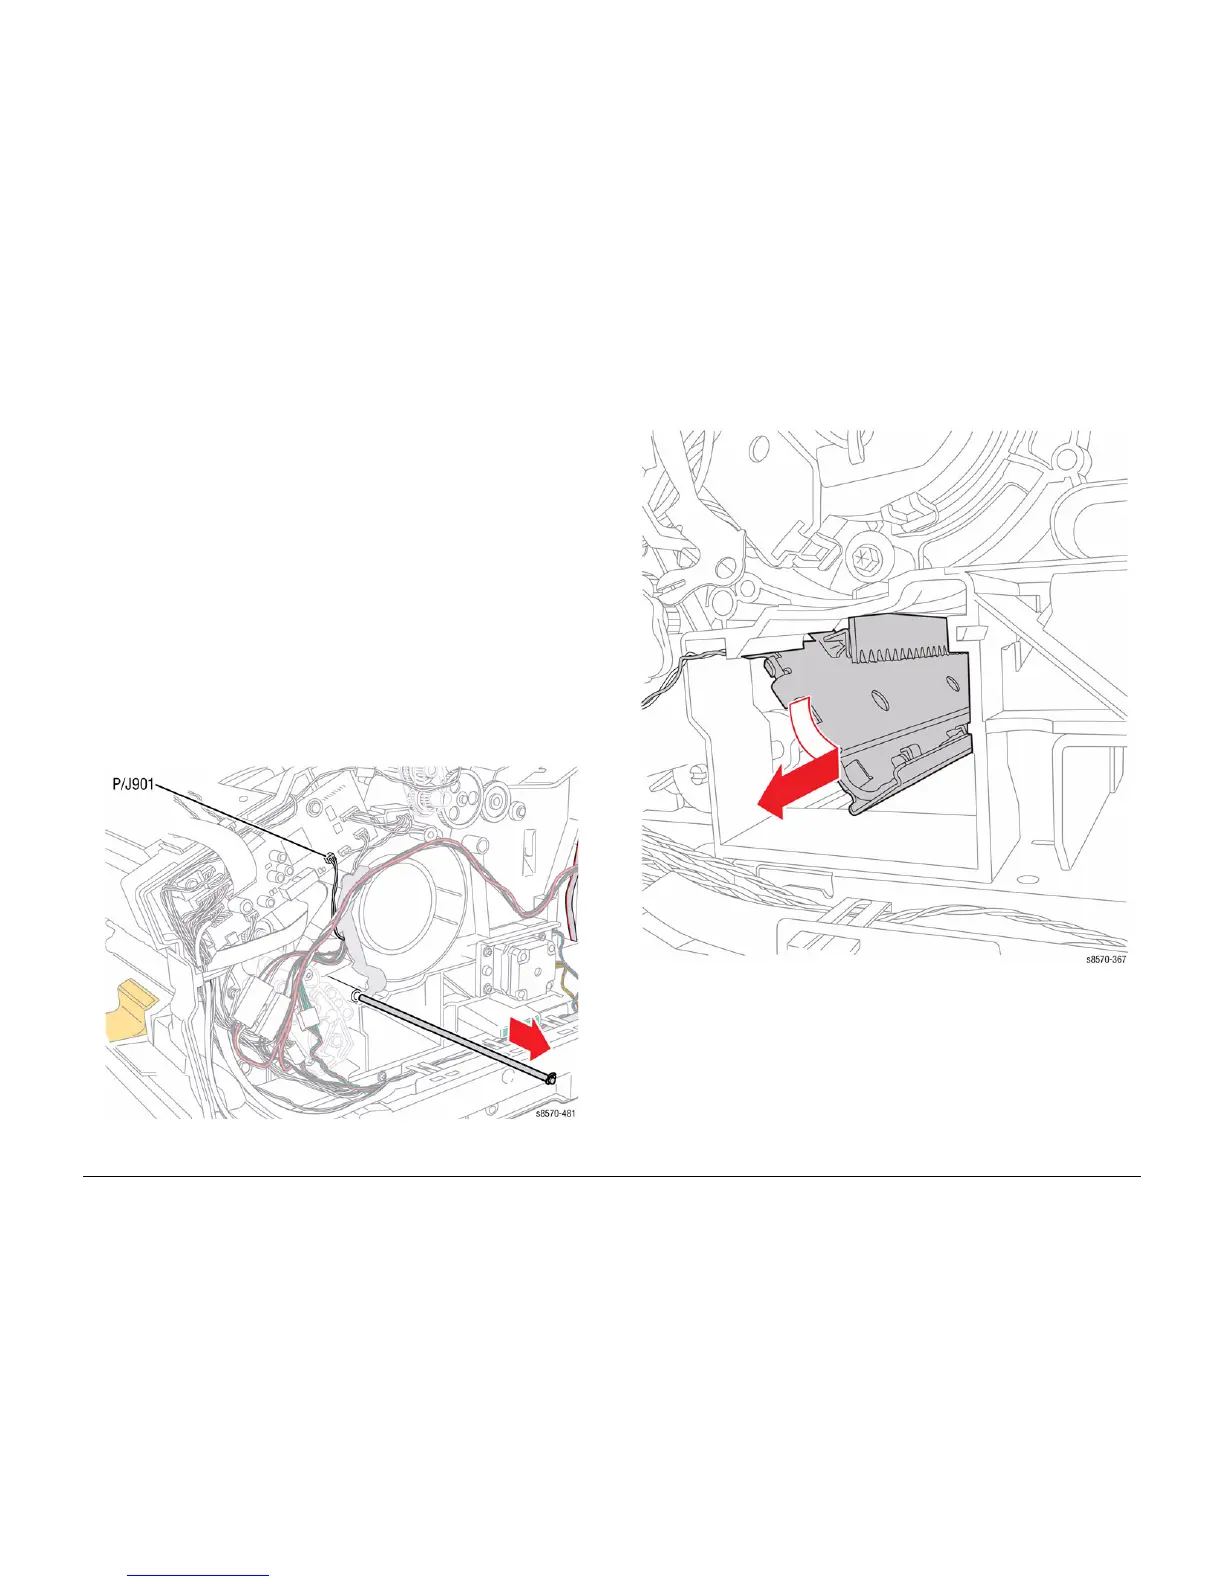
9. Push the Ground Plate out of the way to get access to the Shaft.
10. Disconnect the wiring harness connector P/J901 from the I/O Board.
NOTE: For the following step, be sure to keep the C-Clip attach to the shaft.
11. Pull the shaft out from the chassis,
Figure 1 Removing the Shaft
12. Feed the wiring harness through the hole in the chassis near the front of the Drum
Assembly while sliding the Plate downward and out from the Drum Maintenance drawer
cavity.
Figure 2 Removing the Drum Maintenance Pivot Plate
 Loading...