October 2012
4-5
ColorQube 8570/8870 Service Manual
REP 1.1
Repairs and Adjustments
Xerox Internal Use Only - Revised, 3rd Revision
REP 1.1 Front Door/ Tray 1 (MPT) Assembly
Parts List on PL 1.1 Item 1
Removal
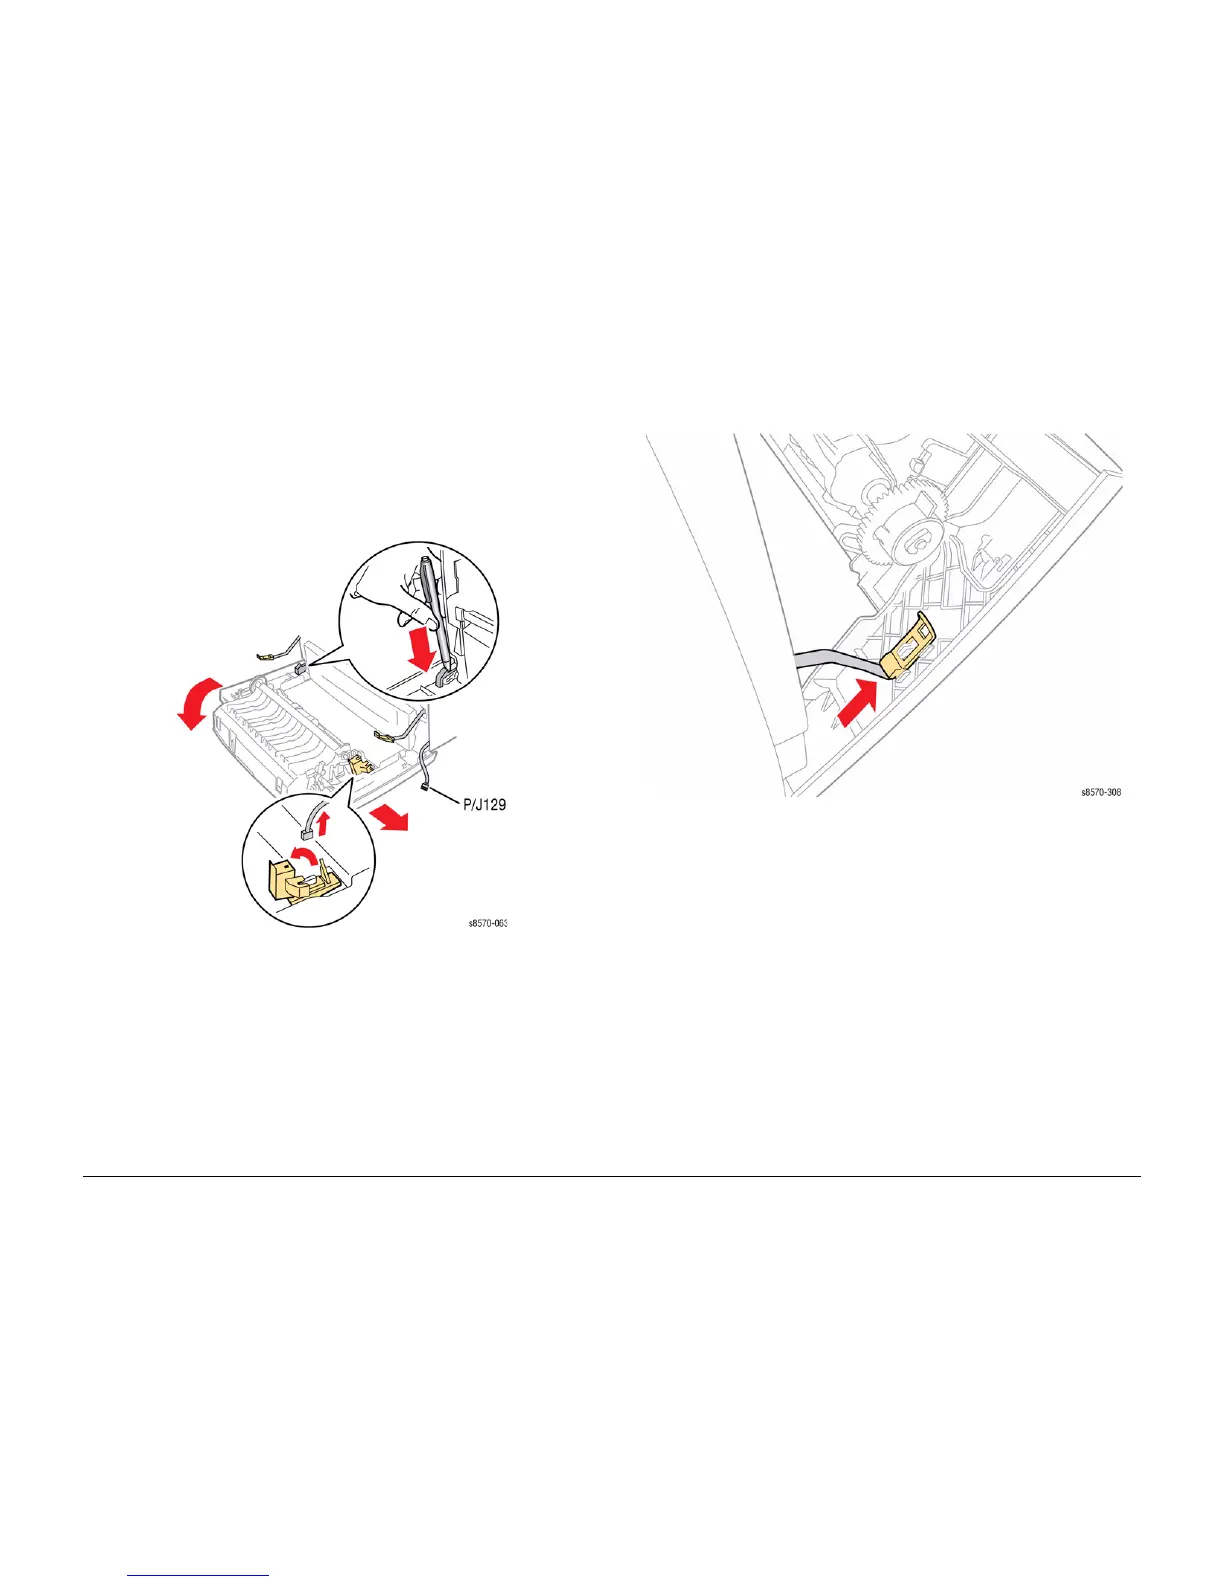
1. Open the Front Door and release the 2 Stopper Straps.
2. Open the plug cover and disconnect P/J129 from the right side of the Front Door.
3. Release the wiring from cable retainers.
4. While releasing the left hinge pin from the frame, slide the Door to the right side to remove
the Front Door (Tray 1).
Figure 1 Releasing the Stopper Straps and Removing the Front Door
Replacement
Be sure to push the Retainer upward and toward the front to lock it in place.
Figure 2 Installing the Retainer
 Loading...