October 2012
4-92
ColorQube 8570/8870 Service Manual
REP 5.6
Revised, 3rd Revision - Xerox Internal Use Only
Repairs and Adjustments
Power Supply Board
Removal
WARNING
Be sure to disconnect AC power prior to disassemble the Electronics Module.
1. Remove the Power Control Board.
CAUTION
The Power Supply is heavy. Handle the Power Supply with care.
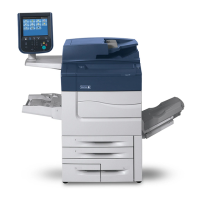
2. Remove 7 screws (metal, T9) that secure the Power Supply Board to the frame.
3. Lift and remove the Power Supply Board from the frame.
Figure 10 Removing the Screws and Power Supply Board
Main Controller Board
Removal
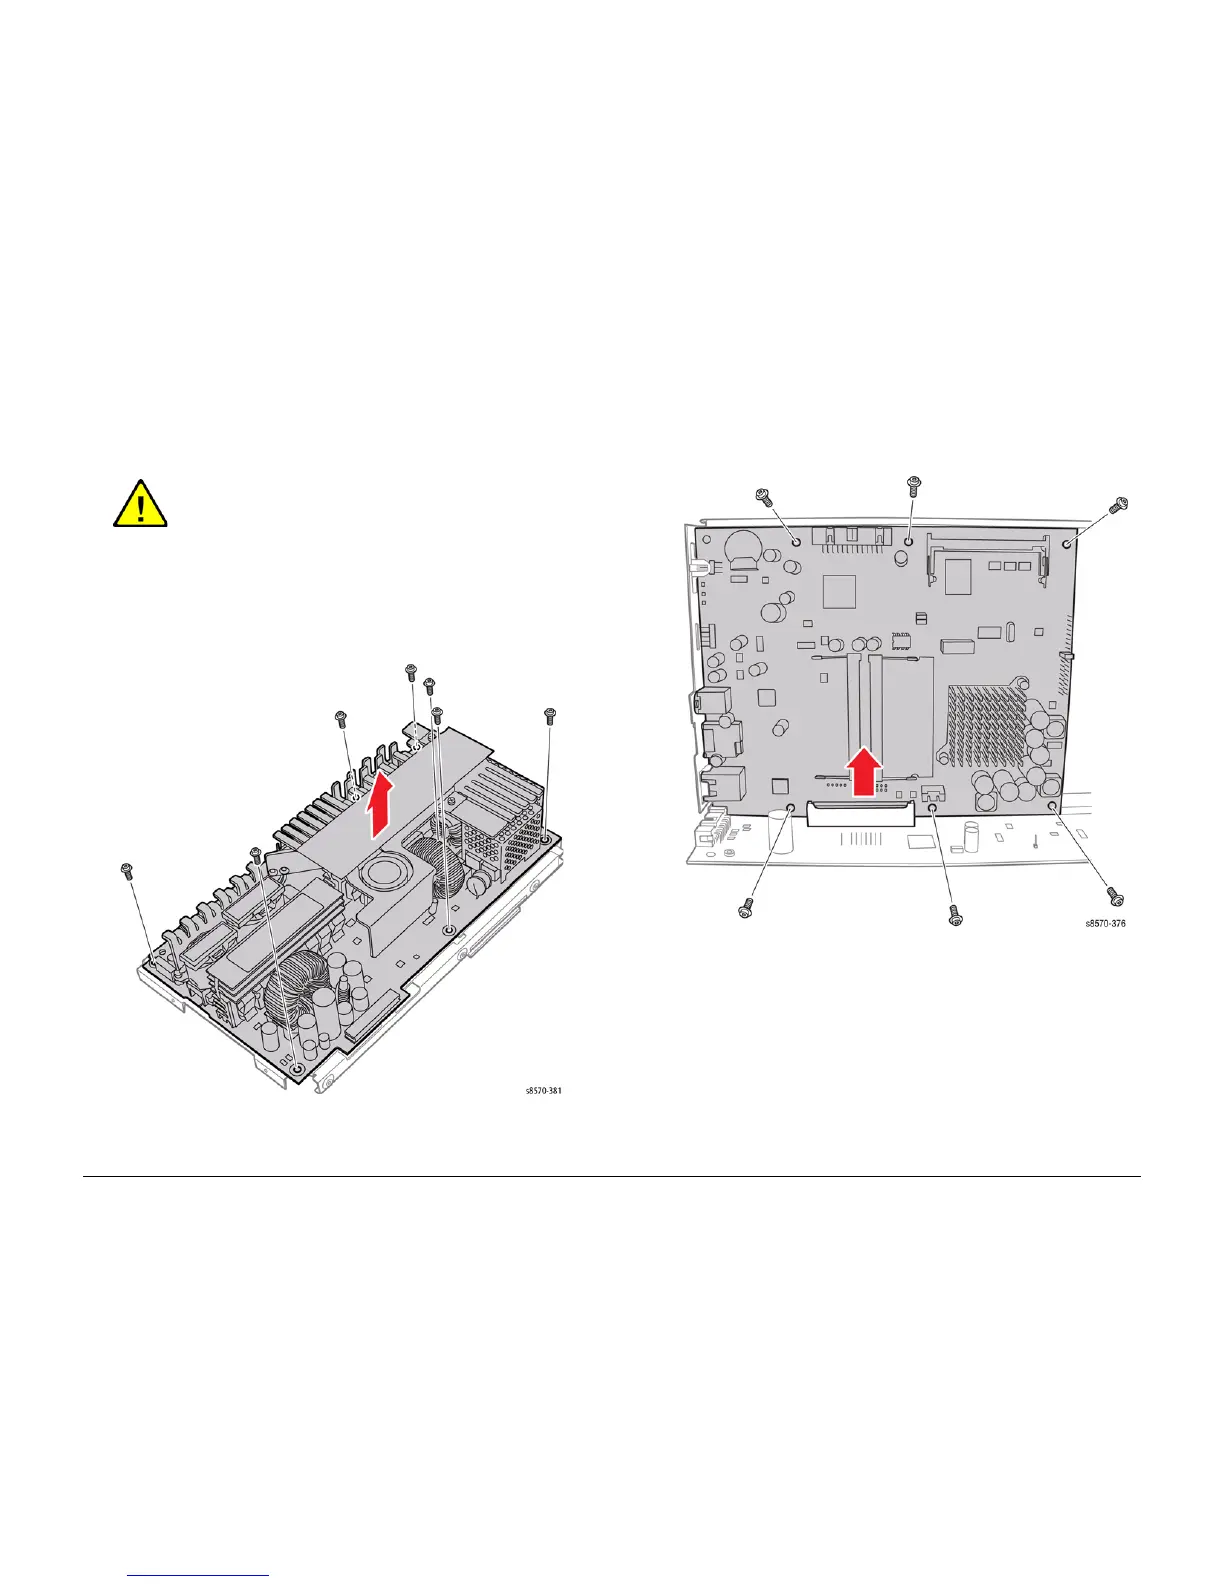
1. Remove 6 screws (metal, T-20) that secure the Main Controller Board to the metal frame.
2. Lift the Main Controller Board and disconnect the connector from the Power Control
Board.
Figure 11 Removing the Screws and Main Controller Board
CAUTION
Up to 400V DC may be stored in the Power Supply Capacitors. Wait 10
minutes after disconnecting AC power before touching any Power Supply
Heatsinks or handling the Power Supply PWB.
 Loading...