October 2012
4-95
ColorQube 8570/8870 Service Manual
REP 5.9
Repairs and Adjustments
Xerox Internal Use Only - Revised, 3rd Revision
Replacement
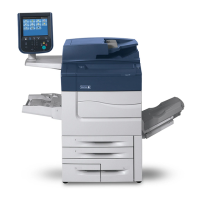
Route the cables through the slots provided. Position the T-shaped strain relief near the Wave
Amplifier following installation.
Be sure to align the pins in the rear of the Wave Amp Board.
Lay the Wave Amp on top of the flat surface on the rear of the printer to connect the wiring har-
ness connector as shown in Figure 5.
Figure 5 Positioning the Wave Amp
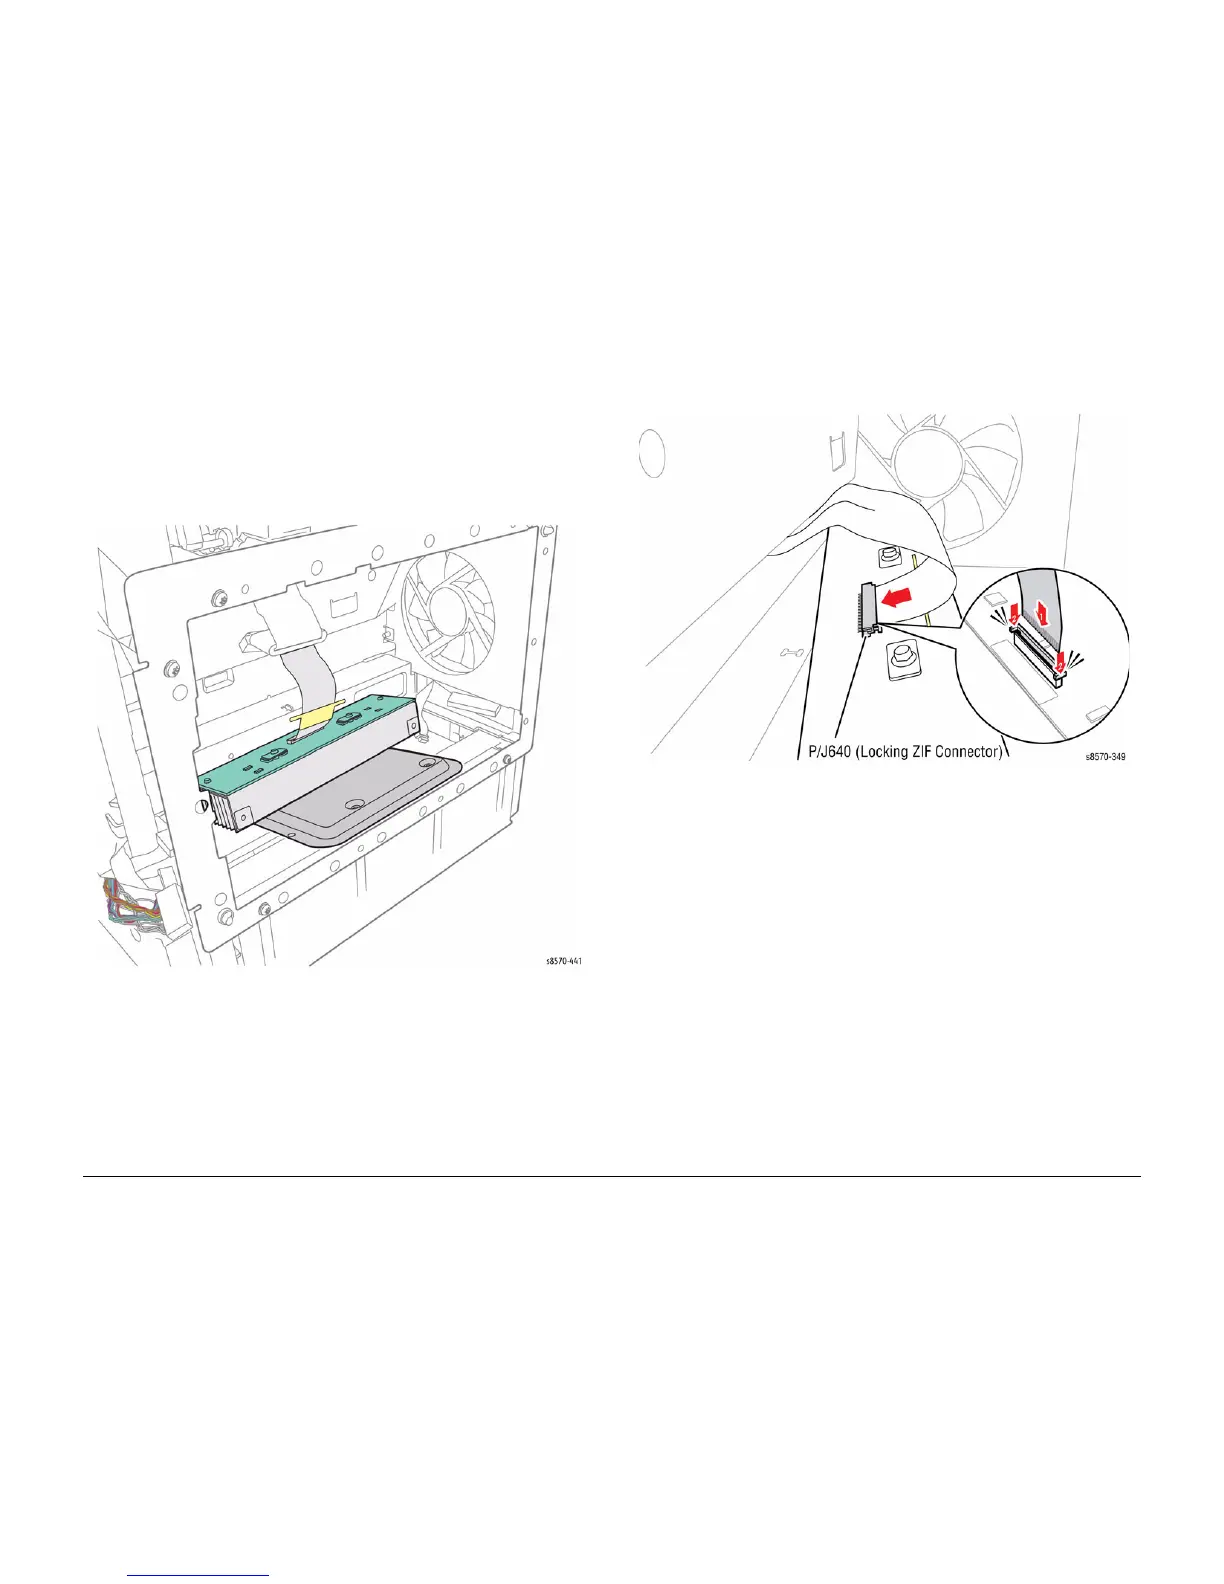
Be sure to secure the wiring harness connector P/J640 and lock the ribbon cable in place.
Figure 6 Securing the ZIF Connector
Perform the Homing the Printhead Forward to Print Position procedure (ADJ 1.2) and Process
Drive Alignment procedure (ADJ 1.3) before restoring the printer power.
 Loading...