10 Drive Start-Up
YASKAWA TOEPC71061723A YASKAWA AC Drive CR700 Quick Start Guide 51
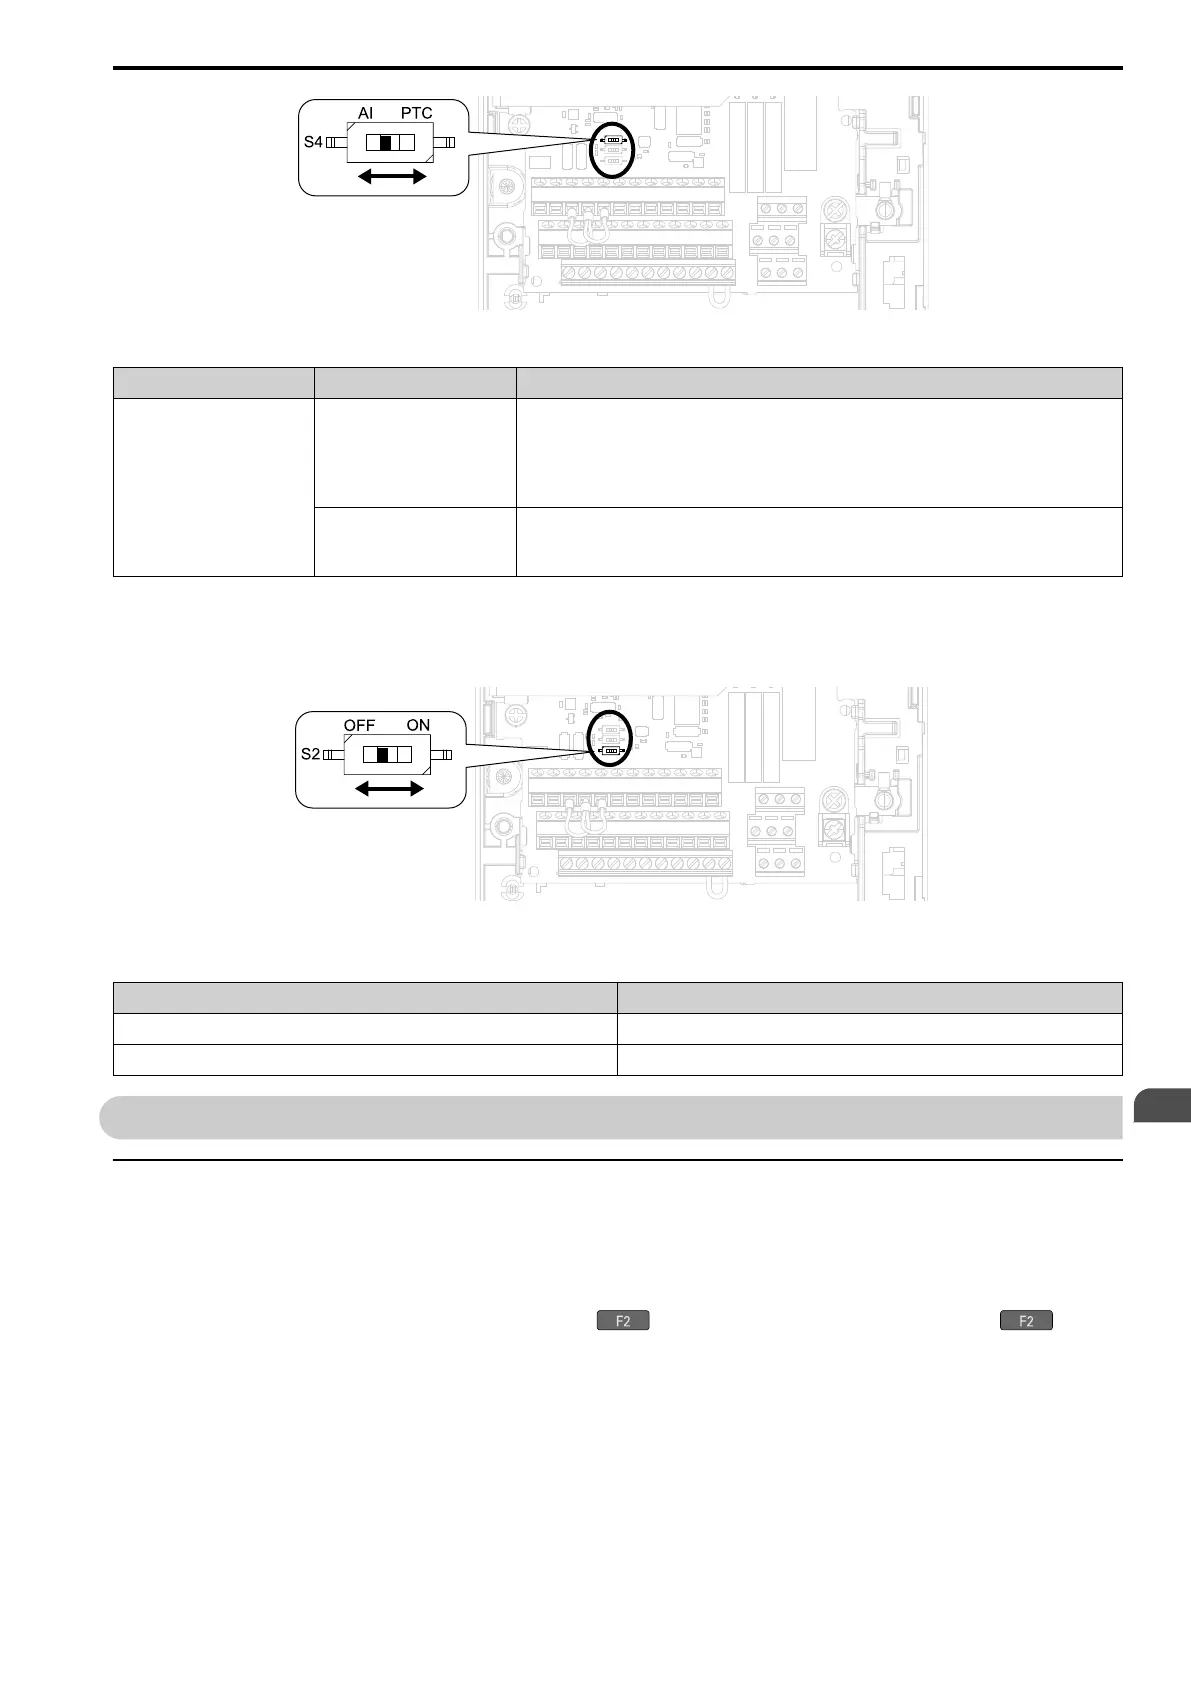
Figure 9.30 Location of DIP Switch S4
Terminal Settings for DIP Switches Description
A3
AI
(Default)
Functions as multi-function analog input terminal.
Select the function with H3-06 [Terminal A3 Function Selection].
Select the signal level with H3-05 [Terminal A3 Signal Level Select].
• 0: 0 V to 10 V/100% (input impedance: 20 kΩ)
• 1: -10 V to +10 V/-100% to +100% (input impedance: 20 kΩ)
PTC
Functions as PTC input terminal.
Set H3-06 = E [Motor Temperature (PTC input)].
Set H3-05 = 0 [0 to 10 V].
■ Switch ON Termination Resistor for MEMOBUS/Modbus Communications
Set DIP switch S2 to the ON position when the drive is the last slave in a MEMOBUS/Modbus communications.
This drive is equipped with a built-in termination resistor for the RS-485 interface.
Figure 9.31 Location of DIP Switch S2
Table 9.12 MEMOBUS/Modbus Communications Termination Resistor Setting
DIP Switch S2 Description
ON The built-in termination resistor is switched ON.
OFF (default) The built-in termination resistor is switched OFF.
10 Drive Start-Up
◆ Setup Wizard
The drive is prepared to run the operation. Use the motor data for Auto-Tuning and test runs.
1. Energize the drive to show the initial setup screen.
Note:
If the keypad does not show the Initial Setup screen, push [Menu] to show the Menu screen then push to
select [Initial Setup].
2. Select [Set Date/Time] to set the date and time.
Note:
Open the clock battery cover to put in a battery to use the clock functions. Use a Hitachi Maxell “CR2016 Lithium Manganese
Dioxide Lithium Battery” or an equivalent battery with these properties:
• Voltage: 3 V
• Operating temperature range: -20°C to +85°C (-4°F to +185°F)
3. Use A1-06 [Application Preset] and A1-02 [Control Method Selection] to do Auto-Tuning if necessary.
EN
 Loading...