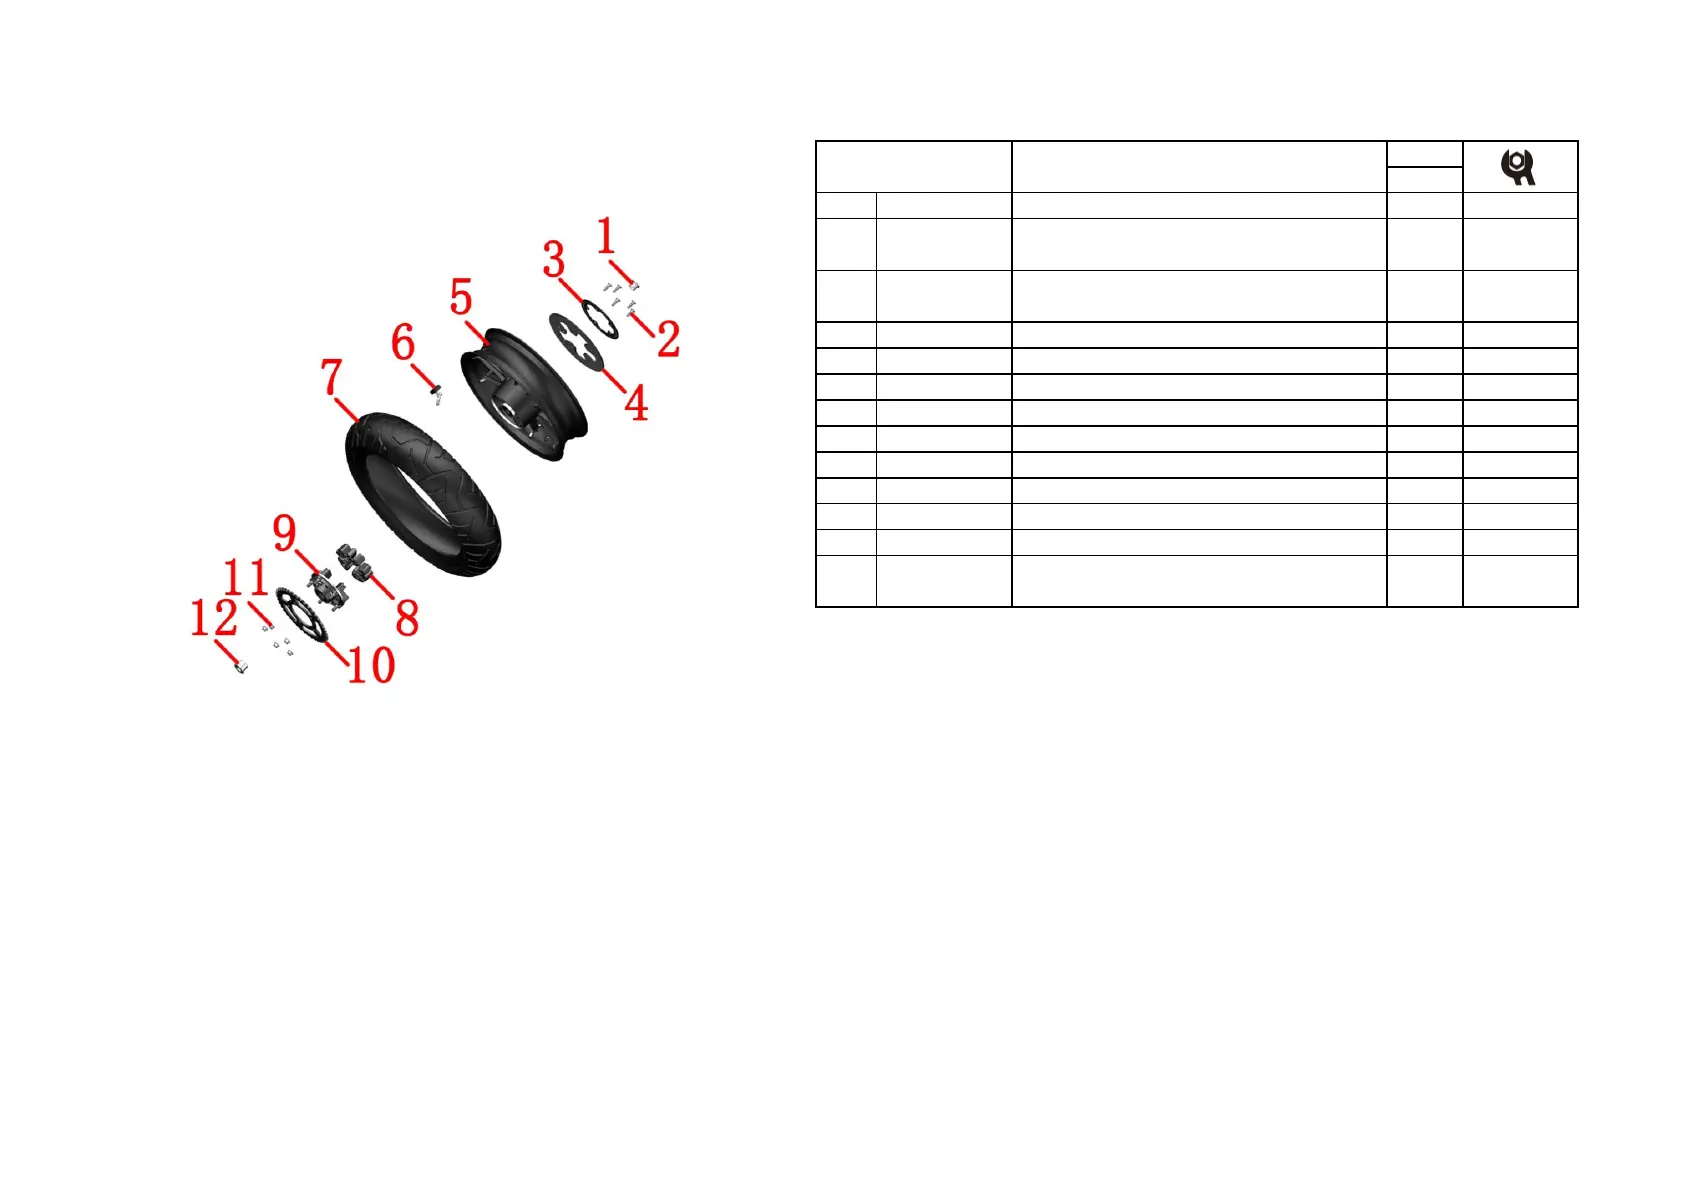
4-REAR WHELL COMPONENT 20
CHK
ADJ
NO. PART NO.
3 1100100-988000
KD200-C rear wheel induction ring gear (50 teeth)
1
4 1100100-600000
KD150-U rear brake disc (230 × 4.5/KD)
1
5 1096500-002000
KD200-C rear aluminum wheel (MT3.75×16/black)
1
6 1184300-056000
ZT350 Tire Pressure Sensor N (M8 Elbow/120°)
1
7 1230100-672000
140/70-16 CM668 65H TL E4
1
8 1244200-050000
9 1094200-069000
10
11 1251300-057093
Non-standard nut M10×1.5(dacromet)
5
●It needs running-in for about 300km after changing new arresters. During this period, leave enough
braking distance while riging.
●The tire repair fluid should not be used because it will block the stoma of the pressure monitoring
sensor,resulting in dificulty in inflating or failure of tire pressure momnitoring .
●Maintenance
Tire: Check regularly the tire on cracks and air pressure.If the tire is ware to the marker, change the
tire with same specification. See details in user manual. Ingradiant of tire include semi hot melt rubber.
Area with too high temperature is not suitable. If temparature of outdoor is too low, storing the
motorcycle in warm place or indoor is suggested in order to avoid frost crack. Normal
temperaturestandard 270kPa.
Rim: Check if the rim has deformation or crack. Support the rim horizontally and check if it can rotate
smoothly. Specification of oil seal on rear rim is TCφ22×φ47×7. Bearing type: φ17×φ47×14,6303RS.
Disc brake plate: Thickness can not be less than 4mm. If not, change it.
Rear wheel component 2
KD200-C rear right wheel bushing (φ17×φ22×
24/shoulder outer diameter φ30×3)
Non-standard inner hex bolt M8×25 (environmental
color)
KD200-C rear left wheel bushing (φ17×φ30×
26/shoulder outer diameter φ38×3)
Fig.4 REAR WHELL
COMPONENT
22~24N·m
1276500-004000
1251100-117093
1276500-003000
●Disc brake plate, ABS gear ring
Remove the right bushing⑴ and the left busing ⑿.
Using 6# inner hexagon socket remove bolts⑵,remove ABS gear ring⑶ and disc brake plate⑷.
●Sprocket bracket assembly
Put down the rear wheel assemble horizontally. Take off nut⑾ with 14# sleeve. Take off sprocket⑽;
sprocket bracket⑼. Pull out the sprocket gum cushion⑻ from the rim.
●Tire and wheel component
Remove the Tire pressure sensor ⑹ built-in valve capuse a tool to release the air, then use a professional tire
puller to remove the rear tire ⑺. Be careful to avoid the tire pressure sensor. Use 2.5# hexagonal socket to
remove the bolt that comes with the tyre pressure sensor and then remove the sensor body, use 12# socket to
remove the nut and pad that comes with it and then remove the valve mouth. Be careful not to lose the O-
ring that comes with the valve mouth when installing, and check if the O-ring is aging or broken before
installing.
CAUTION:
●Be careful while disassembling the tire and rim in case of damages on the components.
●After changing the tire, check air proof performace.
●Not enough tire pressure can cause abnormal wear and tare. Too high pressure in summer might have
1
5
1
1
2
12
 Loading...