R5905753 /17 DPxK-19B/23B/P36
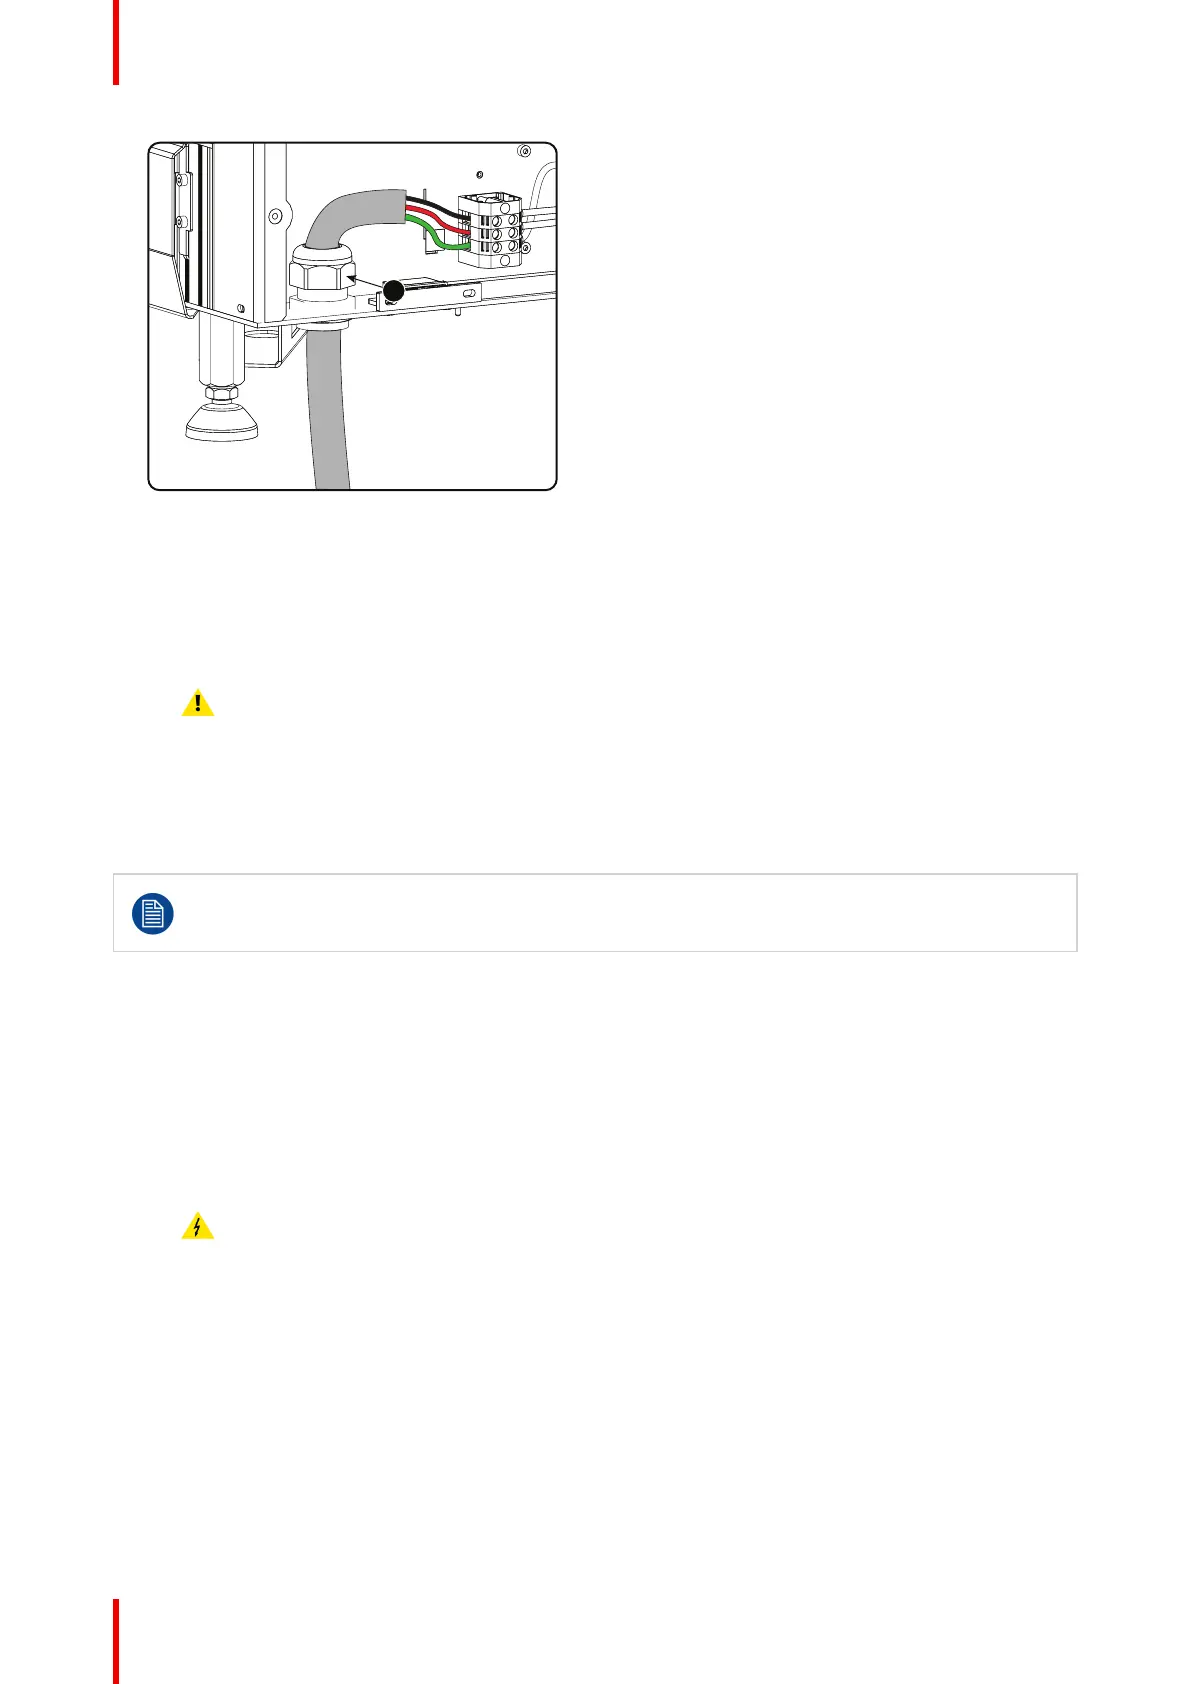
Image 3–10 Power cable connection
4. Push the stripped power supply cable through the cable gland. When using a flexible power cord, make
sure that each conductor end is provided with an end sleeve.
Fix the cable in the cable gland by securing ring 1 with an adjustable wrench.
5. Connect the power cord with the terminal barrier strip. Use a flat torque screw driver set to 2 Nm.
Always connect the ground wire (PE) with the connector indicated with PE on the terminal barrier strip.
Warning: Always connect first the PE wire.
6. Reinstall the power connection cover and the back cover.
3.5 Power loop through to the projector electronics
This procedure explains how to provide the projector electronics with power in case no UPS unit is
used. Note that the projector is by default configured for use without UPS. So, the short power link
cable is already installed.
Required tools
No tools required.
Required parts
Short power link cable with plug type C13/C14
How to loop through the power
1. Plug in the short power cable (1) which was delivered with the projector.
Warning: Always use the Barco short power cable which is delivered with the projector.
Physical installation
 Loading...


