100
Selecting
the
Print
Settings
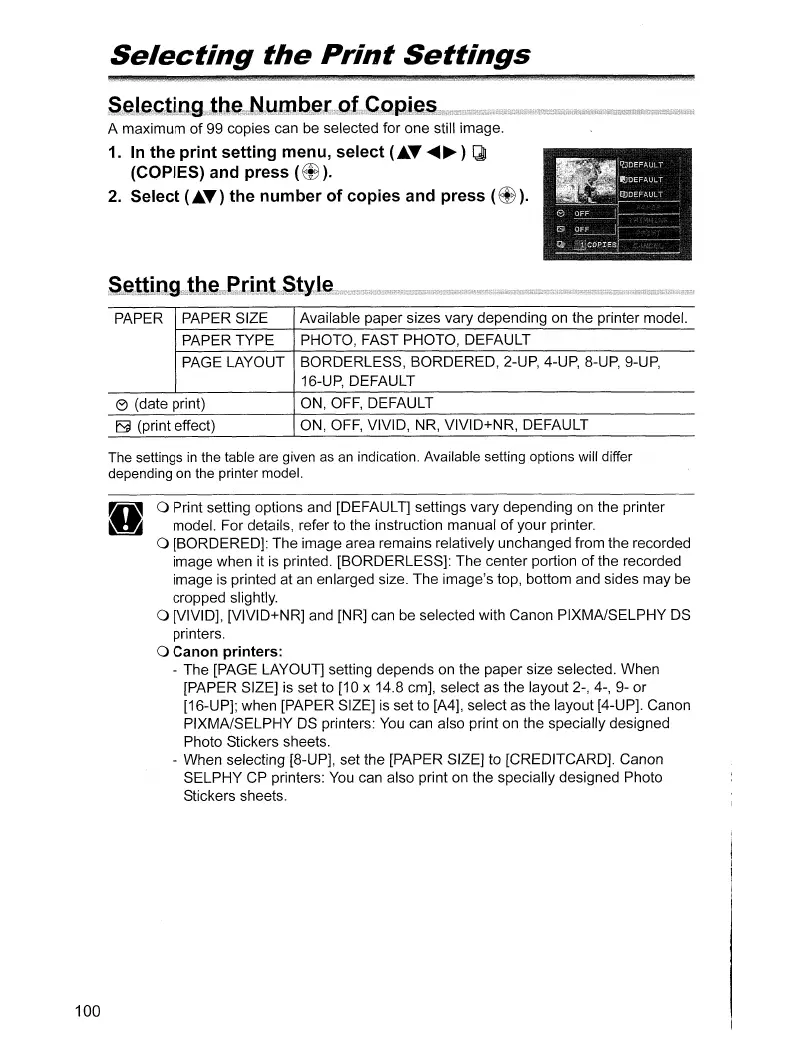
A maximum
of
99 copies can be selected for one still image.
1.
In
the print setting menu, select (.........
~)
1JI
(COPIES) and press
(ffi).
2.
Select (
....
) the number of copies and press
(ffi).
PAPER
PAPER SIZE
Available paper sizes vary depending
on
the printer model.
PAPER TYPE PHOTO, FAST PHOTO, DEFAULT
PAGE LAYOUT BORDERLESS, BORDERED, 2-UP, 4-UP, 8-UP, 9-UP,
16-UP, DEFAULT
o (date print)
ON,
OFF,
DEFAULT
~
(print effect)
ON,
OFF,
VIVID, NR, VIVID+NR, DEFAULT
The settings
in
the table are given
as
an
indication. Available setting options will differ
depending on the printer model.
o Print setting options and [DEFAULT] settings vary depending on the printer
model. For details, refer to the instruction manual
of
your printer.
o [BORDERED]: The image area remains relatively unchanged from the recorded
image when it
is
printed. [BORDERLESS]: The center portion
of
the recorded
image
is
printed at
an
enlarged size. The image's top, bottom and sides may be
cropped slightly.
o [VIVID], [VIVID+NR] and [NR] can be selected with Canon PIXMAISELPHY
OS
printers.
o Canon printers:
- The [PAGE LAYOUT] setting depends on the paper size selected. When
[PAPER SIZE] is set to [10 x 14.8 cm], select as the layout 2-, 4-, 9- or
[16-UP]; when [PAPER SIZE]
is
set to [A4], select as the layout [4-UP]. Canon
PIXMAISELPHY
OS
printers:
You
can also print on the specially designed
Photo Stickers sheets.
- When selecting [8-UP], set the [PAPER SIZE] to [CREDITCARD]. Canon
SELPHY CP printers:
You
can also print on the specially designed Photo
Stickers sheets.
 Loading...