16
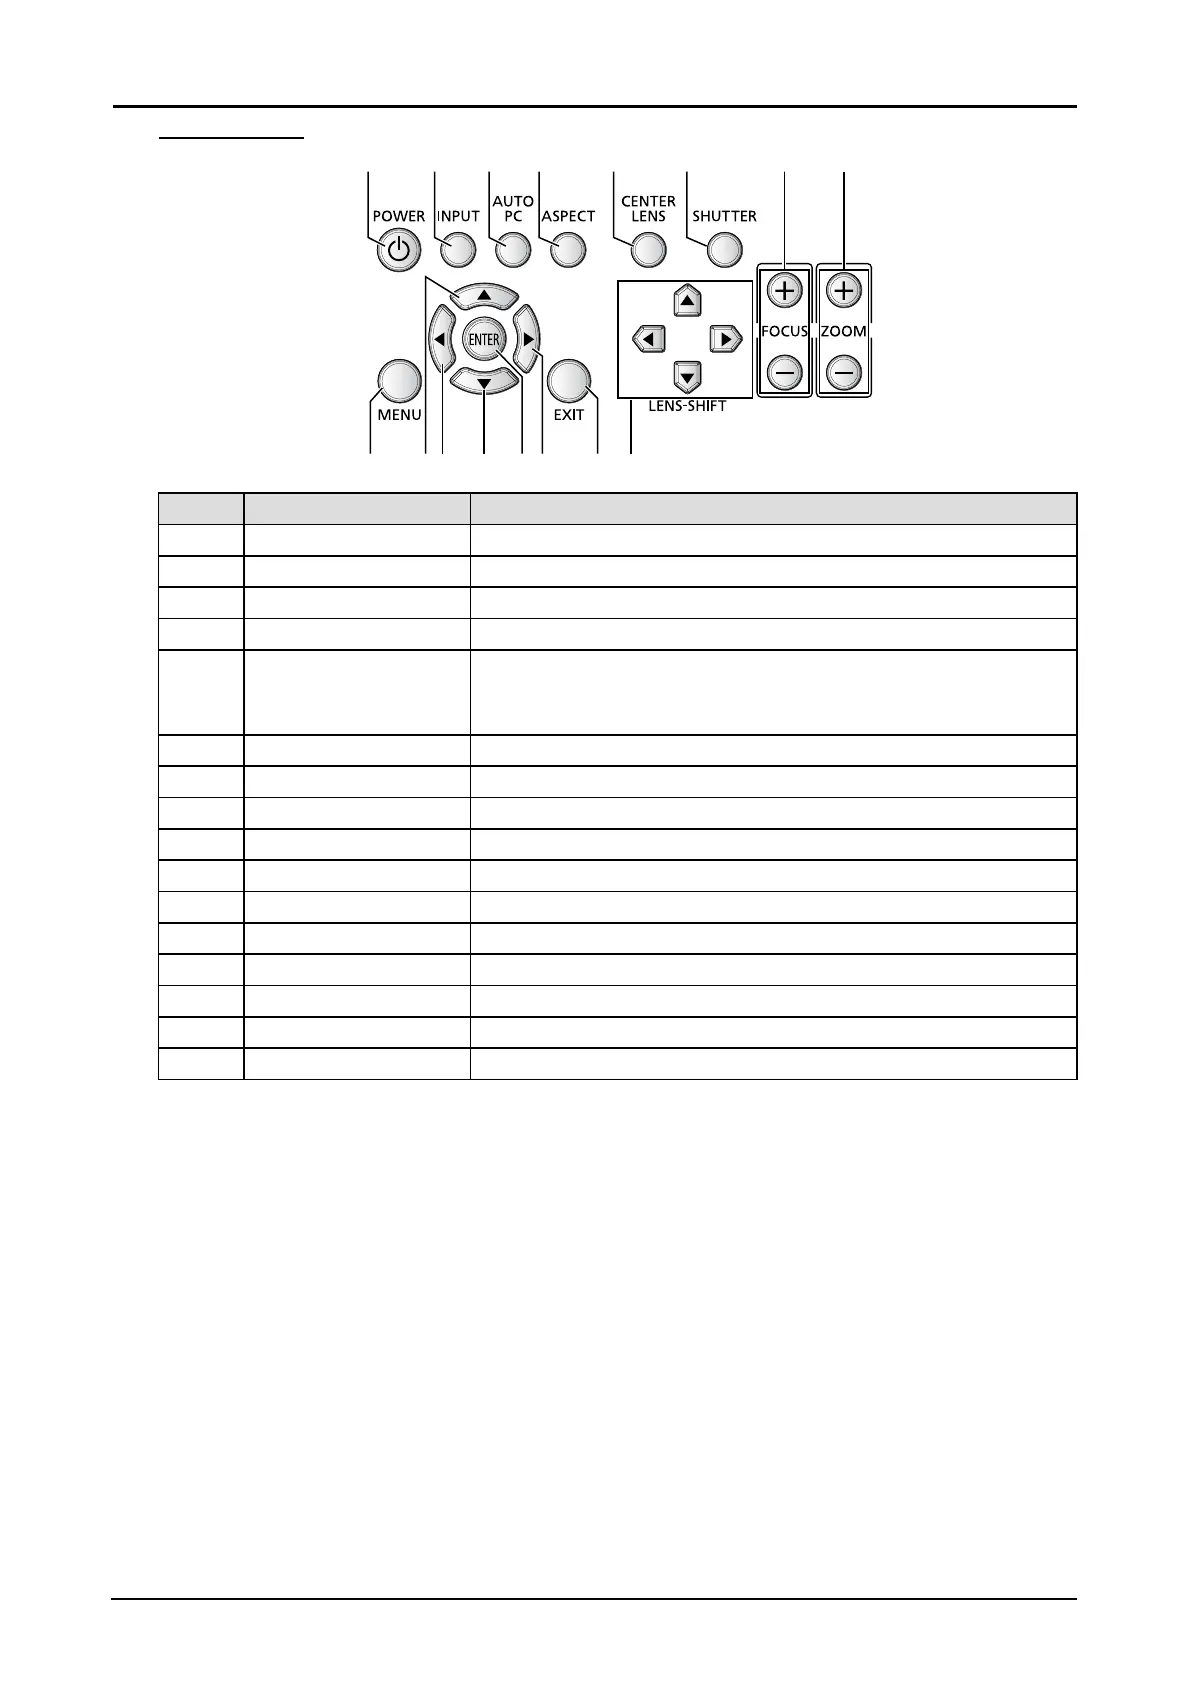
Control Panel
1
1413 1512 1691110
2 3 4 5 6 7 8
Item Label Description
1 POWER Press to turn on or off the projector.
2 INPUT Press to select the input source.
3 AUTO PC Press to initiate the automatic synchronization procedure.
4 ASPECT Press to switch to the next aspect ratio setting.
5 CENTER LENS Press to center the lens.
Note:
Please center the lens every time after the lens is installed.
6 SHUTTER Press to open or close the shutter.
7 FOCUS Press to adjust the focus of the projected image.
8 ZOOM Press to adjust the size of the projected image.
9 MENU Press to display or hide the OSD menu.
10 ▲ Navigates and changes settings in the OSD.
11 ◄ Navigates and changes settings in the OSD.
12 ▼ Navigates and changes settings in the OSD.
13 ENTER* Press to conrm the changed settings.
14 ► Navigates and changes settings in the OSD.
15 EXIT Press to return the previous level or exit the OSD menu.
16 LENS-SHIFT Press to move the lens up, down, right or left.
* Lens Adjustment Screen appears when ENTER button is pressed when OSD is not displayed.
 Loading...