22
Precaution for Installing the Projector
The high quality display from the project is only available when the projector is correctly installed.
Generally, the light source facing the screen should be reduced or eliminated as much as possible. The
contrast of the image will be obviously reduced if the light directly shines on the screen, such as the
beam from windows or the searchlight cast on the image. The image may become faded and not bright.
Projector Installation and Setup
There are six xture screw holes (M4 x 0.7 x 12mm) at the bottom of projector for ceiling mounting. The
available installation options are available as follows:
■ Front Table: Install the projector on the table and project the image forward.
■ Rear Table: Install the image behind the screen and project onto the screen.
■ Front Ceiling: Mounting the projector on the ceiling and project the image forward.
■ Rear Ceiling: Mounting the projector on the ceiling behind the screen and project onto the screen.
■ Up + Front: Projector is mounted vertically upwards and the image is projected onto the ceiling
mounted screen.
■ Down + Front: Projector is mounted vertically downwards the image is projected onto the oor
mounted screen.
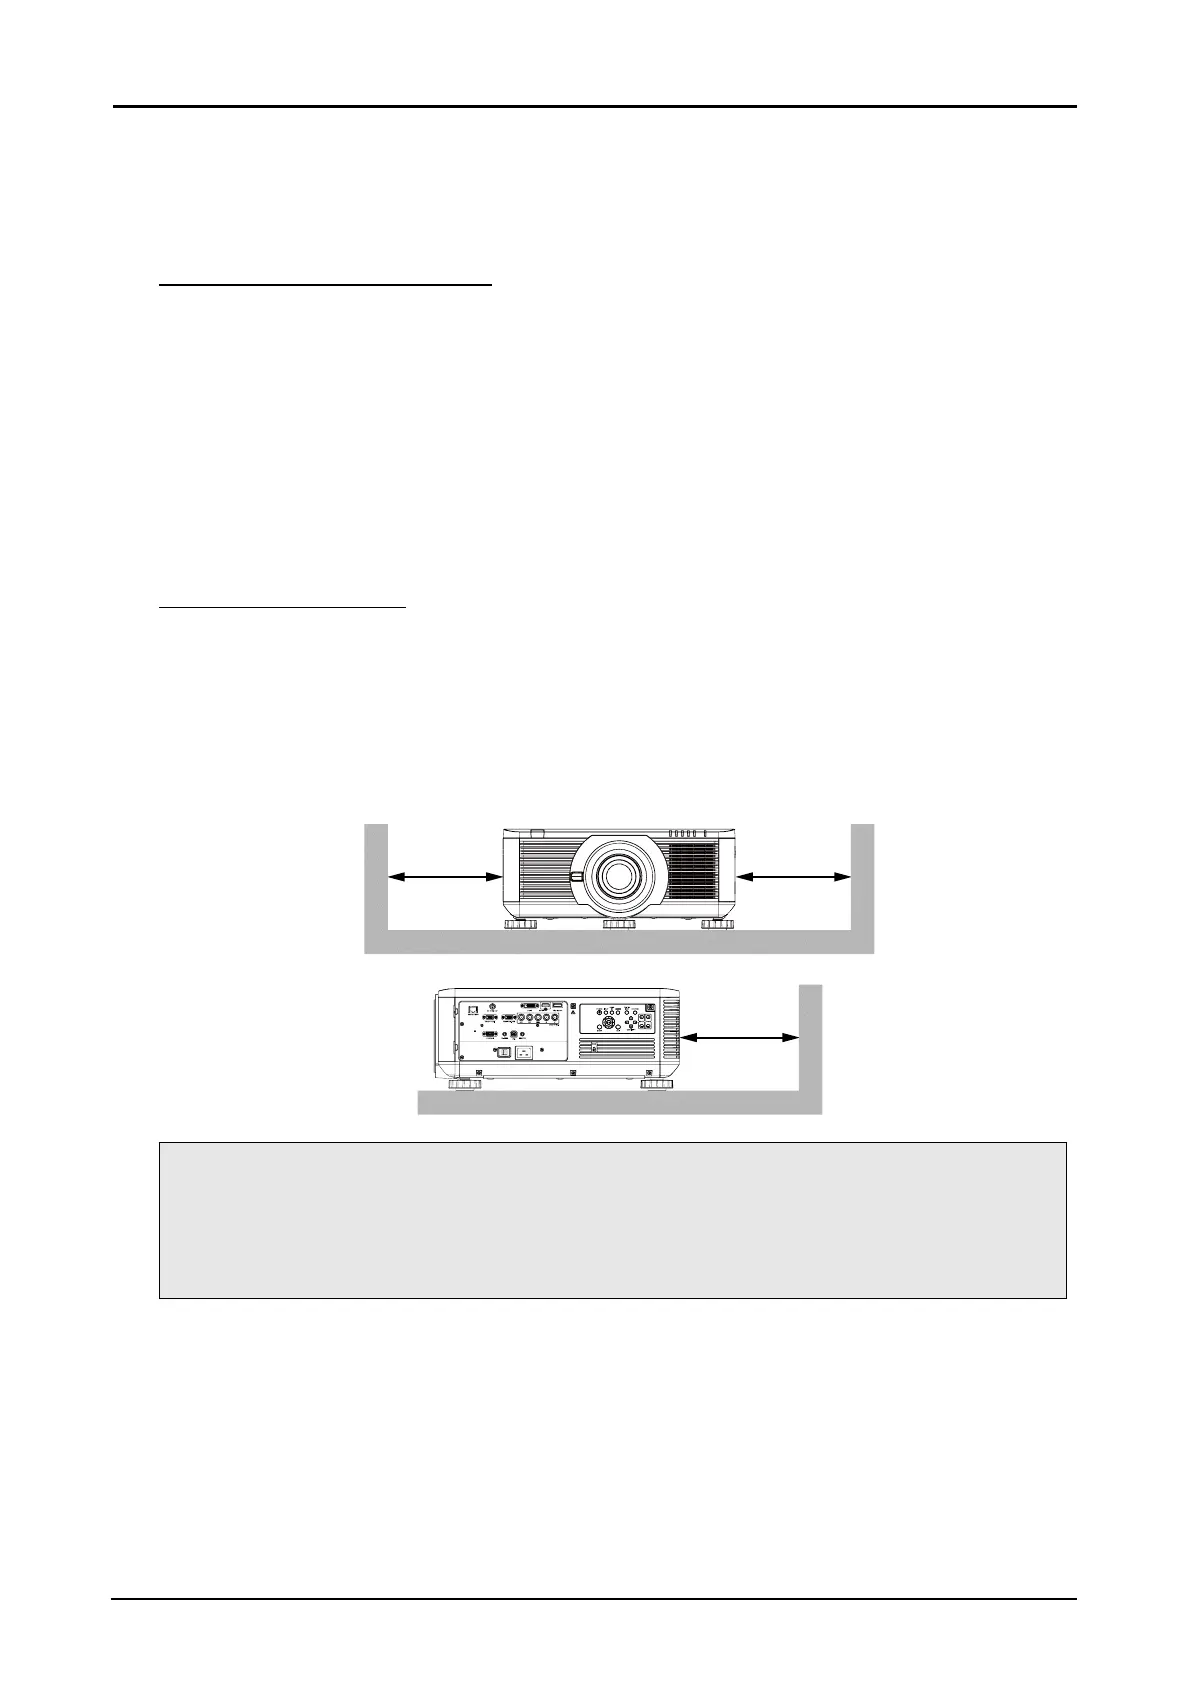
Cautions for Ventilation
The product is a high-brightness projector. The intake with lters are located on the left and right sides
to provide sufcient air for cooling. The projector has two vents on the back for cool air discharging.
When installing, make sure the intake and outlet vents meet the required clearance to allow for the
proper cooling requirements of the system. At least 50cm around the intake and 70cm around the vent
should be clear.
Make sure that there is no obstruction or ammable material in proximity of the vents when the projector
is installed so that necessary cooling is applied to the system.
50cm
Or Greater
50cm
Or Greater
Release
Lens
PRESS
70cm
Or Greater
Note:
■ Inadequate cooling may cause the projector to stop operations due to overheating.
■ Overheating may shorten the life of components or lamps.
■ If installation requirements necessitate installation in a structure or enclosed space, the intake
and outtake vents should not be obstructed to prevent overheating.
 Loading...