BODY PANELS
23
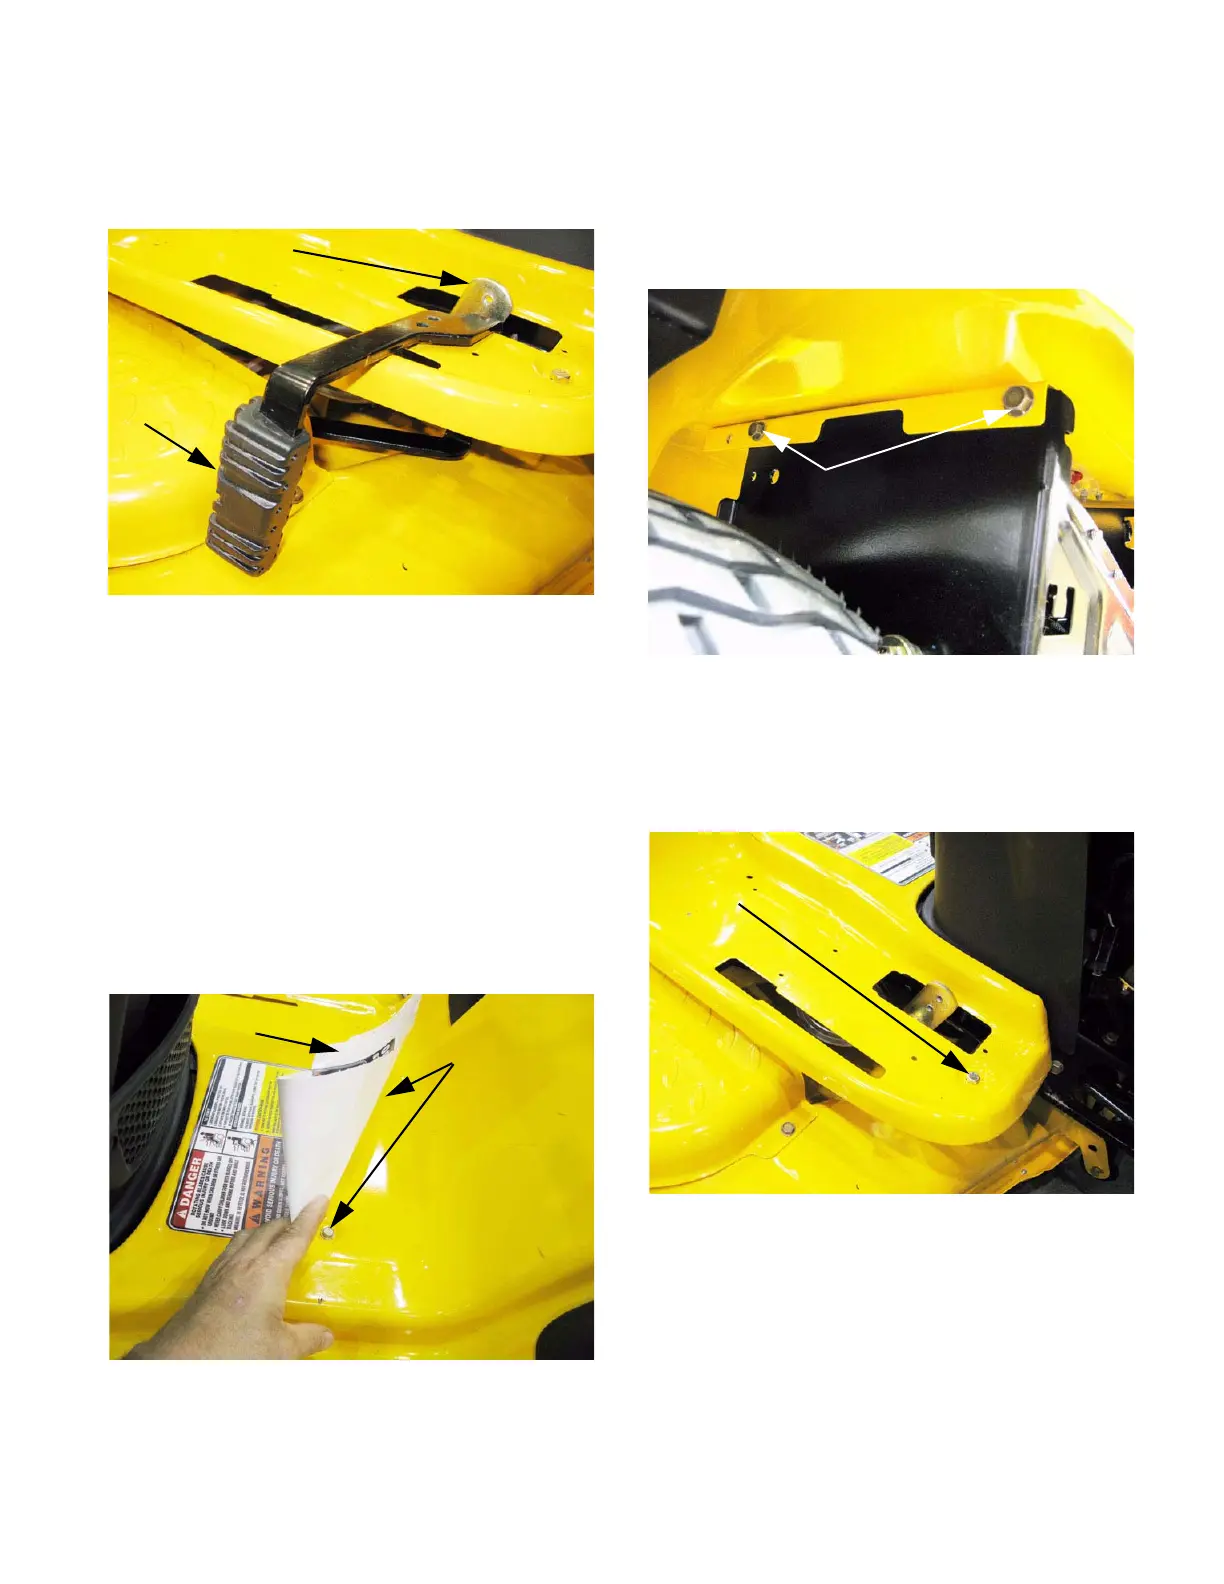
5b. Unbolt the drive pedal using a 1/2” wrench,
and maneuver it out of the tractor.
See Figure 4.29.
5c. Remove the brake pedal using a 1/2”
wrench.
6. Remove the fender panel.
6a. Carefully peel-up the large operating
instructions label from the floor portion of
the fender panel. See Figure 4.30.
• Gentle application of heat will help loosen the
adhesive.
• Start at the back: the back edge is closer to the
fasteners that are concealed by the label.
• Use wax paper to preserve the adhesive.
Figure 4.29
Drive pedal
Drive linkage
Figure 4.30
Bolts
under label
Wax paper
6b. Remove the two bolts that are found under
the label using a 3/8” wrench.
6c. Remove the four bolts that hold the fender to
the seat-box portion of the frame using a 1/
2” wrench. See Figure 4.31.
6d. Remove the nuts and bolts that hold the
front edge of each fender to the frame out-
riggers using a pair of 7/16” wrenches.
See Figure 4.32.
Figure 4.31
Bolts
Figure 4.32
Nut, bolt, and washer
 Loading...