16 Install the Printer
Printer Installation
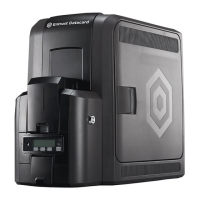
To install the CR500 printer, place the printer on the selected work surface. Make sure that the
work surface meets the requirements described in “Work Surface” on page 12. Then, perform
the following procedures:
1. (Optional) Use the bolt-down feature to secure the printer to the work surface.
2. Plug in the power cords to the print unit and the security enclosure.
3. Connect the data network cable to the printer.
4. Power on the printer to verify it initializes correctly.
5. Run the appropriate single-sided cleaning card through the printer.
6. Install the concealed output stacker onto the printer.
Use the Bolt-Down Feature
Use the optional bolt-down feature to secure the printer to the work surface.
To use the printer’s bolt-down feature, you must provide the following parts and tools:
A bolt that meets the following requirements:
The bolt size is 1/4-20 UNC: the diameter is 1/4 inch, with 20 threads per inch. Do not use
a metric-sized bolt in place of the UNC bolt.
The bolt cannot intrude into the printer by more than 1 inch (25.4 mm).
The bolt length must be the thickness of the work surface, plus the thickness of the
washer, plus the thickness of the spacer, plus 1/4 inch to 1 inch going into the rivet nut in
the bottom of the printer.
For example, if your printer’s work surface is 1-1/2 inches thick, the bolt length can be
from 2-3/8 to 3-1/8 inches, as shown in the following table:
A drill with a bit the appropriate size for the bolt. The hole must be smaller than the
15/16 inch (23.8 mm) diameter of the provided washer.
Work Surface
(example) +
Washer
Thickness +
Spacer
Thickness +
Rivet Nut
Depth =
Desired
Bolt Length
1-1/2 inch + 1/16 inch + 9/16 inch + 1/4 inch
(minimum)
= 2-3/8 inch
(minimum)
1-1/2 inch + 1/16 inch + 9/16 inch + 1 inch
(maximum)
= 3-1/8 inch
(maximum)
 Loading...