35
Installation and Operation Manual for RPI M6A M8A M10A inverters V1.0 2016-02-03
5 Planning the installation
5.14 What you need
5.14.1 For mounting the inverter
Part name Quantity Description
M5 mounting screws 8
The mounting plate has to be mounted with 8 M5 screws.
Depending on where you mount the inverter (e.g. on a brick wall, concrete
wall, metal frame, etc.), you may need additional mounting equipment: wall
plugs (dowels), washers, spring washers, nuts, etc.
When choosing additional mounting material, take into consideration the
installation location as well as the galvanic corrosion effect of dissimilar met-
als.
5.14.2 For connecting the inverter to the grid
Part name Quantity Description
AC cable -
Use properly sized wire to connect to the correct poles.
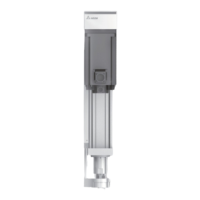
AC connector Amphenol C16-3
Current rating ≤ 25 A
Min. / Max. cable diameter 11 ... 20 mm
Min. / Max. wire diameter 5 ... 8 mm
2
Recommended torque for terminal
screws
≥ 0.7 Nm
The AC plug delivered with the inverter can only be used with exible copper
cable.
When calculating the cross section of the cable, consider:
● material used
● thermal conditions
● cable length
● type of installation
● AC voltage drop
● power losses in cable
Always follow the system installation requirements dened for your country!
France: Follow the system installation requirements dened by UTE
15-712-1 regarding minimum cable sections and protections against over-
heating due to high currents!
Germany: Follow the system installation requirements dened by VDE 0100
712 regarding minimum cable sections and protections against overheating
due to high currents!
Australia/New Zealand: Always follow the system installation requirements
dened by AS/NZS 5033:2005 regarding minimum cable sections and pro-
tections against overheating due to high currents!
Wire end sleeves (bootlace pins) 5
Wire end sleeves are needed to tightly mount the wires of the AC cables to
the AC plug.
Use a crimping tool to fasten the wire end sleeves to the wire.
 Loading...