Getting Started Connections Settings Playback Remote ControlMulti-zone Information Troubleshooting SpecificationsSettings
ENGLISH
When a TV is connected to the AVR-4810, the GUI menu, sound field
parameters, etc., can be displayed on the TV.
This allows you to operate the AVR-4810 and make settings on it
while looking at the GUI menu displayed on the TV.
Operate with the main remote control unit switched to the “MAIN”
mode (vpage 99 “Operating the Main Remote Control Unit”).
•
•
Typical examples are described below.
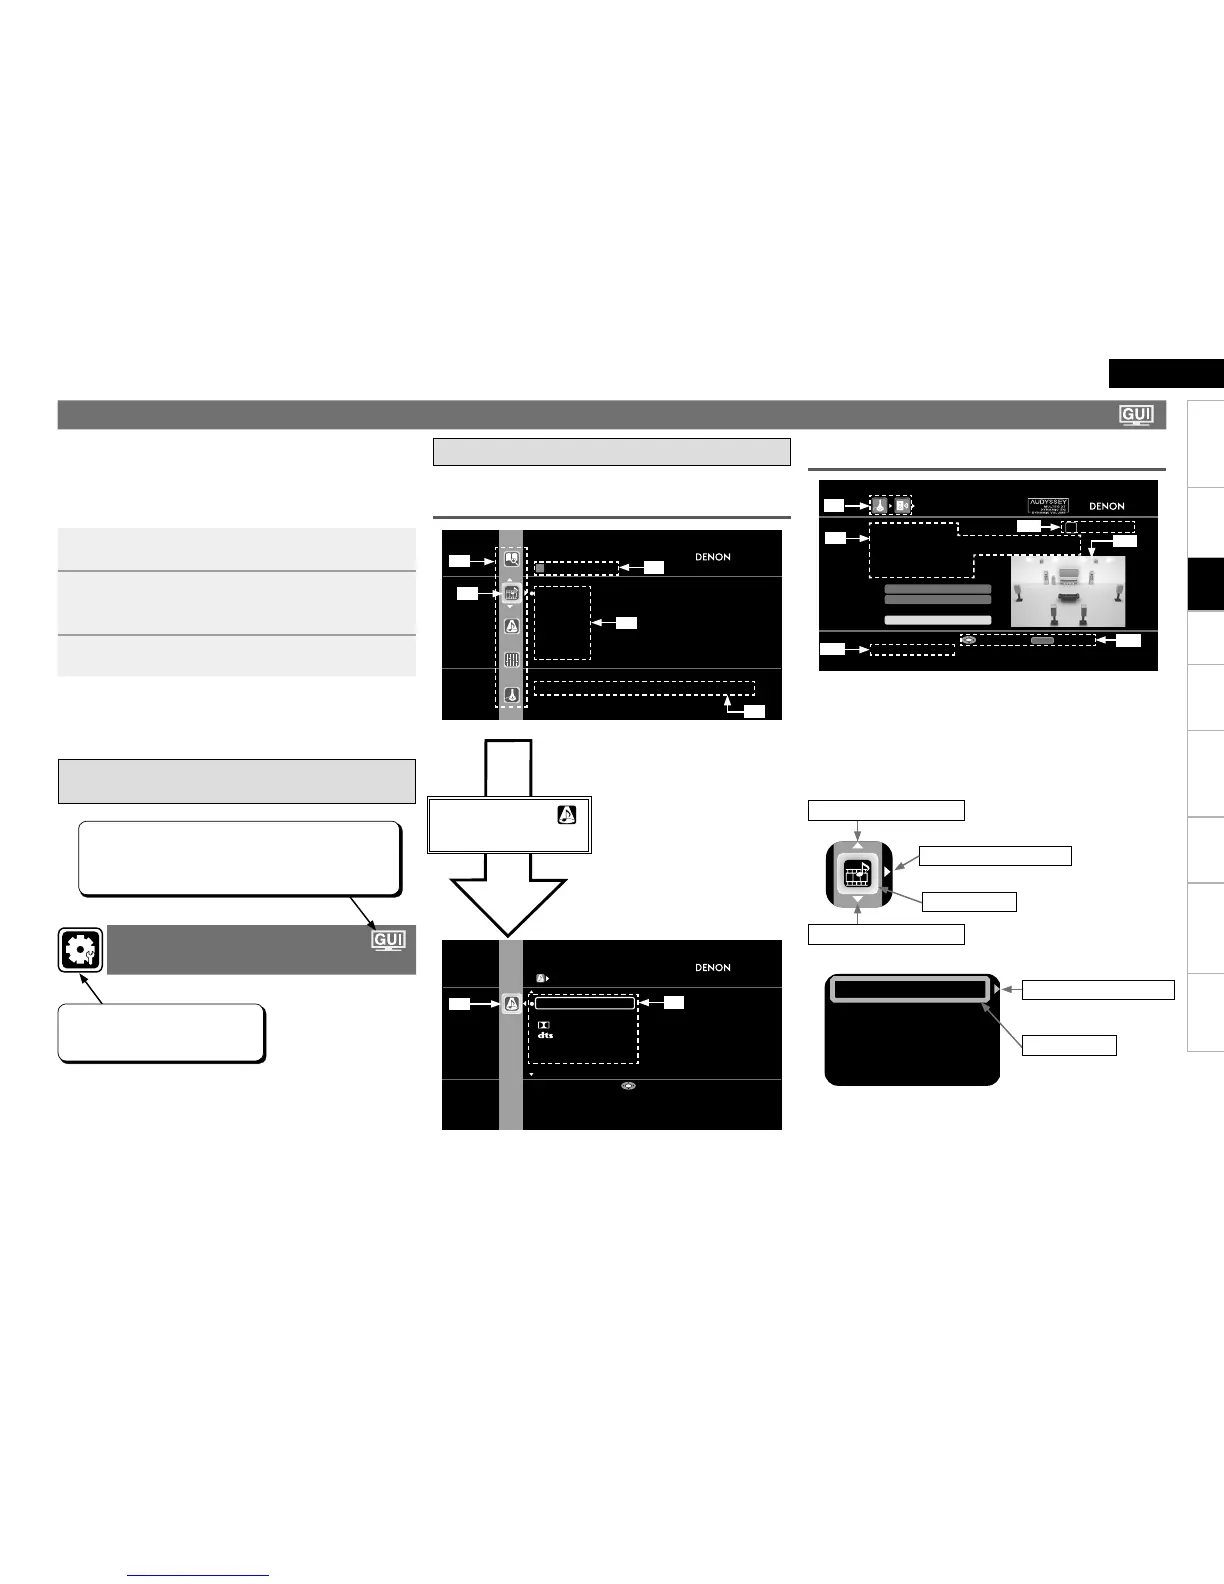
Examples of GUI Menu Screen Displays
GExample 1H Menu selection screen (Top menu)
SURROUND MODE
STEREO
DIRECT
DOLBY PL II
DTS NEO:6
MULTI CH STEREO
WIDE SCREEN
Stereo playback mode with tone controls
Enter
z1 : List GUI menu setup icons
z2 : Currently selected setup icon
z3 : Currently selected setup item
z4 : List of currently selected setup items
z5 : Guide text for the currently selected
setup item
Press i to select “ ”
and then press p.
(Or press ENTER.)
z6
z7
Exiting the GUI Menu
Press MENU while the GUI menu is displayed.
The GUI menu display disappears.
n
SOURCE SELECT
SAT/CBL
VCR/iPod
DVR
V.AUX
NET/USB
Favorites
Select input source and make playback setteings
z3
z4
z5
z2
z1
z6 : Selected setup icon
z7 : Options of the selected setup item
1
Press MENU.
The GUI menu is displayed on the TV screen.
2
Press uip to select the menu to be set or
operated.
To return to the previous item, press o or RETURN.b
3
Press ENTER to enter the setting.
GUI Menu Operation
Making Detailed Settings
(Manual Setup)
Items for which this mark is indicated at the title can be
operated from the GUI.
We recommend performing such operations from the
GUI.
Example of the Display of the GUI Mark
at a Title
This is the GUI icon for this setting
item or for the menu series to which
this item belongs.
Input Assign
Input Mode
Video
Rename
Source Level
GExample 2H Audyssey Auto Setup screen
(with illustration)
Switch to the next item
Selected item
Switch the selected item
Switch to the next item
Switch the selected
item using ui.
b
Iconn
Listn
Selected item
(Use p or ENTER to switch.)
Switch the selected item
AUDYSSEY AUTO SETUP
1 2 3 4 5 6
Amp Assign
RETURN
Auto Setup Start
Channel Skip
STEP1 Preparation
Connect the speakers and place them according
to the recommendations in the manual.
Set the following items
if necessary.
Start Auto Setup
Enter Cancel
z9
z12
z13
z11
z8 : History icon
z9 : Operation guidance text
z10 : Operation step indicators
z11 : Illustration
z12 : Guide text for the currently selected
setup item
z13 : Operation button guidance
(Use i to switch.)
(Use p or ENTER to switch.)
(Use u to switch.)
z8
z10
 Loading...