Adjusting the Image
39
Input Image Setting Name
Normal Full Zoom
Notes
Matches the vertical size of
the projection panel. The
aspect ratio differs de-
pending on the input im-
age.
Uses the entire projection
panel. The aspect ratio dif-
fers depending on the in-
put resolution.
Retains the aspect ratio of
the input signal, and
matches the horizontal
size of the projection pan-
el. The top and bottom of
the image may be trunca-
ted.
*
The letterbox image used in this explanation is a 4:3 aspect ratio image displayed in 16:9 with black margins at
the top and bottom for subtitle placement. The margins at the top and bottom of the screen image are used for
subtitles.
For EH-TW6800, you can also set Anamorphic Wide and Horiz. Squeeze.
Set Anamorphic Wide and attach a commercially available anamorphic lens to enjoy DVDs, Blu-rays, and so
on of images recorded at Cinema Scope size.
Horiz. Squeeze stretches the horizontal aspect of the input signal. This allows you to project across the full
width of the screen when using a commercially available anamorphic lens.
c
•
If Anamorphic Wide is selected when Overscan is set, the image may be truncated. Set Overscan to
Off.
s Signal - Overscan p.88
•
When projecting 3D images in Anamorphic Wide, only 1080p/24 Hz/frame packing signals are
supported.
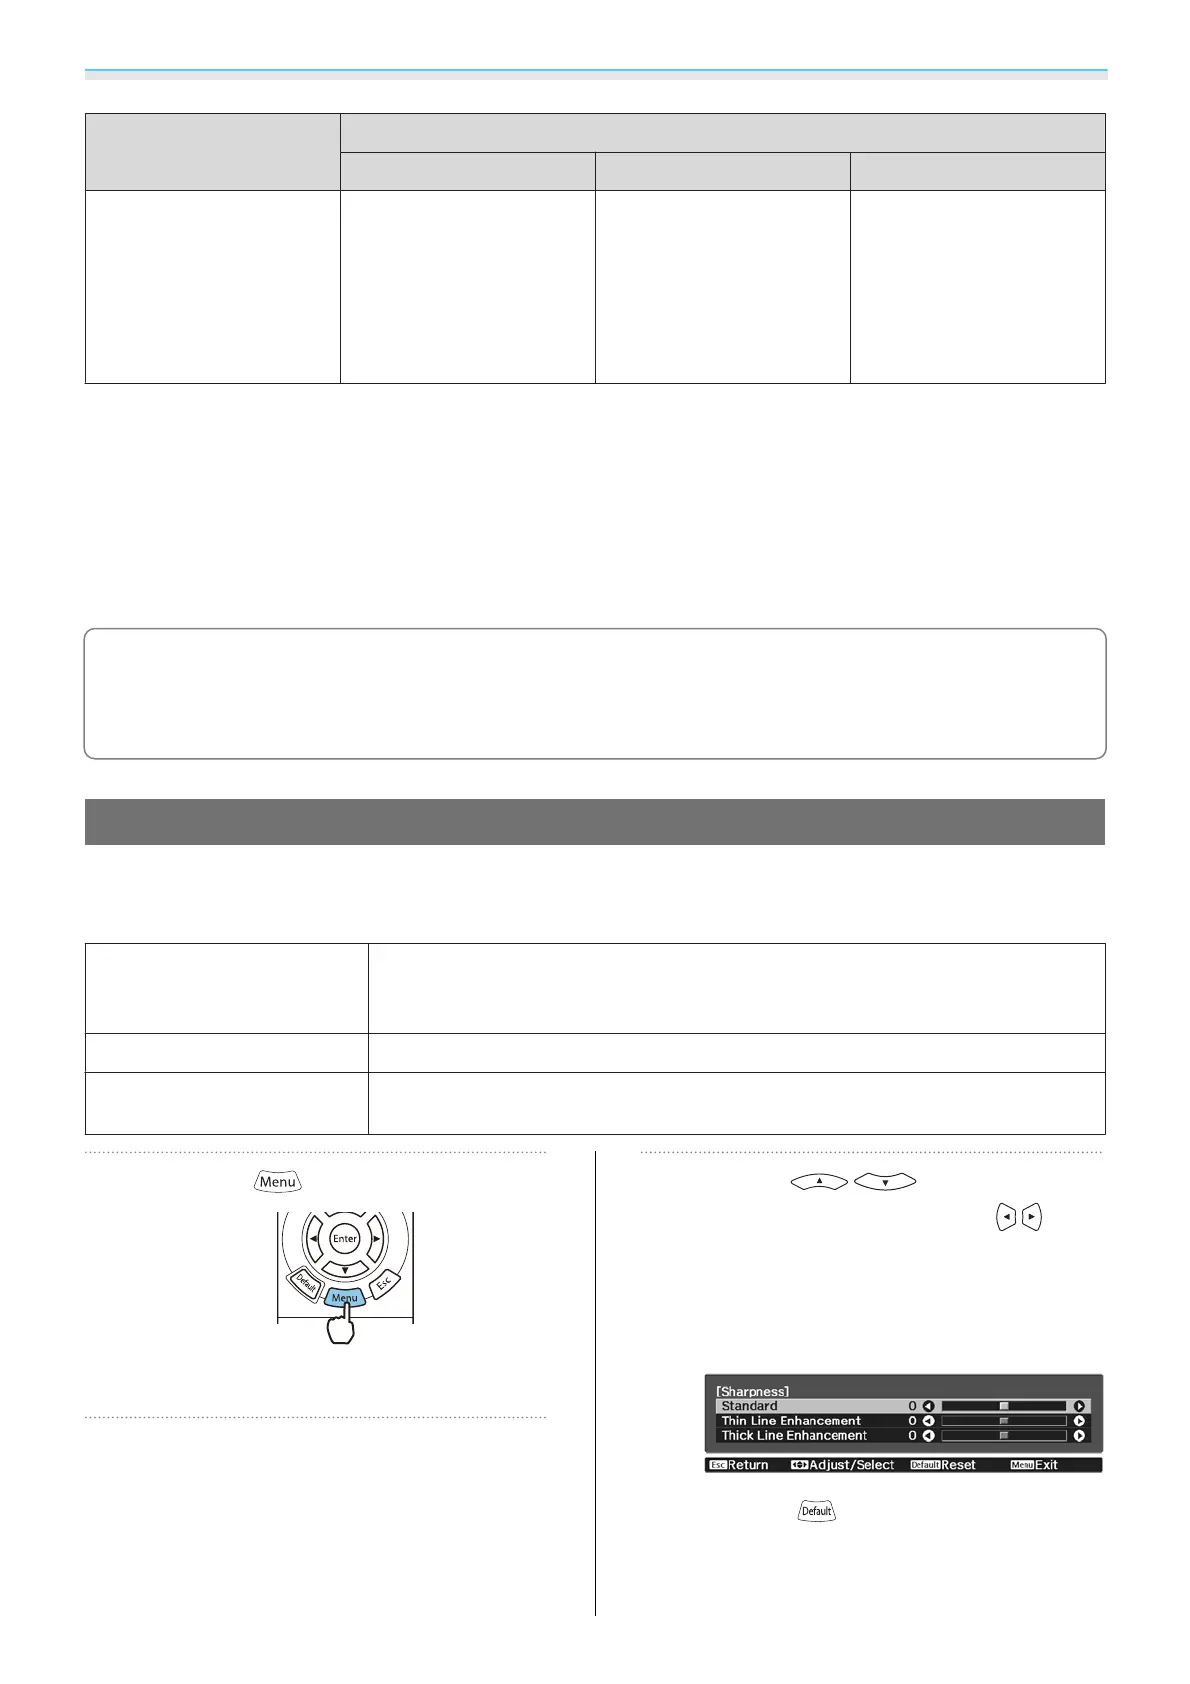
Adjusting the Sharpness
You can make the image clearer.
The following shows the setting items and procedures.
Standard
Enhances the outlines for the projected image overall. When adjusting Stand‐
ard, the adjustment values for Thin Line Enhancement and Thick Line En‐
hancement are also adjusted at the same time.
Thin Line Enhancement
Details such as hair and patterns on clothing are enhanced.
Thick Line Enhancement
Rough parts such as outlines for entire subjects or the background are enhanced,
making the overall image clearer.
a
Press the button.
The Configuration menu is displayed.
b
Select Image - Sharpness.
The Sharpness adjustment screen is
displayed.
c
Use the buttons to select
the item, and then use the
buttons to make the adjustments.
The image is enhanced when moved to the
right (positive) and softer when moved to
the left (negative).
Press the button to return the
adjustments to their default values.
Downloaded from www.vandenborre.be
 Loading...