EH-TW8000/TW9000/TW9000W Disassembly and Assembly CONFIDENTIAL
SEIKO EPSON 107 Revision A
3.3.17.3 PS Unit
1. Remove the Air Filter. (p.64)
2. Remove the Lamp. (p.64)
3. Remove the Rear Case. (p.66)
4. Remove the Front Case. (p.67)
5. Remove the Upper Case. (p.68)
6. Remove the MA Board (assembly). (p.70)
7. Remove the Lens Shutter. (p.77)
8. Remove the Optical Engine (assembly). (p.78)
9. Remove the Power Supply (assembly). (p.103)
10. Remove the TH3 Board. (p.105)
11. Remove the PS Fan. (p.106)
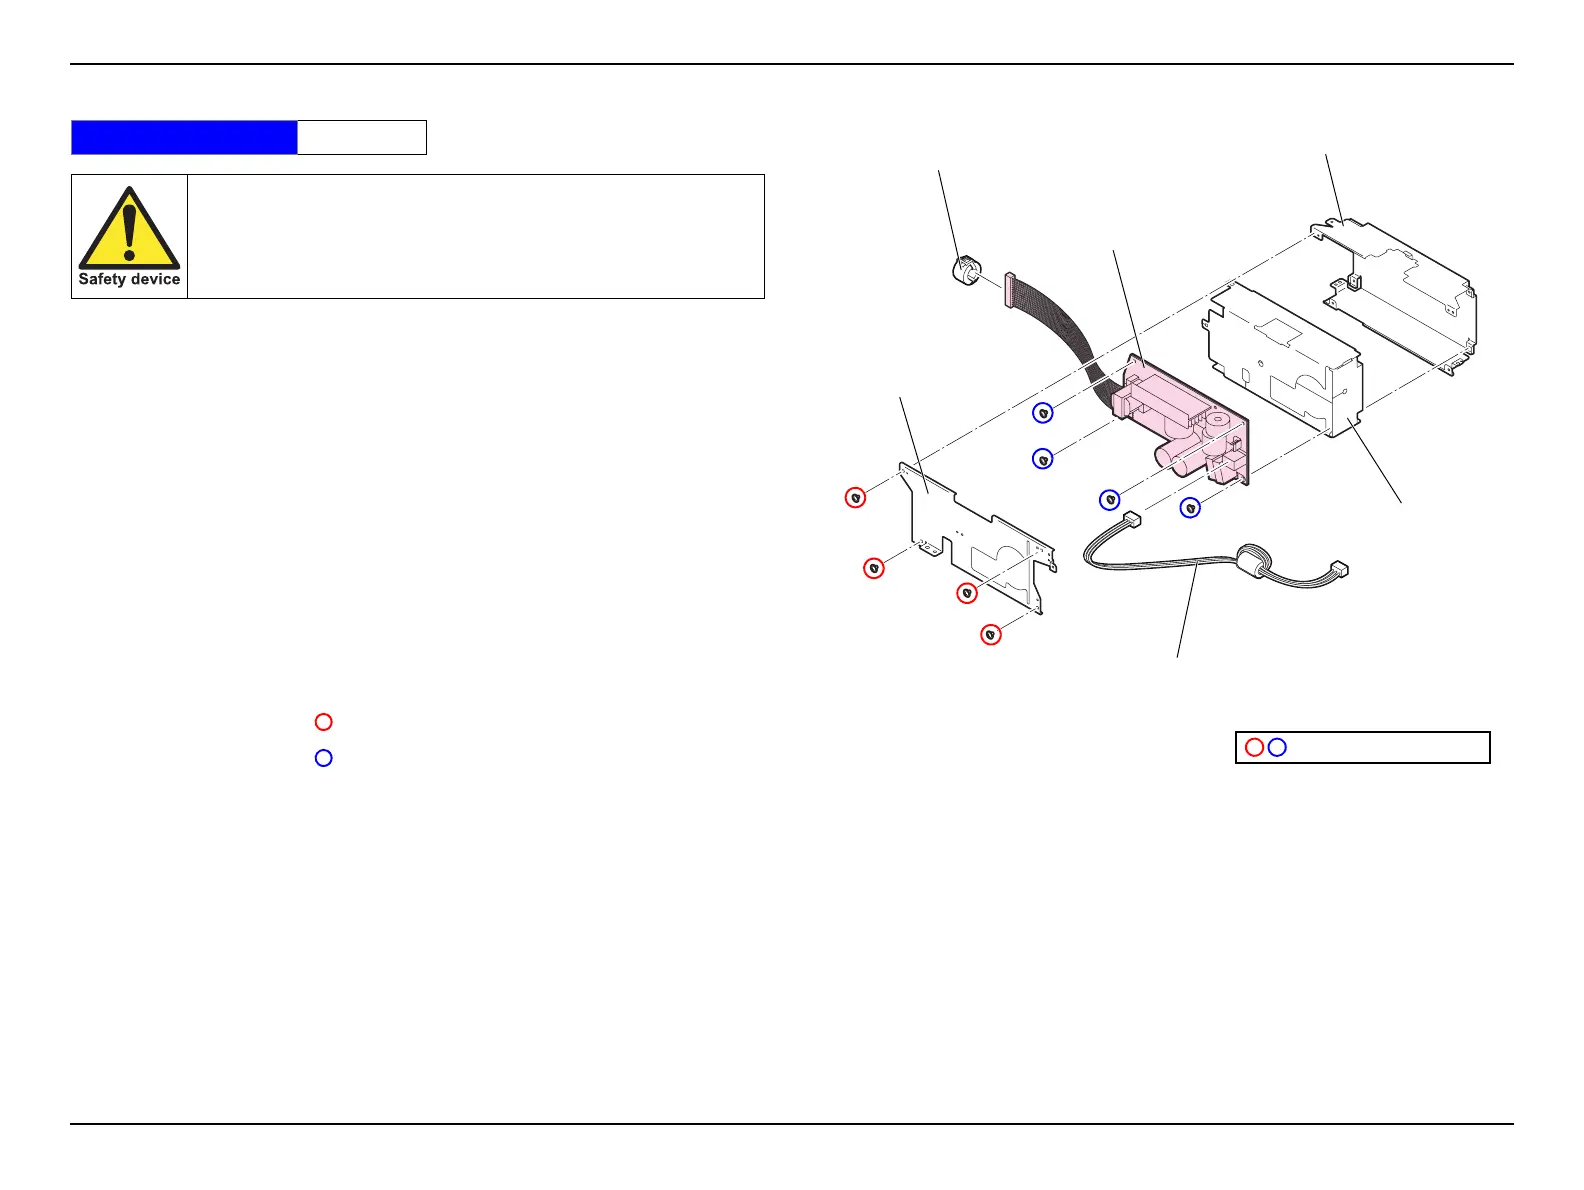
12. Remove the four screws ( ), and remove the PS Frame B.
13. Remove the four screws ( ).
14. Open the PS Insulation Sheet, and remove the PS Unit.
15. Remove the BA Cable from the PS Unit.
16. Remove the Ferrite Core from the PS Unit.
17. Remove the PS Insulation Sheet from the PS Frame A.
Figure 3-40.
Standard Operation Time 25 Min.
This part is designated as the Safety Device. When removing/
replacing the part for repair, be sure to refer to “3.4 Safety Check
after Servicing (p.113)”. According to the instructions in it,
handle the part and perform the procedure after servicing.
PS Unit
BA Cable
PS Frame A
PS Frame B
PS Insulation Sheet
C.C.SCREW,3X4,F/ZN-3C
Ferrite Core
 Loading...