EH-TW8000/TW9000/TW9000W Troubleshooting CONFIDENTIAL
SEIKO EPSON 25 Revision A
2.1 Required Tools
The following tools and equipment will be required in order to carry out
troubleshooting, and so you should check that they are on hand.
Note *1: q.s.: Sufficient quantity
*2: When repairing this projector (16:9 wide panel model), prepare your video source
and device considering the full screen display in 16:9 aspect ratio.
*3: When using the HDMI link function, a 3D Video Player must be compliant with the
CEC standards.
2.2 Troubleshooting Procedure
This chapter describes troubleshooting procedure starting from error messages/status to
diagnose problems. Refer to the descriptions and remedies below to specify the
troubled part, and carry out the necessary repair or replacement.
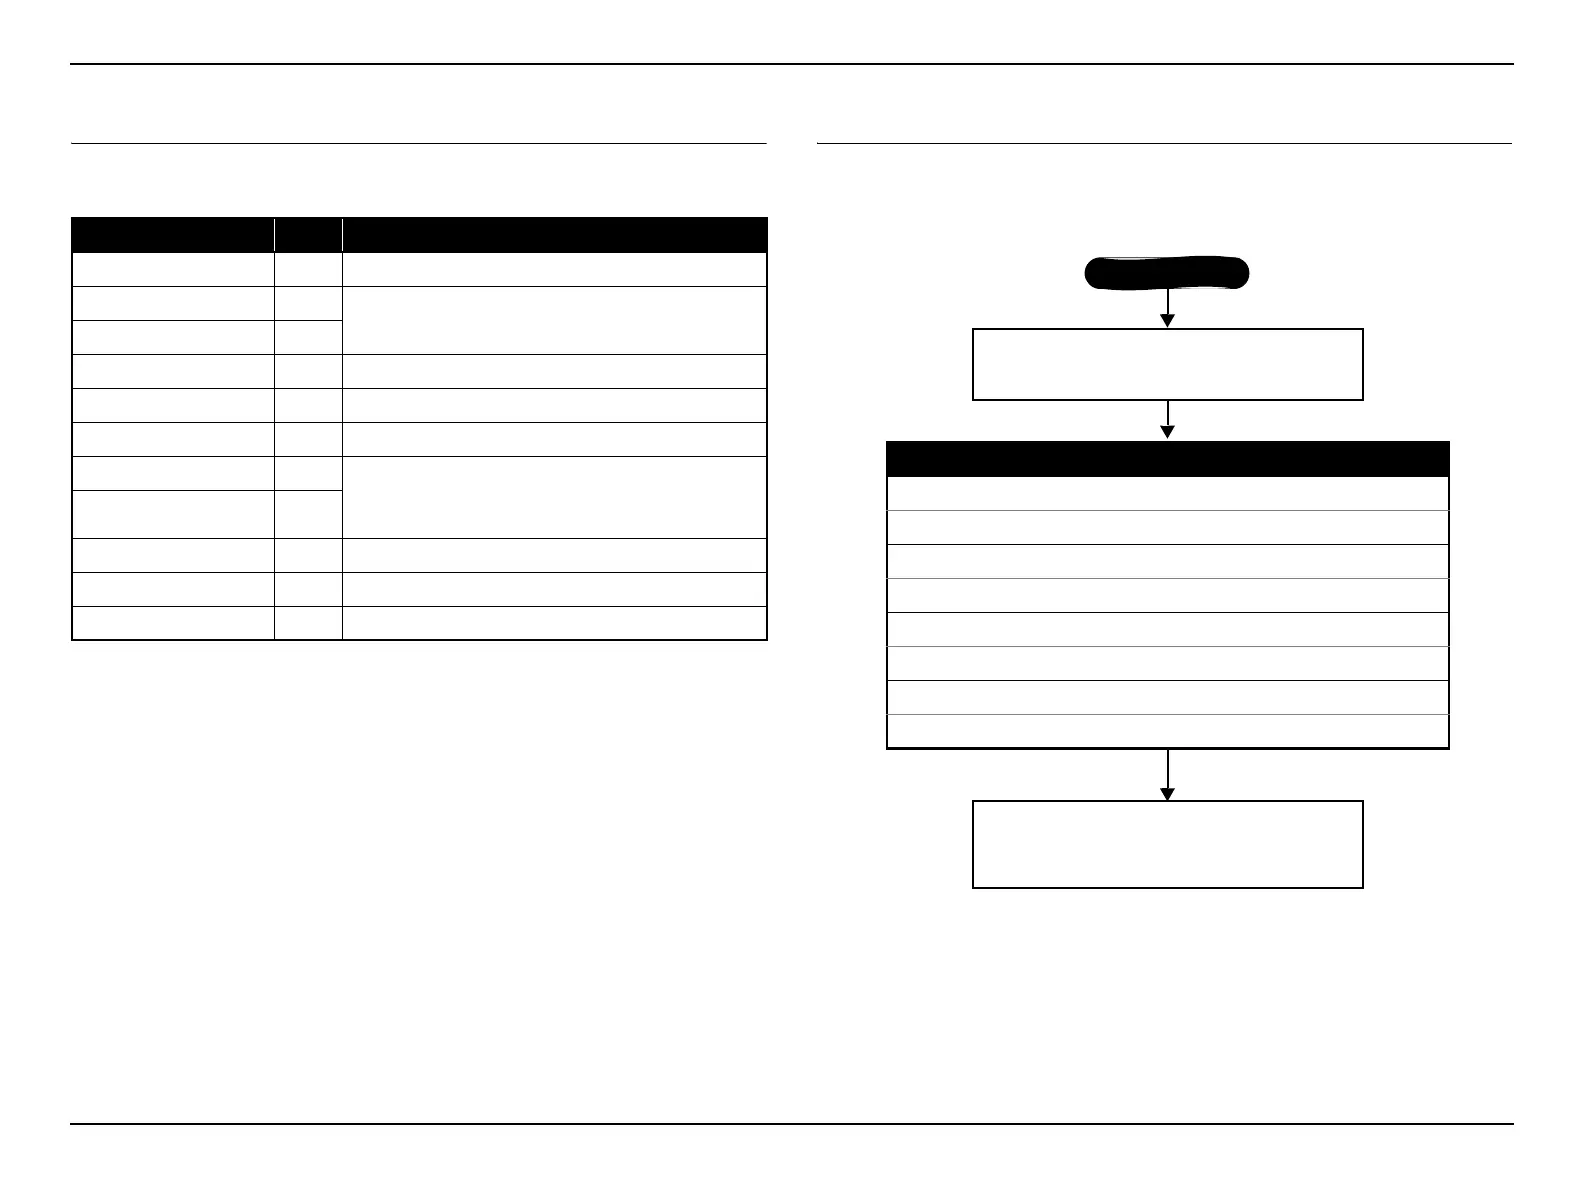
Figure 2-1. Troubleshooting Workflow
Name Qt. Application/Other
Projection screen 1 To project image on
Host computer 1
To project computer image on
*2
PC cable 1
3D Video Player 1 To output 3D video
*3
HDMI cable 1 HDMI cable supports 3D (HDMI ver.1.4 or later)
3D DVD/Blu-ray disc 1 3D video source
Video equipment 1 To output video data to the projector
*2
(To check the HDMI, composite video, component
video)
Video Cable 1 each
Multi meter 1 To measure resistance values and voltages (AC/DC)
Double-sided tape q.s.
*1
To secure parts
General tools 1 set Tools given in “ 3.1.5 Tools (p59)”
Check the parts to be repaired visually.
(See “ 2.3 Exterior Check (p26)” )
Problem diagnosis and troubleshooting
If LED error indication is indicated,
=> See “ 2.4.2 Troubleshooting based on LED Indications (p34)”
If you know the error code,
=> See “ 2.4.3 Troubleshooting from the Error Codes (p37)”
If abnormality related to the projector’s performance is occurring,
=> See “ 2.4.4 Troubleshooting without Error Indications (p42)”
If image quality is abnormal,
=> See “ 2.4.5 Troubleshooting on image abnormality (p49)”
Reassembly, operation check and Safety check*
*In the case that a safety device (p.113) is repaired
or maintained.
Start
 Loading...