EPSON LX-300+II/300+II RTP/1170II Revision D
Disassembly and Assembly Disassembly and Assembly 70
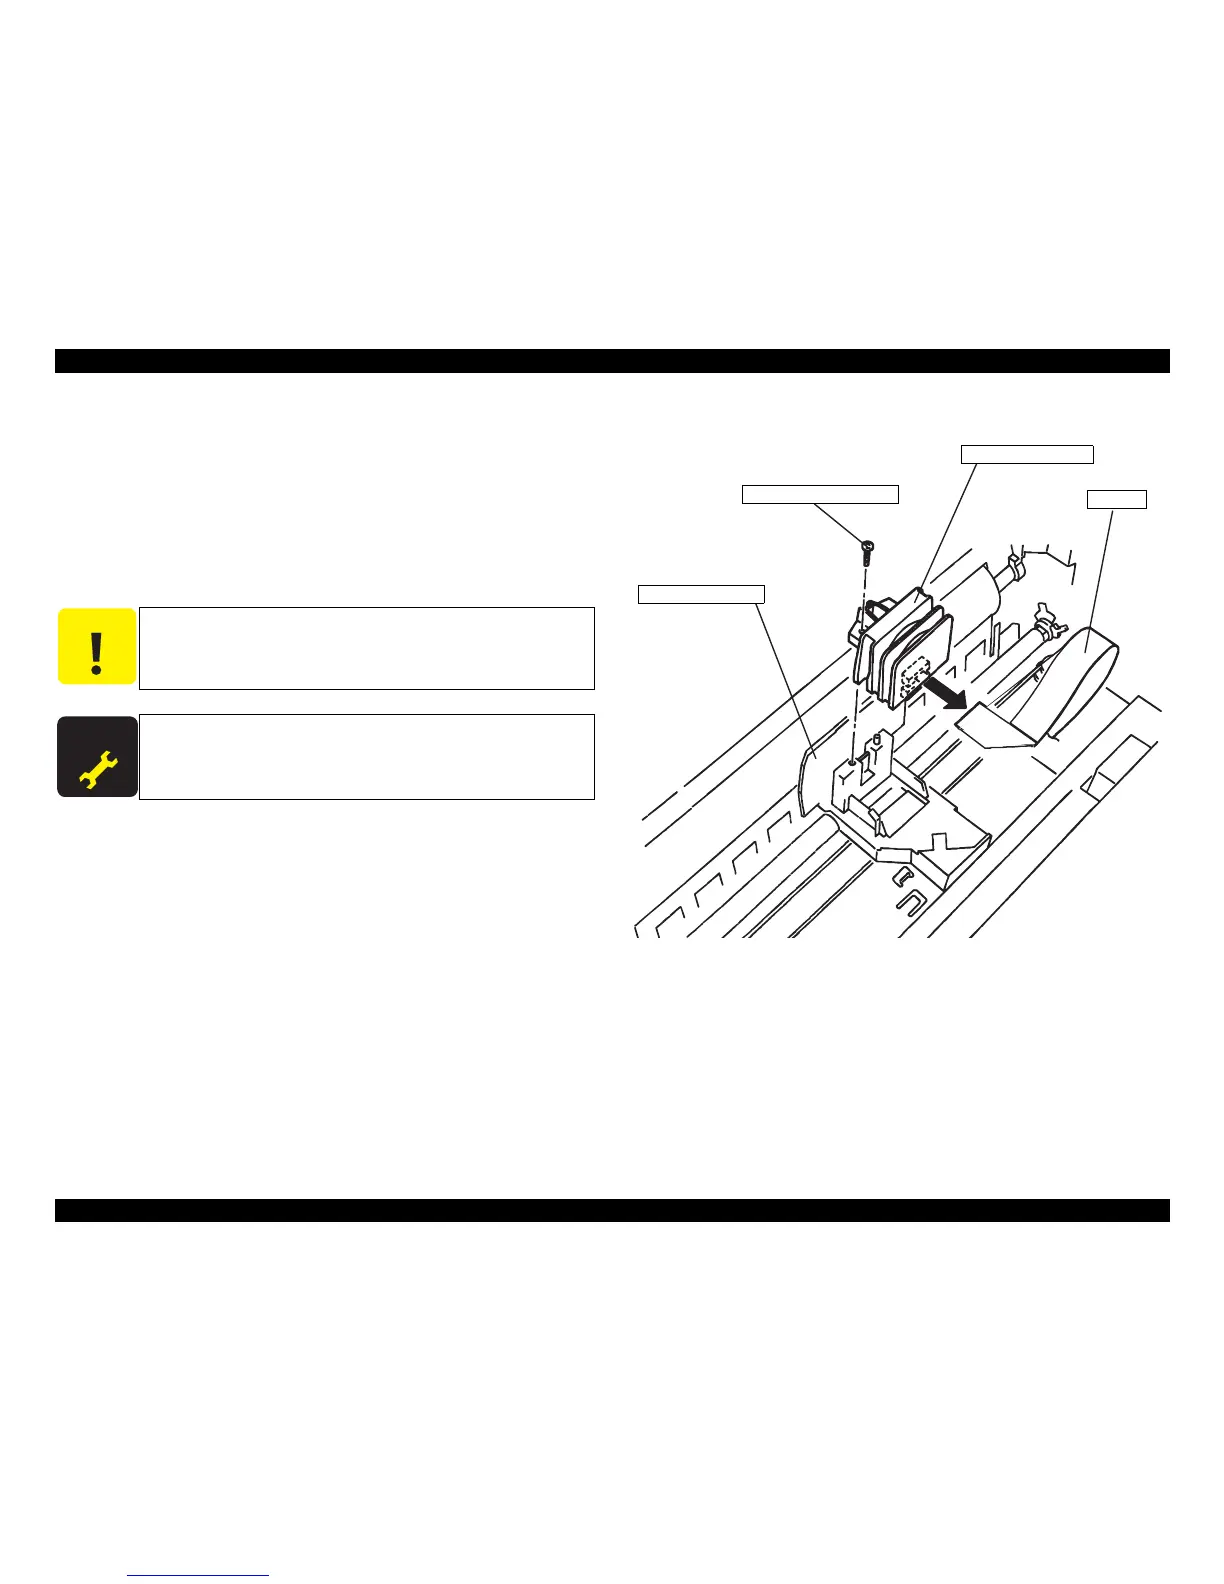
4.2.1 Printhead Unit Removal
1. Remove the cover of the printer.
2. Remove 1 screw (C.P.B., Screw, 3x14 F/ZN; Torque 0.59-0.78N.m) securing the
printhead to the carriage assembly.
3. Lift the printhead a little bit. Unlatch 2 hooks securing the printhead FFC to carriage
unit.
4. Remove FFC from the printhead.
Figure4-1. Printhead Removal
When the printhead unit is removed or replaced, perform the platen
gap adjustment and Bi-D adjustment.
 Loading...


