Field replaceable units: Replace main unit parts
2000966-542D Dash 3000/4000/5000 7-41
0
5. Attach the NBP assembly to the DAS assembly. Do not forget:
the four mounting screws,
the tube connection, and
the flex connector.
6. Reassemble the patient monitor in reverse order.
Replace writer assembly or writer flex
1. Remove the DAS assembly according to steps starting on page 7-37.
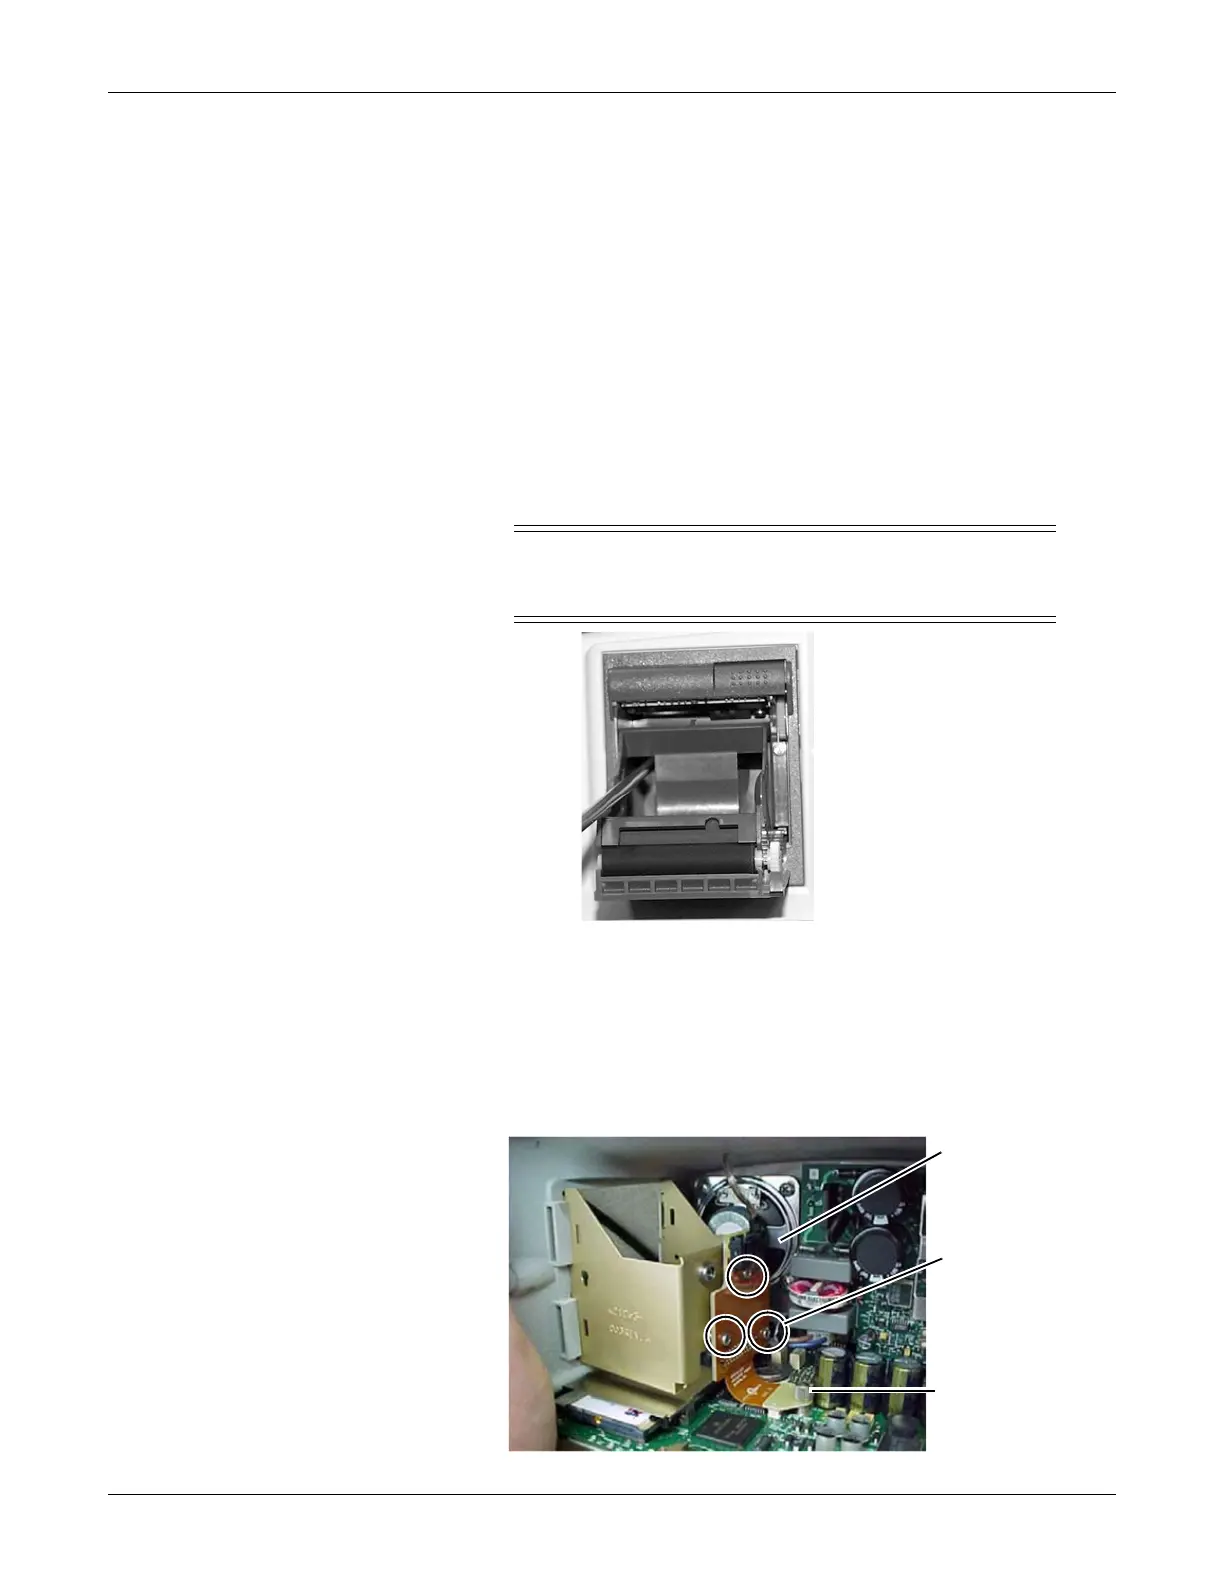
2. Remove the writer by unscrewing the two captive screws inside the
writer.
CAUTION
Approach the screw from below the top bar on the paper
roll holder so that you do not damage the unit.
3. Unscrew the thumb screw anchoring the writer cable to the main
assembly and disconnect the flex cable from the CPU/battery housing
assembly.
NOTE
When securing the thumb screw for reassembly, first finger-
tighten the thumb screw. Then, use a flat-head screw driver to
tighten the screw an additional 1/4 turn.
thumb screw
562B
speaker harness
and alarm light
cable
three writer flex
screws
 Loading...