Note:
As the LCD display has a resolution of 16 characters by 3 lines, some of the information is in a condensed mnemonic form.
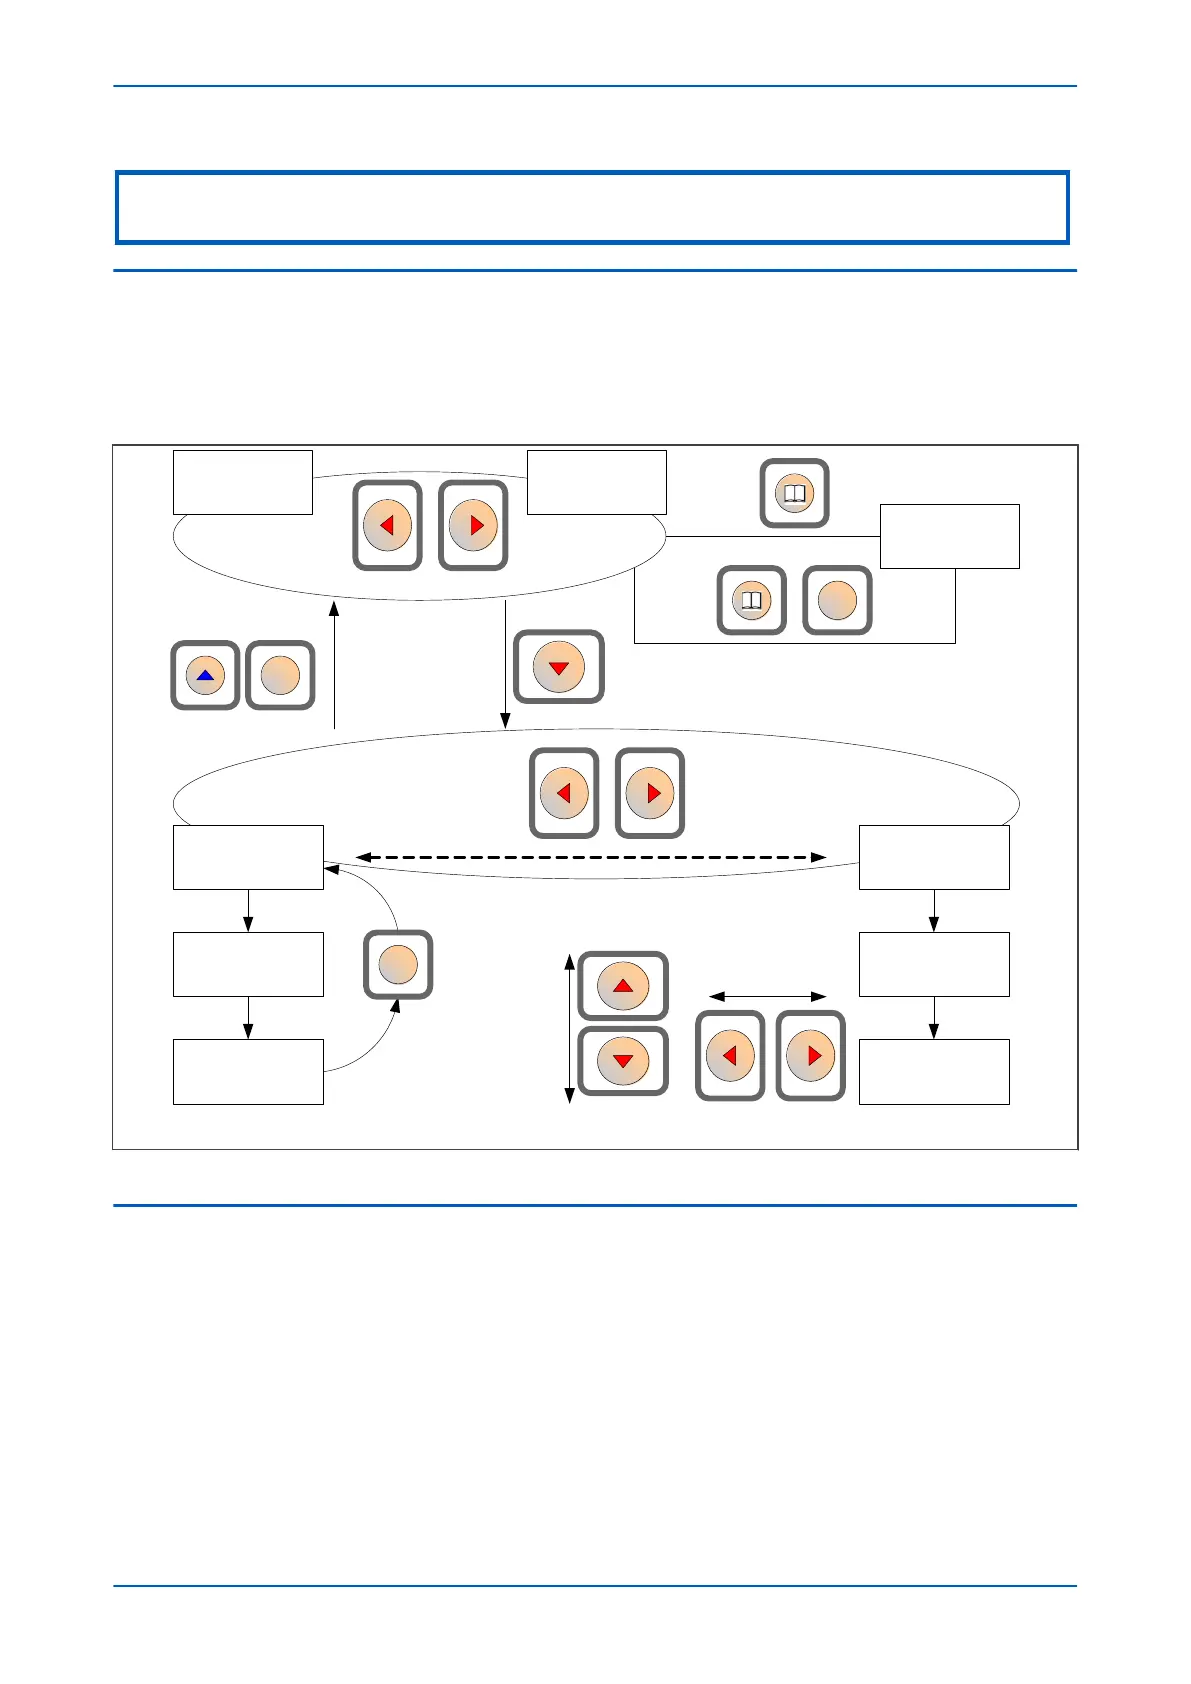
3.1 NAVIGATING THE HMI PANEL
The cursor keys are used to navigate the menus. These keys have an auto-repeat function if held down
continuously. This can be used to speed up both setting value changes and menu navigation. The longer the key is
held pressed, the faster the rate of change or movement.
The navigation map below shows how to navigate the menu items.
V00400
Alarm message
Column 00
System data
Last Column
Default display
option
Default display
option
Default display options
Subsequent column headings
Row 01
Language
Row 01
Subsequent rows Subsequent rows
Vertical cursor keys move
between setting rows
Horizontal cursor
keys move
between values
within a cell
The Cancel key
returns to
column header
C
C
C
Figure 28: Navigating the HMI
3.2
GETTING STARTED
When you first start the IED, it will go through its power up procedure. After a few seconds it will settle down into
one of the top level menus. There are two menus at this level:
● The Alarms menu for when there are alarms present
● The default display menu for when there are no alarms present.
If there are alarms present, the yellow Alarms LED will be flashing and the menu display will read as follows:
Chapter 5 - Configuration P446SV
74 P446SV-TM-EN-1
 Loading...