between PRP and HSR or configure their parameters, configure the redundancy IP address, or configure the SNTP
IP address.
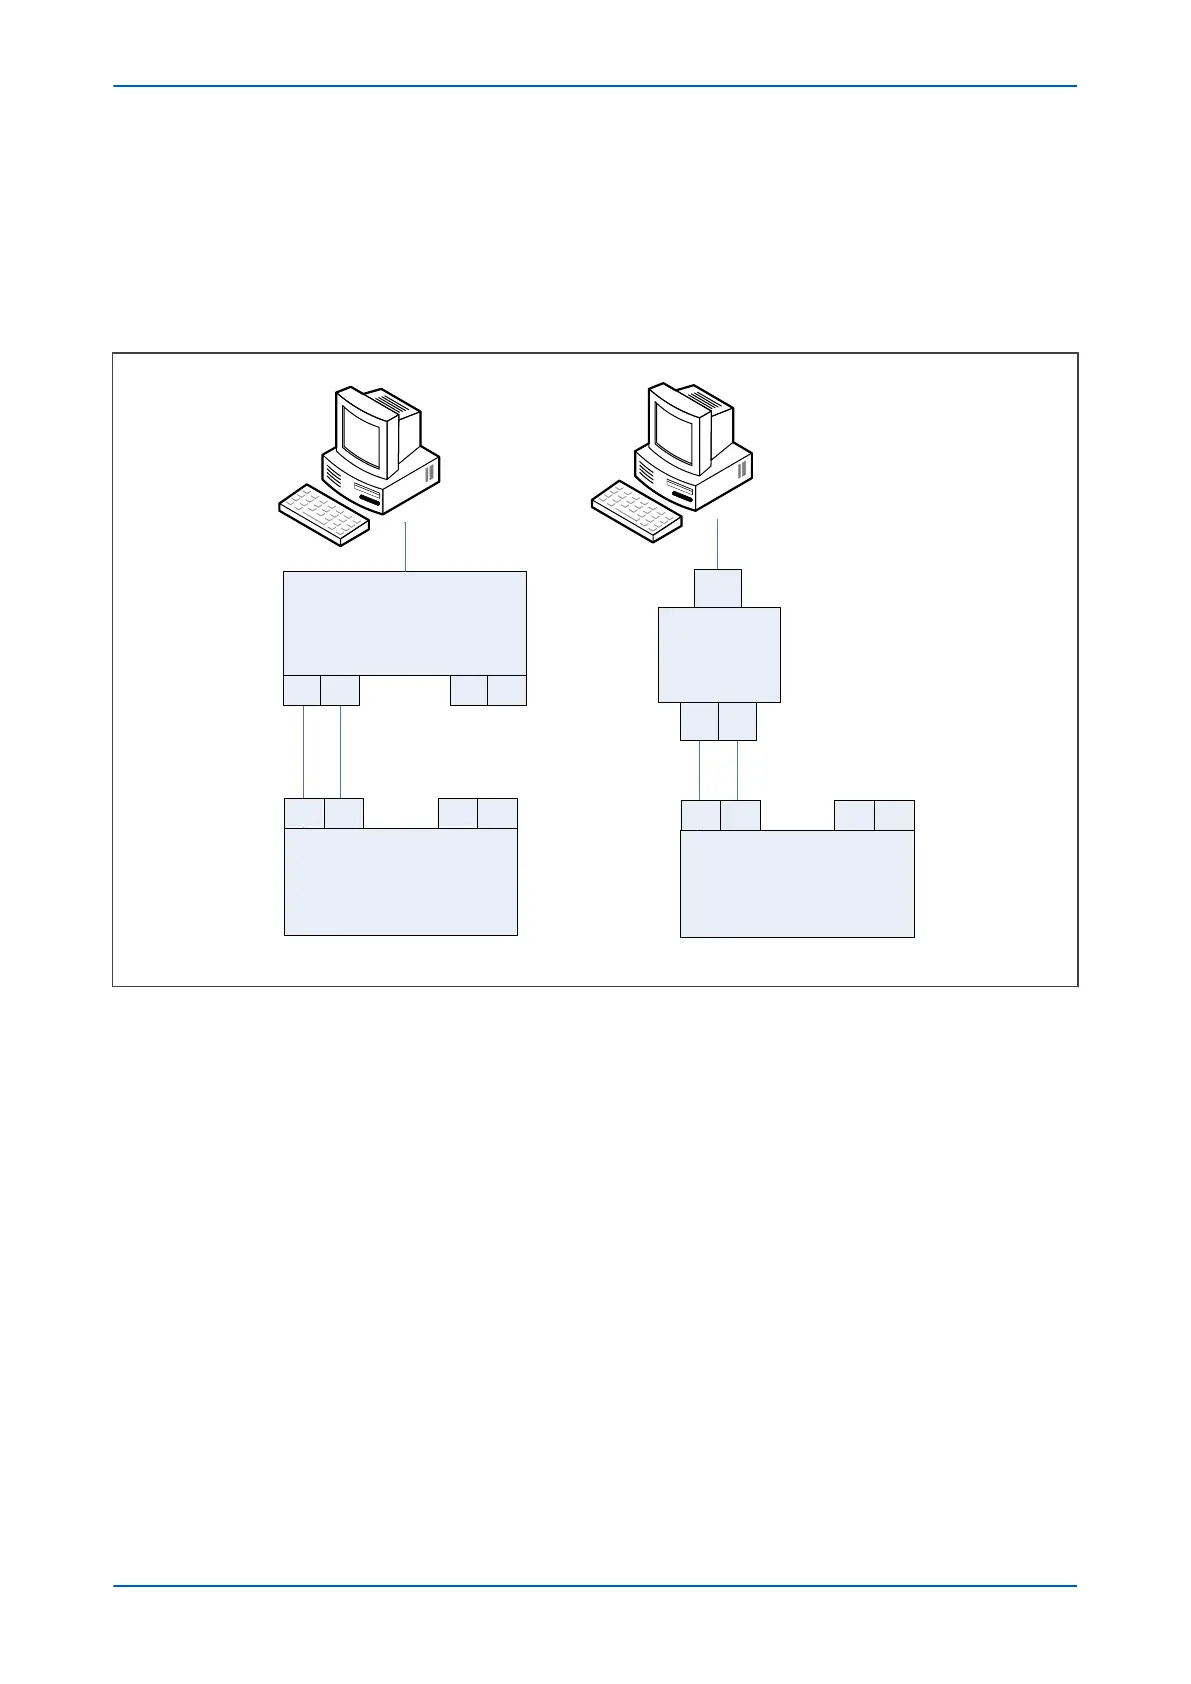
5.8.1 CONNECTING THE IED TO A PC
Connect the IED to the PC on which the Configurator tool is used. This connection is done through an Ethernet
switch or through a media converter.
IED
Ethernet switch
TXA
Media
Converter
RJ45
V01806
RXA TXB RXB
RXA TXA RXB TXB
TX RX
(a) (b)
IED
RXA TXA RXB TXB
Figure 279: Connection using (a) an Ethernet switch and (b) a media converter
5.8.2
INSTALLING THE CONFIGURATOR
To install the configurator:
1. Double click the WinPcap installer.
2. Double click the Configurator installer.
3. Click Next and follow the on-screen instructions.
5.8.3
STARTING THE CONFIGURATOR
To start the configurator:
1. Select the Configurator from the Windows Programs menu.
2. The Login screen appears. For user mode login, enter the Login name as User and click OK with no
password.
3. If the login screen does not appear, check all network connections.
4. The main window appears. In the bottom right-hand corner of the main window, click the Language button
to select the language.
5. The Network Board drop-down list shows the Network Board, IP Address and MAC Address of the PC in
which the Configurator is running.
P446SV Chapter 21 - Communications
P446SV-TM-EN-1 523
 Loading...