EasyManuals Logo

Hitachi TM3000 User Manual

Hitachi TM3000
272 pages
To Next Page IconTo Next Page
To Previous Page IconTo Previous Page
Page #230 background image
5 - 13
Figure 5.2-7 Beam Axis Adjustment STEP 1, an Example
4a. First, loosen the four axis adjustment knobs, A, B, C and D, by approximately one turn.
Figure 5.2-8 Operating the Electron Gun Axis Adjustment Knobs (1)
Figure 5.2-9 Operating the Electron Gun Axis Adjustment Knobs (2)
4b. In the next step, turn one of the knobs (for example, Screw A in Figure 5.2-8) in a
fastening direction. When it becomes tight, loosen the knob in the opposite direction (in
Figure 5.2-8, Screw C), and then turn Screw A further in the tightening direction. During this
operation, turn the knob while paying attention to the image. When an image appears, adjust
the knobs in the direction of a brightening image.

Table of Contents

Questions and Answers:

Question and Answer IconNeed help?

Do you have a question about the Hitachi TM3000 and is the answer not in the manual?
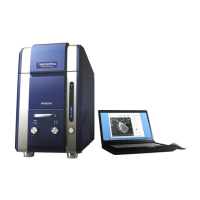
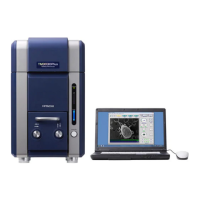
Hitachi TM3000 Specifications

General IconGeneral
Accelerating Voltage5 kV, 15 kV
Resolution30 nm
TypeTabletop Scanning Electron Microscope
Sample Size70 mm diameter
Vacuum SystemTurbo Molecular Pump
Image CaptureDigital image capture
Filament TypeTungsten filament
DetectorSecondary Electron Detector (SED), Backscattered Electron Detector (BSED)

Related product manuals