Version 1.1, 08/2013. Copyright 2012 Hitron Technologies
28
Version 1.1, 08/2013. Copyright 2013 Hitron Technologies
28
Hitron CGN3 User’s Guide
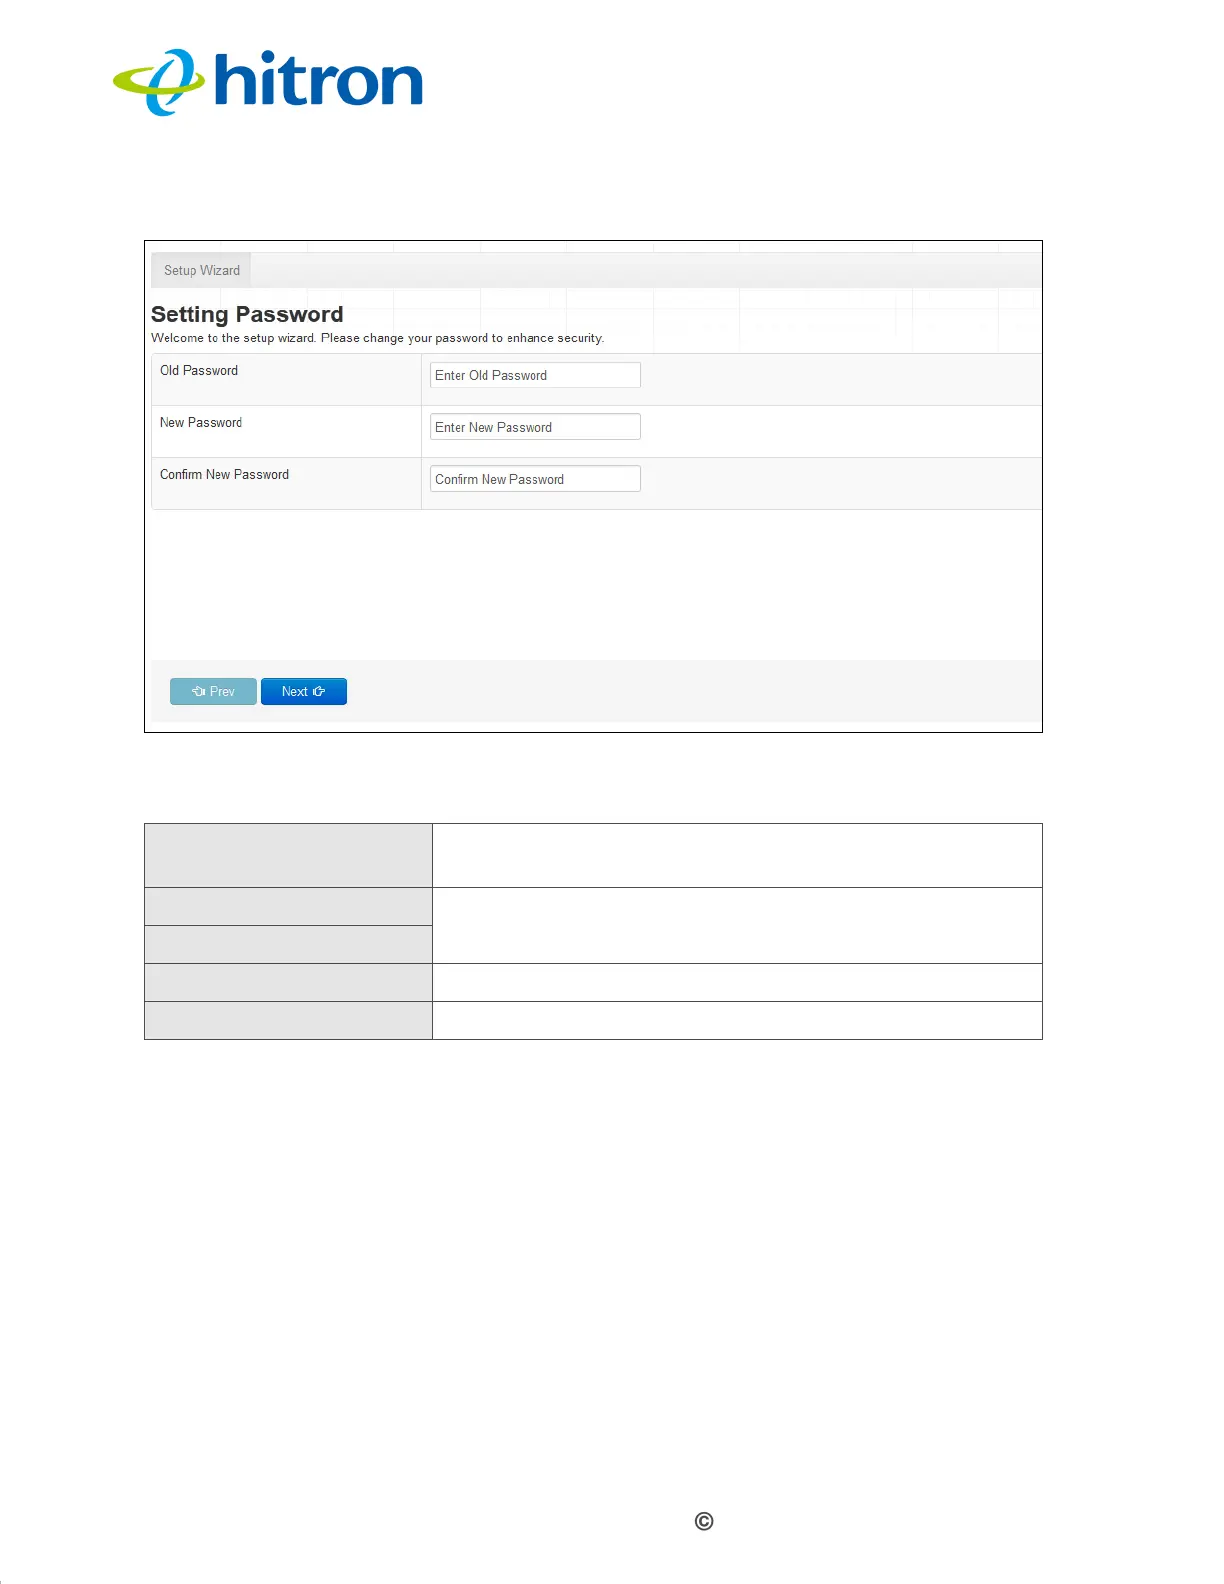
Figure 7: The Setup Wizard: Setting Password Screen
The following table describes the labels in this screen.
2.3 LAN Settings
Use this screen to set up your CGN3’s Local Area Network settings, including its IP
address, subnet mask and DHCP status.
NOTE: If unsure about how to configure the fields in this screen, leave them at their
defaults.
Click Next in the Setup Wizard: Setting Password screen. The following screen
displays.
Table 5: The Setup Wizard: Setting Password Screen
Old Password Enter the password with which you currently log into the
CGN3 for this account.
New Password Enter and re-enter the password you want to use to log
into the CGN3 for this account.
Confirm New Password
Prev Click this to return to the previous screen.
Next Click this to continue to the next screen.
 Loading...