11-5
dummyheaddummyhead
OTHER ELECTRICAL
OIL ALERT UNIT REMOVAL/
INSTALLATION
With control box: Disassemble the control box (page 11-4).
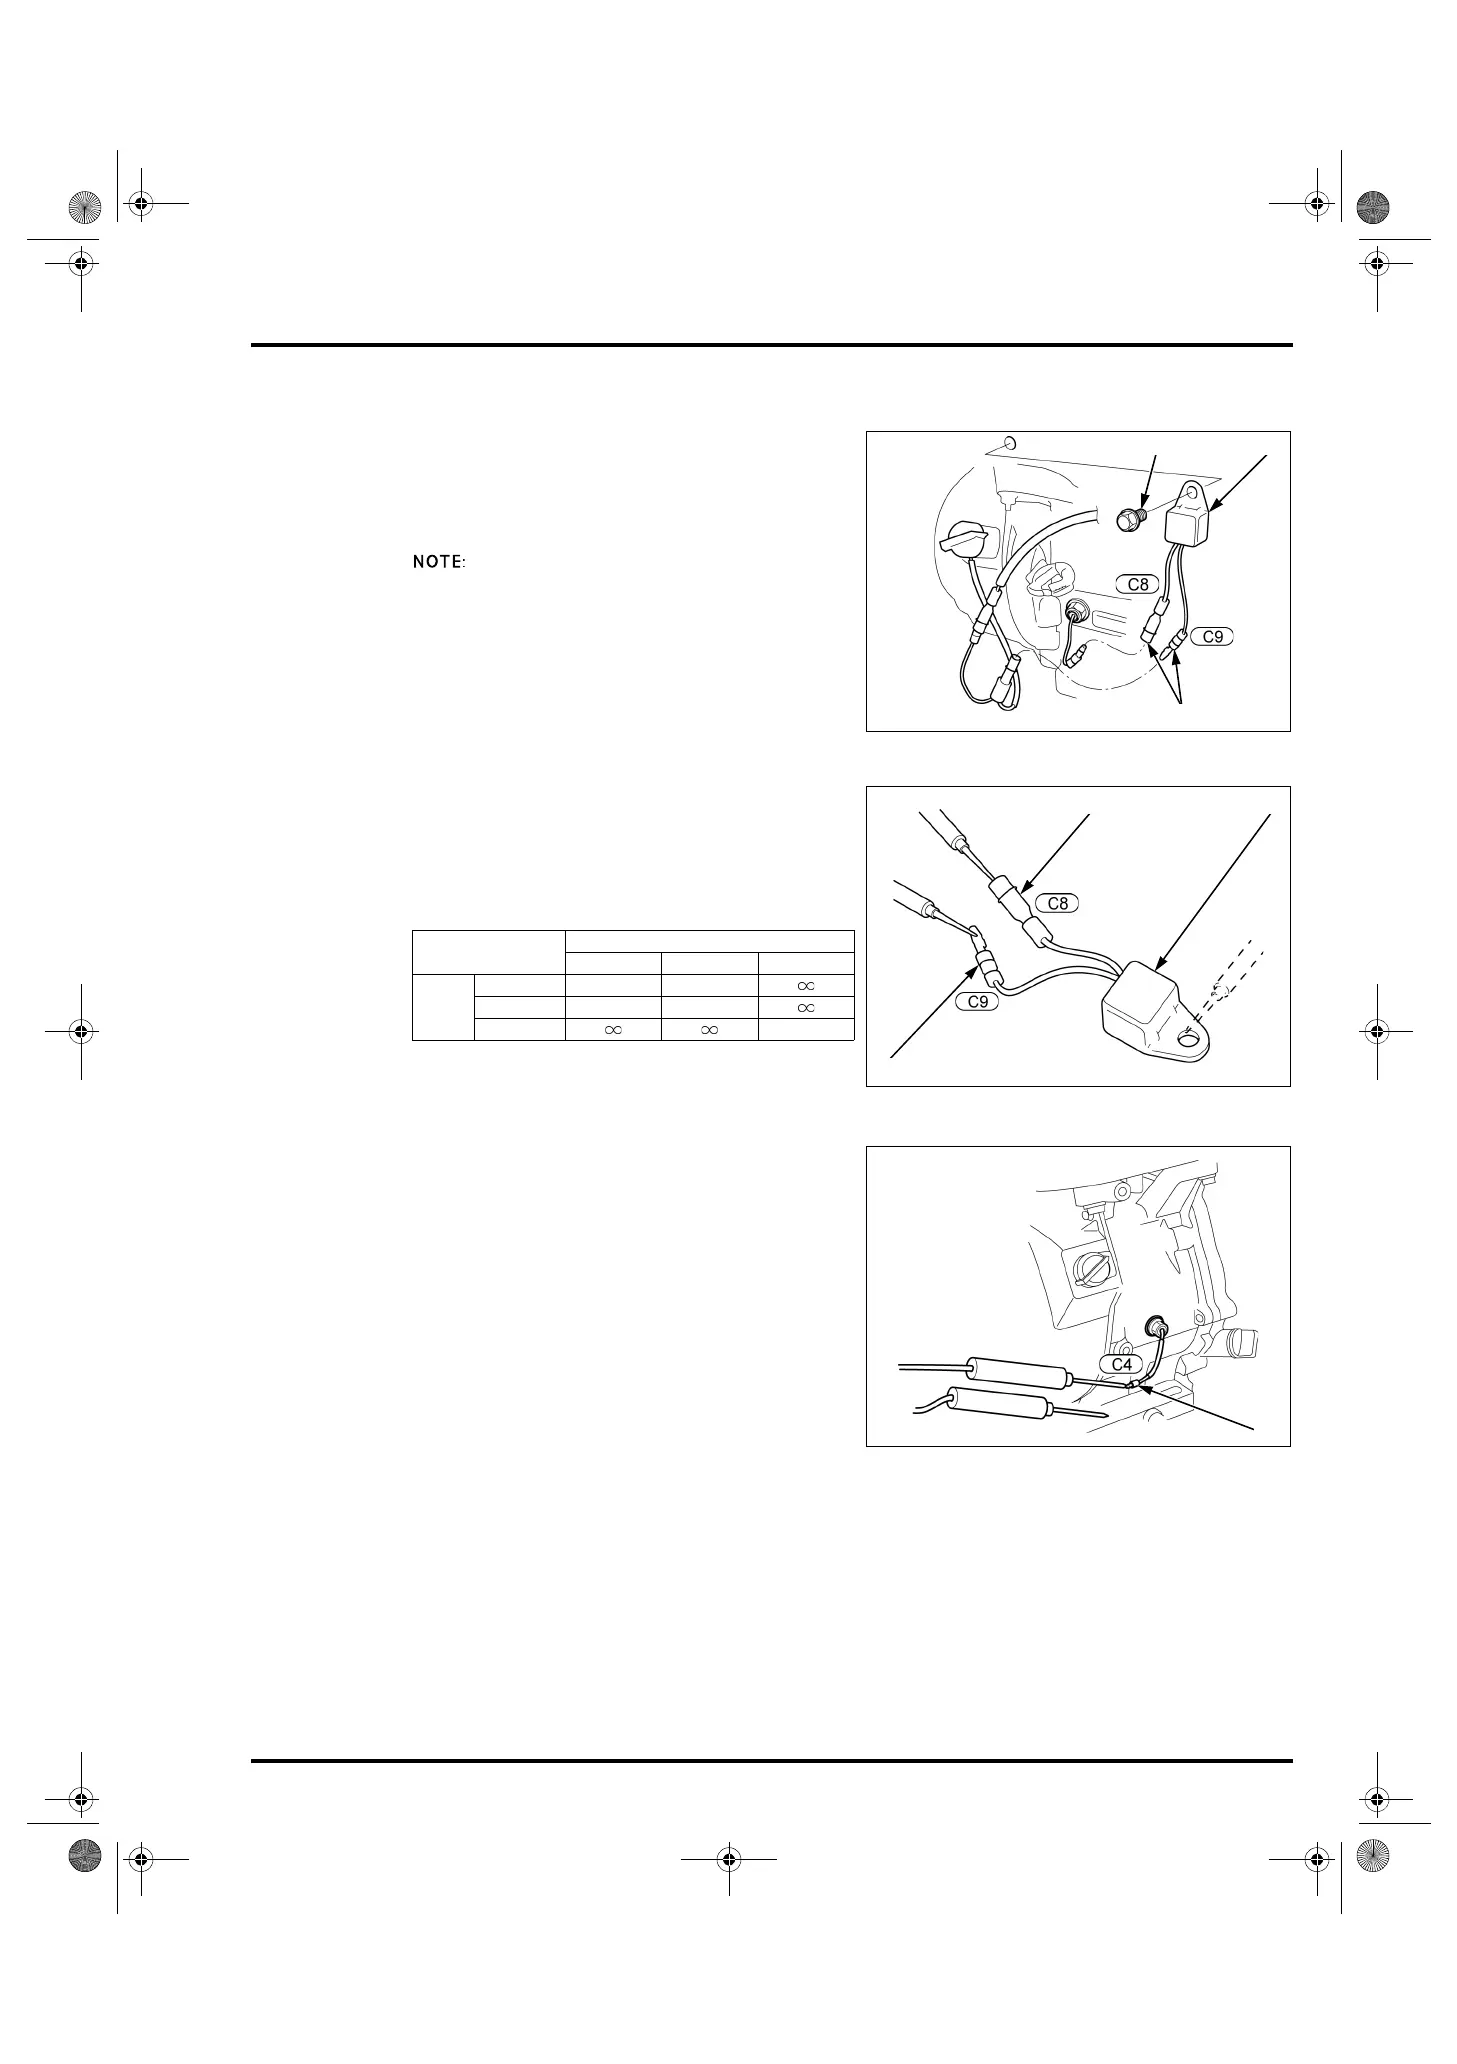
Disconnect the oil alert unit connectors [1].
Remove the bolt (6 x 12 mm) [2] and oil alert unit [3].
Installation is in the reverse order of removal.
• Route the wire harness properly (page 2-10).
OIL ALERT UNIT INSPECTION
Remove the oil alert unit.
– Without control box (page 11-5)
– With control box (page 11-4)
Check the continuity between the terminals, and oil
alert unit body.
Unit: k
OIL LEVEL SWITCH INSPECTION
Check the oil level (page 3-3).
Disconnect the oil alert unit connector [1].
Disconnect the oil level switch connector [1].
Check the continuity between the switch terminal and
engine ground.
There should be no continuity when the engine is full of
oil.
Drain the engine oil completely (page 3-3).
Check the continuity between the switch terminal and
engine ground.
There should be continuity.
Check the continuity between the switch terminals while
filling the engine with oil.
The ohmmeter reading should go from continuity to no
continuity as the oil is filled.
If the correct continuity is not obtained, replace the oil
level switch (page 14-6).
Without control box:
(+)
Bl [1] Y [2] Body [3]
(–)
Bl [1] – 0.5 – 10
Y [2] 0.5 – 10 –
Body [3] –
Without control box:
With control box:
62Z7B000.book 5 ページ 2012年9月27日 木曜日 午前10時21分
 Loading...