11-6
dummyheaddummyhead
OTHER ELECTRICAL
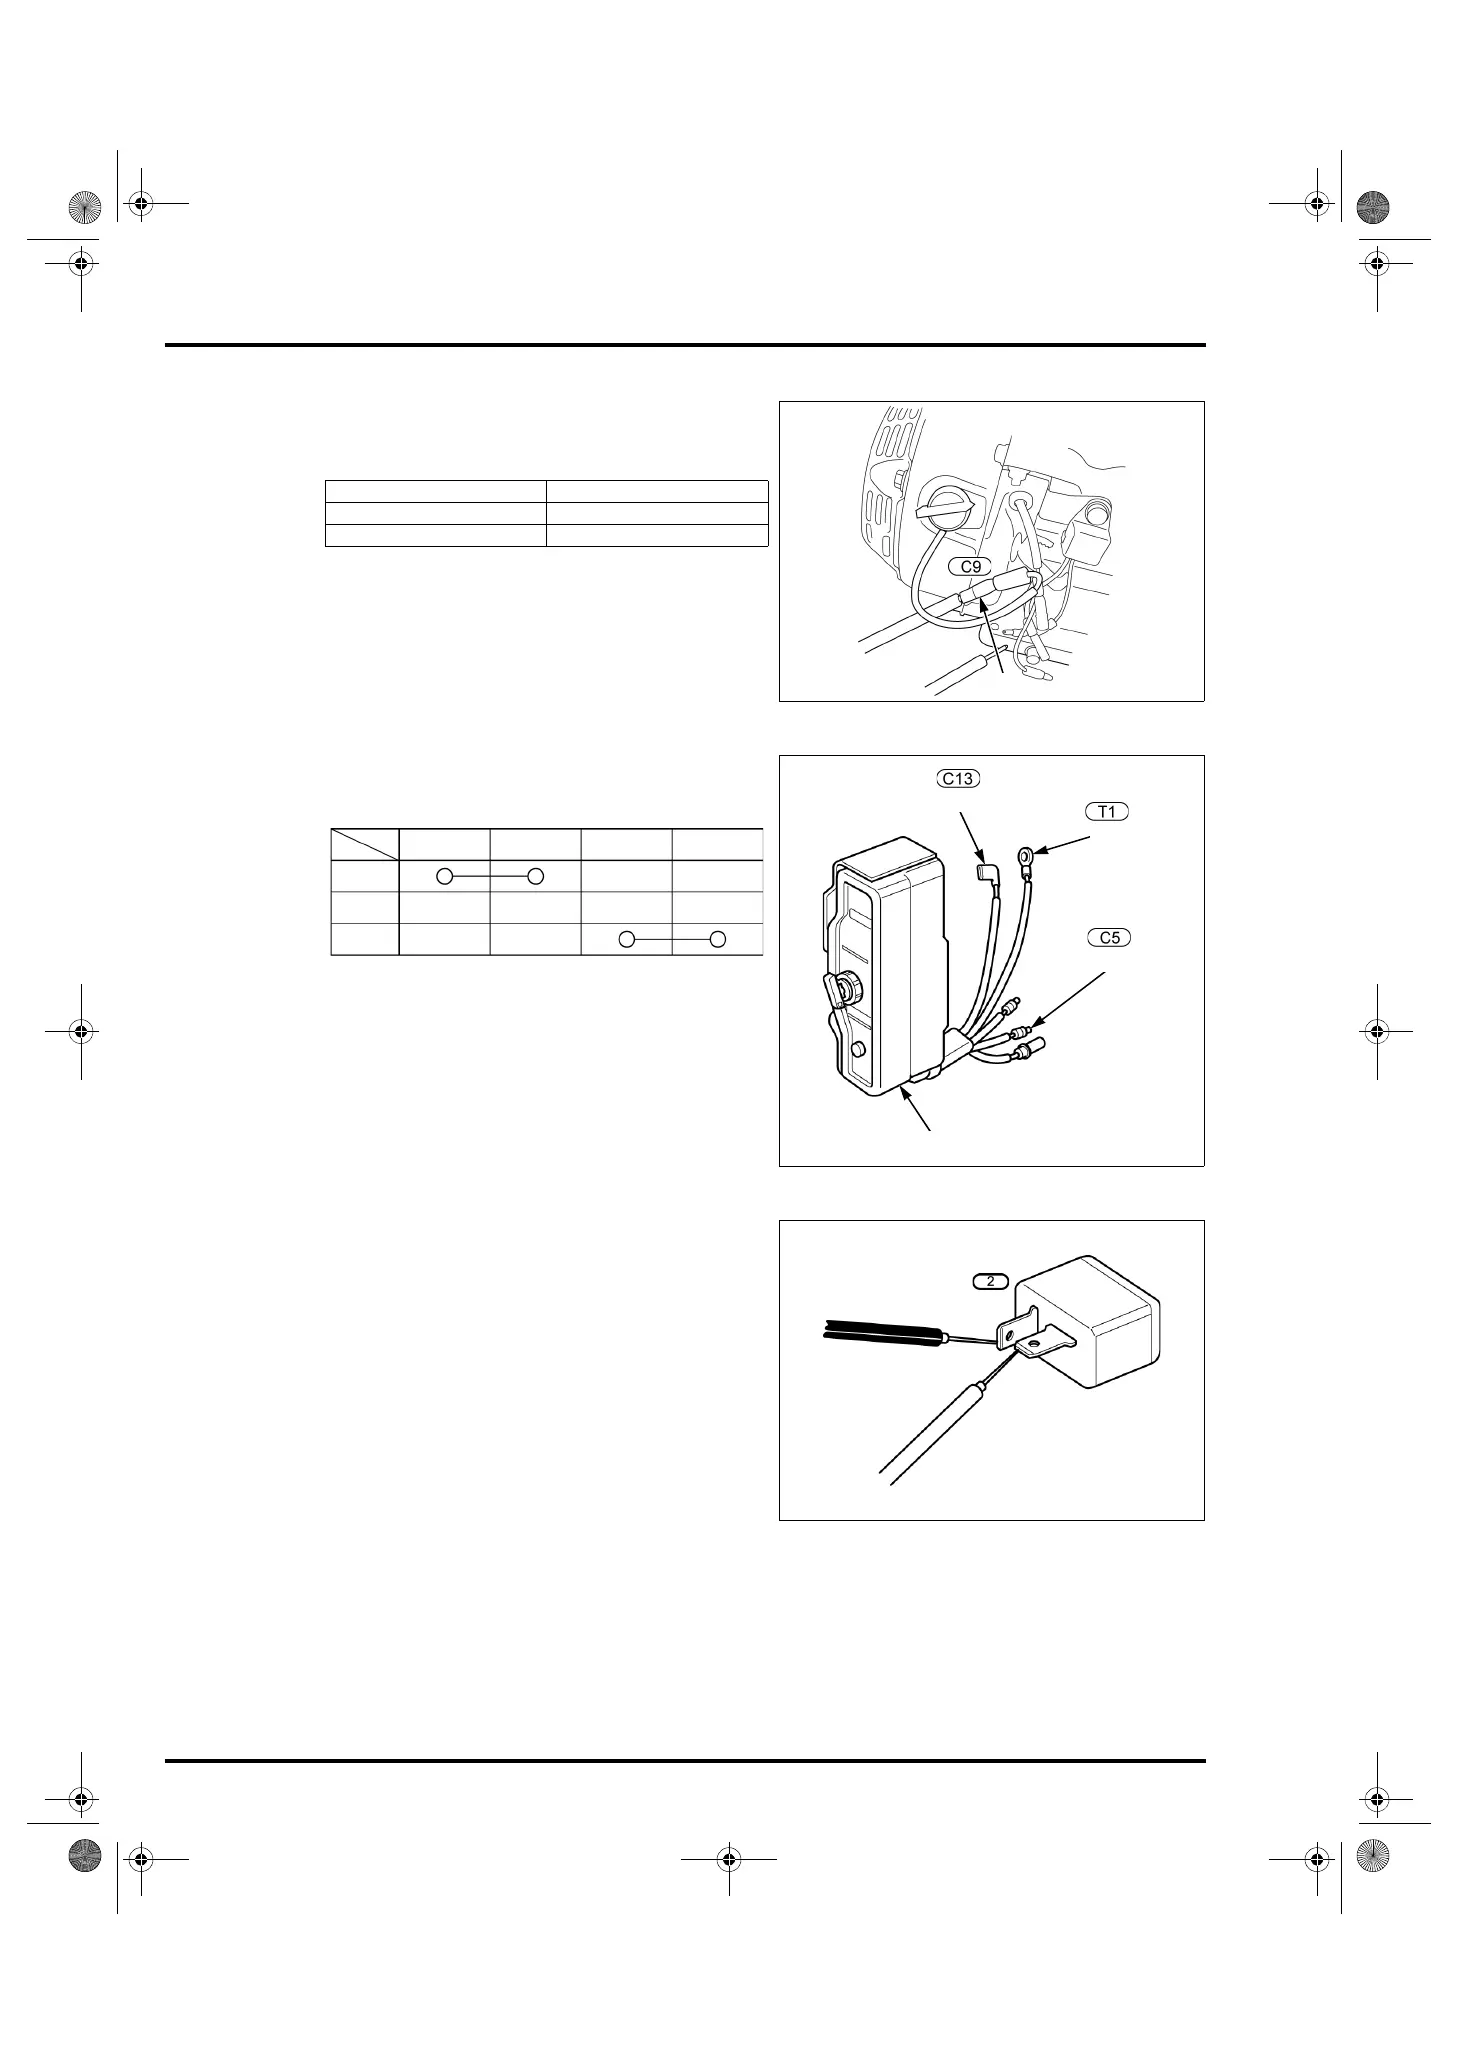
ENGINE STOP SWITCH INSPECTION
Remove the engine wire harness connector [1].
Check the continuity between the terminals at each
switch position.
If the correct continuity is not obtained, replace the
engine stop switch (page 5-2).
COMBINATION SWITCH INSPECTION
Disconnect the combination switch connectors.
Check the continuity between the terminals at each
switch position.
If the correct continuity is not obtained, replace the
combination switch (page 11-4).
SILICON RECTIFIER INSPECTION
Remove the silicon rectifier (page 11-4).
Check continuity between the terminals. There should
be continuity in one direction only. Replace the rectifier
if there is continuity in both directions or in neither
direction.
Switch position Continuity
ON No
OFF Yes
CIRCUIT PROTECTOR
[2]
[1]
[3]
Bl/R [1] Ground W [2] Bl/W [3]
OFF
ON
START
62Z7B000.book 6 ページ 2012年9月27日 木曜日 午前10時21分
 Loading...