ID3000/ID2000 Fire Panel Configuration Tool Manual
Introduction
1 - 7 997-291, Version 3.05
November 2010
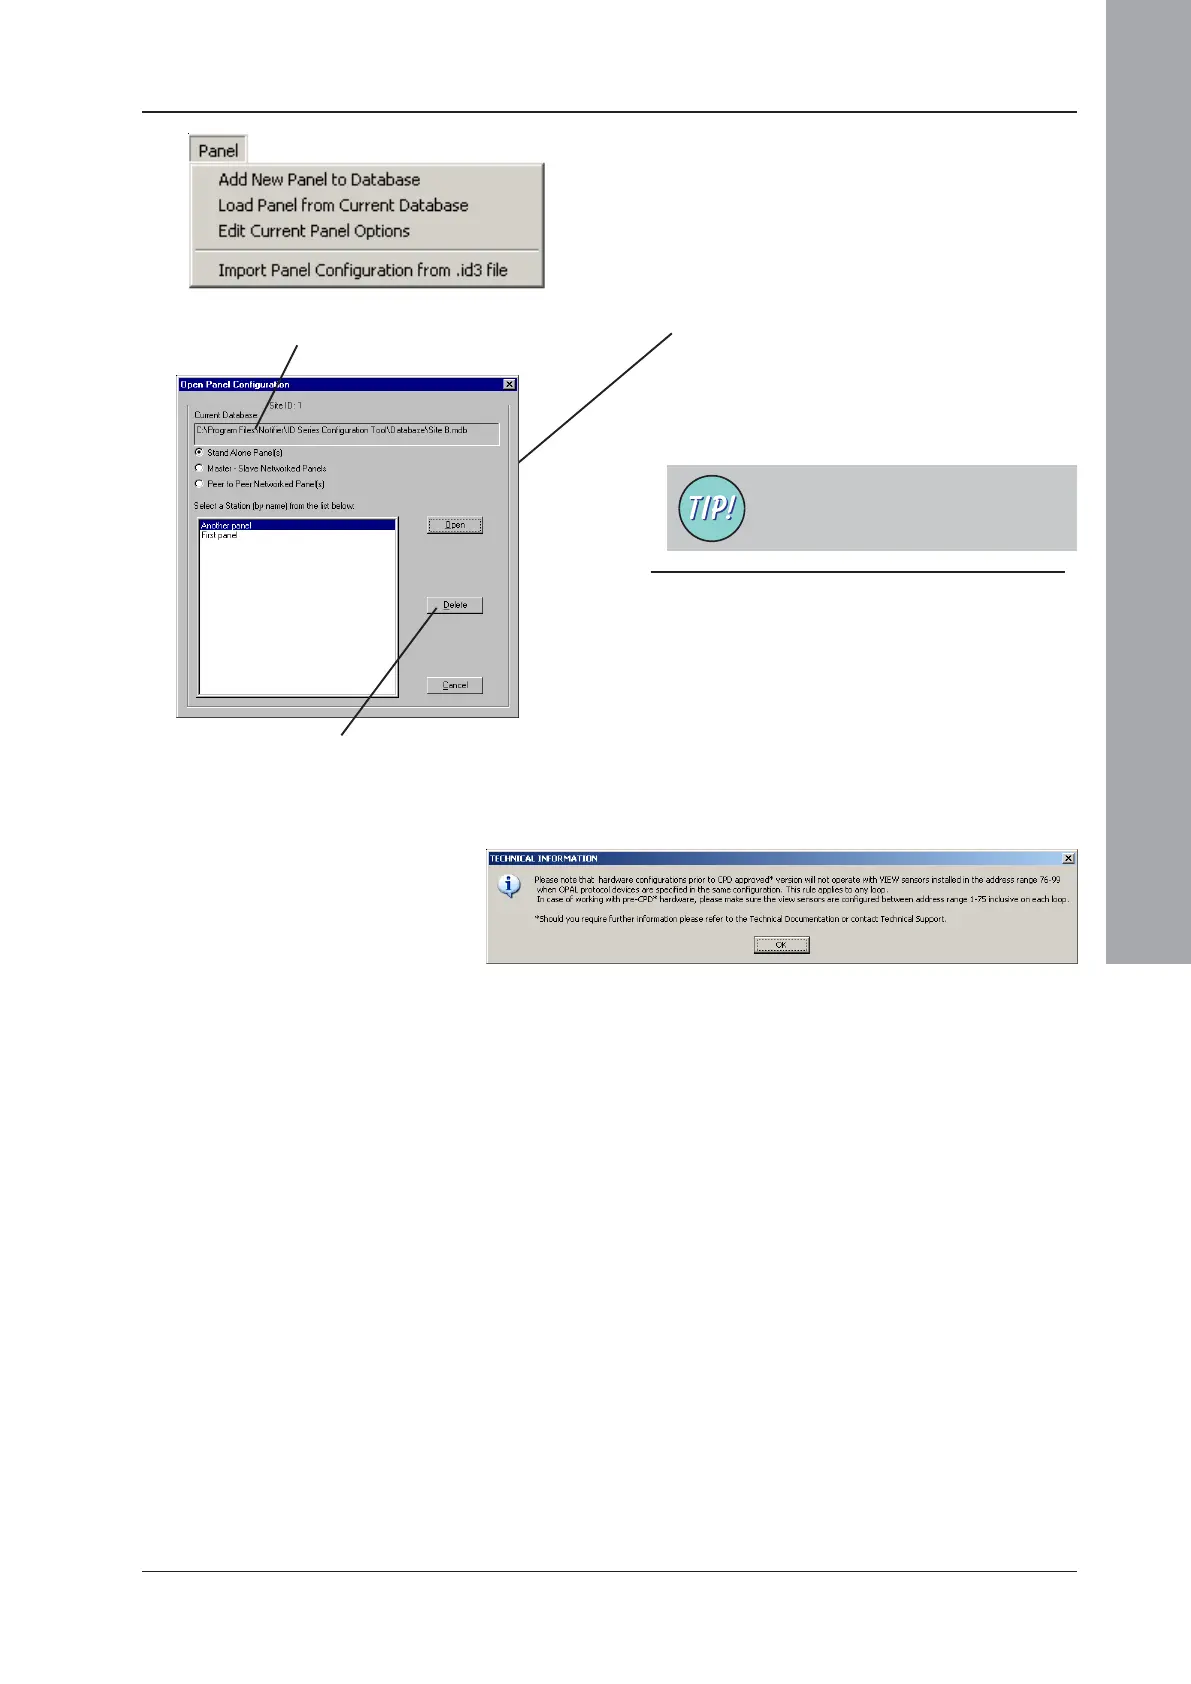
1.5.4 Panel Menu
This menu has the following options:
a. Add New Panel to Database - displays the
Create New Panel Configuration window
(see Section 2). When saved, the panel is
added to the current database.
b. Load Panel from Current Database - displays
the Open Panel Configuration window. Only
panels which have the network type
currently selected on the radio buttons are
shown; double-click the panel or click
‘Open’. Panels are listed in order by address.
Pathname of current configuration database is
displayed here
To delete a panel, select it and click on ‘Delete’. (Does
not delete a Master/Slave network panel’s entry in
the network configuration; Section 6.2.2 describes
the network delete button).
If the panel you want is not displayed,
check that you have selected the
correct Site ID - see Section 1.5.9.
Note: When loading or saving a mixed-protocol
configuration an advisory message is displayed
if VIEW
TM
devices have been allocated addresses
in the range 76-99. When a CPU PCB with
increased memory, i.e. CPD-compliant version,
is fitted in the panel the VIEW
TM
address limit is
not imposed. However, as the WCT is unaware
as to which CPU PCB is fitted in the panel this
message is displayed to advise of a possible
configuration non-compliance.

 Loading...