Step 7 If you do not install a new drive immediately, install a drive filler in the slot.
----End
5.3.2 Installing a SAS/SATA Drive
Step 1 Wear an ESD wrist strap. For details, see 12 Preventing Electrostatic Discharge.
NOTE
l You do not need to power off the server when installing a drive.
l After a failed drive is disconnected from the drive backplane, wait for 30 seconds before removing it
and inserting a new one. The alarm persists after a new drive is installed and will be cleared after the
RAID array is rebuilt. Do not frequently hot-swap a drive to prevent new alarms.
Step 2 If the server is equipped with a front bezel, remove the bezel before installing a front drive.
For details, see 5.2.1 Removing the Front Bezel.
Step 3 If the drive is in the built-in drive module, perform the following operations:
NOTICE
If the chassis cover is away for too long while the server is powered on, some components
will become overheated. Install the chassis cover within 3 minutes.
1. Remove the chassis cover. For details, see 3.4 Removing the Chassis Cover.
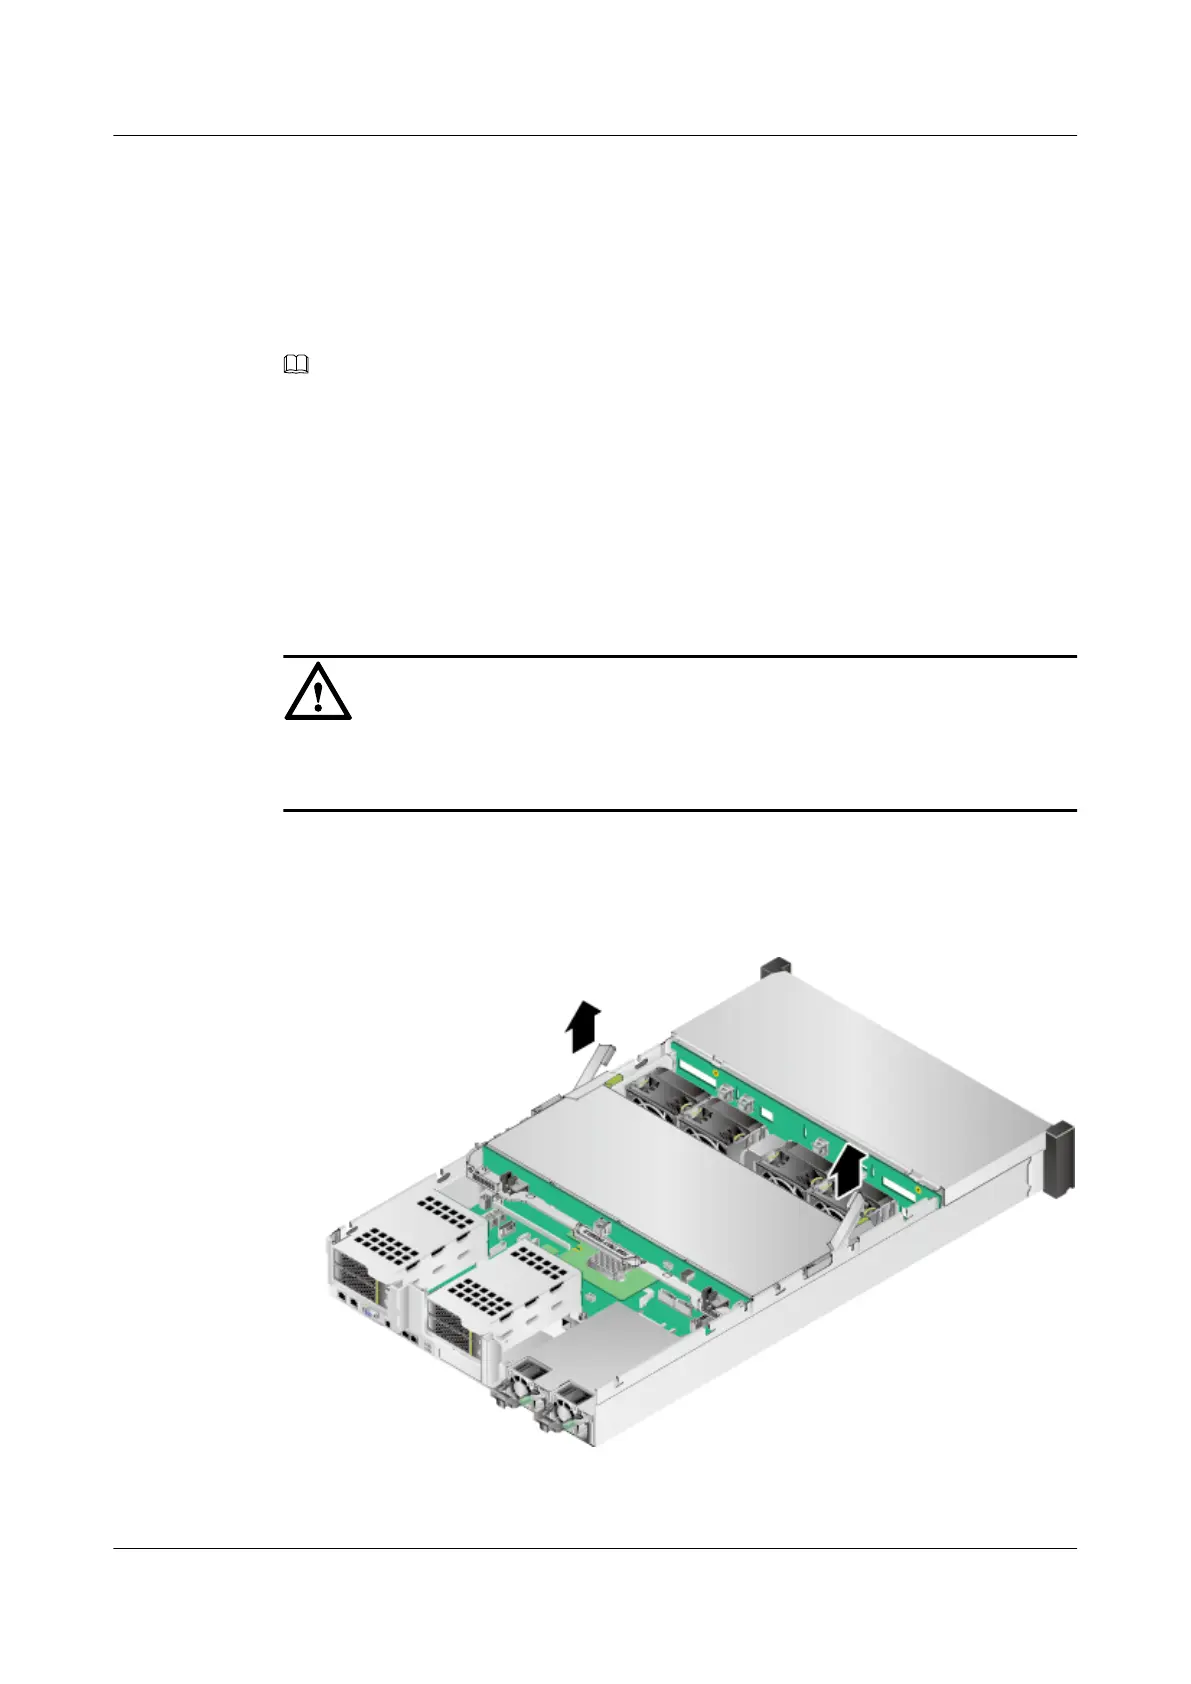
2. Open the handles of the built-in drive module. See Figure 5-7.
Figure 5-7 Opening the handles of the built-in drive module
Step 4 Remove the drive filler using the same method for removing a drive.
2288H V5 Server
User Guide
5 Optional Part Installation
Issue 04 (2018-09-04) Copyright © Huawei Technologies Co., Ltd. 118
 Loading...