44 - English
3. INSTALLATION
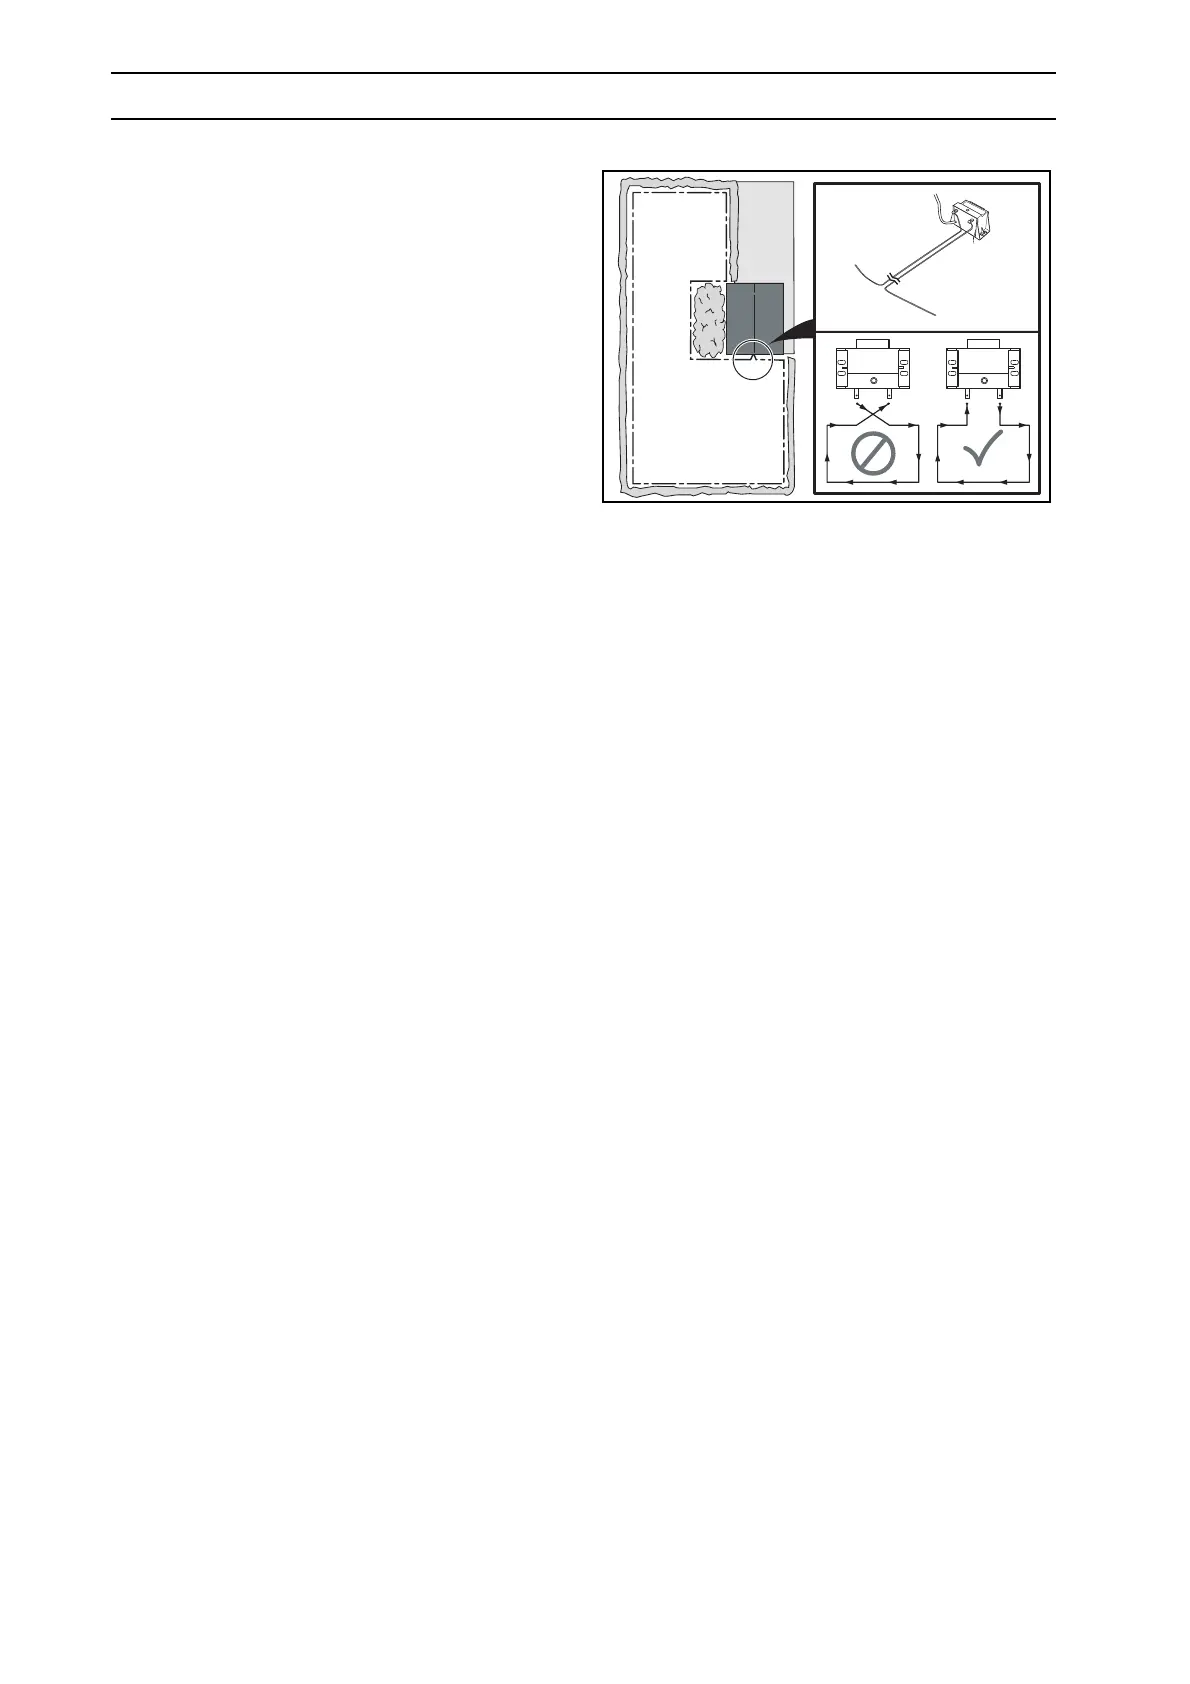
Loop generator/charger (only 210C) should be
installed as the transformer above. The ends of
the boundary wire are run in parallel and close to
each other, in towards the loop
generator/charger.
• If you use a guide wire the charging station must
be placed so that the overall guide loop is not too
long. The guide loop should not be longer than
about 200 metres (700 ft).
Guide loop = the guide wire from the charging
station to the T-connection on the boundary wire
+ the boundary wire from the T-connection (to
the left seen in the direction towards the charging
station) back to the charging station. For more
information about the guide loop, see 1.10.2
Guide loop, page 16.
3.2 Boundary wire
To start an Automower requires a charging station and
boundary wire to be installed. It is not possible to test
drive a mower until the installation is complete. The
Automower displays the fault message No loop signal
when an attempt is made to start before the installation
is complete.
However, it is possible, to test the mower before the
installation is completed, by connecting a short,
temporary loop in a small area around the mower.
Alternatively you can temporarily deactivate the
mower’s loop detection (see 2.7.5 Loop detection (5-5),
page 41. Note that this type of special function is not
available to consumers).
3.2.1 Laying the boundary wire
Stapling
It is easier to readjust a stapled boundary wire, as it
does not lie so deep. The function Check loop,
(shortcut 3-4-1) can be used to detect the wire, which
can then be pried up using a screwdriver. Care must
be taken though so as not to damage the wire.
Burying
A buried boundary wire is more protected than a
stapled wire, which may be an advantage if you need
to dethatch or aerated the lawn.
When burying, make a channel using a spade,
approximately 1 – 20 cm (0.5” - 8”) deep, around the
entire garden. Place the wire in the channel and then
fill it in.
You can also cut a channel using an edge cutting tool.

 Loading...